


A good media wall installation example is never just about where the television sits. The difference between something that looks expensive and something that feels awkward usually comes down to proportion, storage, cable planning and how well the design fits the room around it. In many homes, especially where an extension or renovation has created a larger open-plan living area, the media wall ends up doing several jobs at once. It anchors the room, hides clutter, adds display space and makes the television feel integrated rather than dropped in as an afterthought.
For homeowners investing in made-to-measure interiors, that matters. A bespoke media wall should look as though it was always meant to be part of the house. It should work with the architecture, not fight it.
A real-world media wall installation example
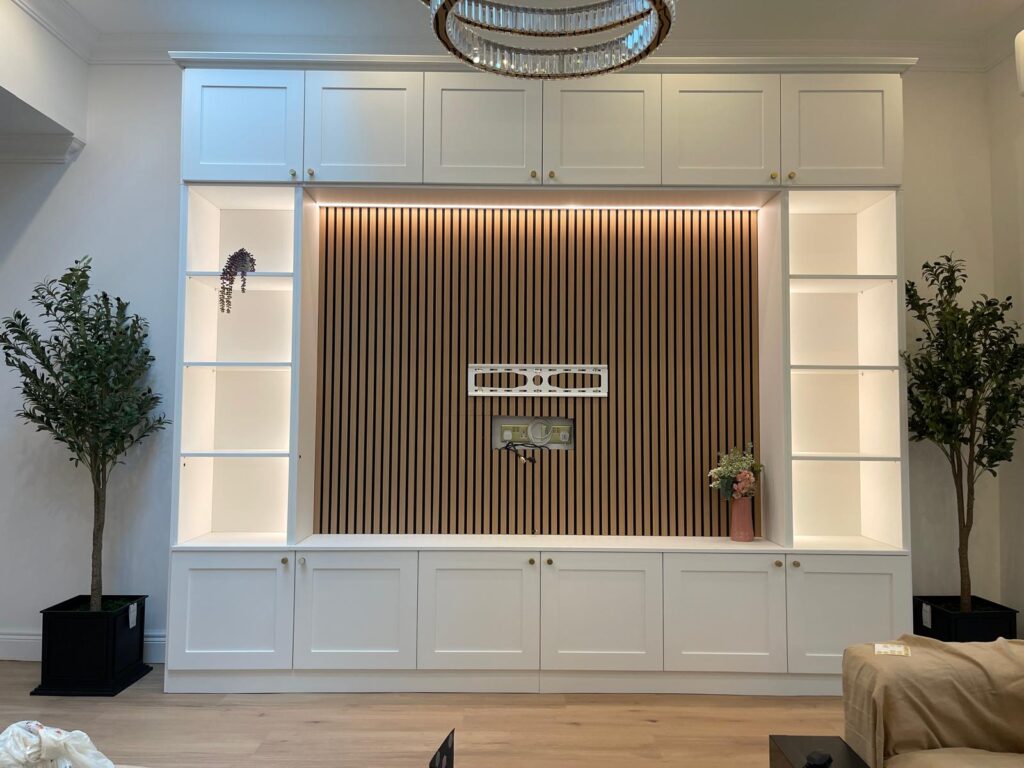
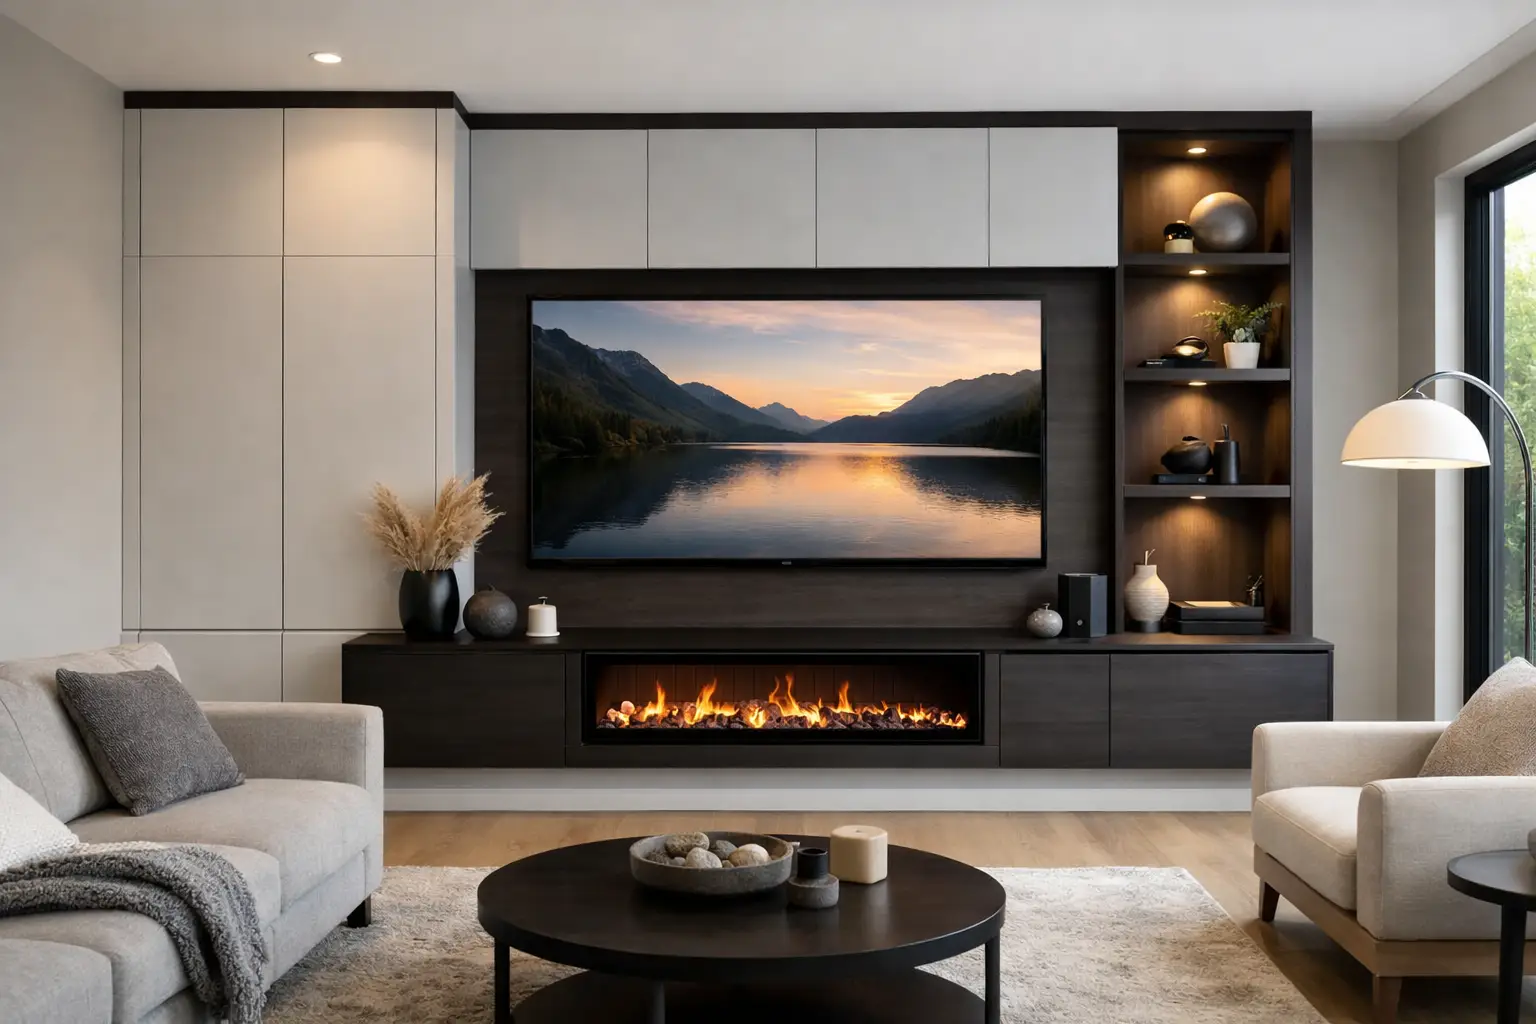
Picture a family room in a recently extended Wimbledon house. The rear wall is just over 3.6 metres wide, with a sofa facing bifold doors and a dining area to one side. The owners want a large screen for everyday viewing, but they do not want the room to feel dominated by black glass and visible wires. They also need practical storage for games consoles, books, board games and the bits that tend to gather in a busy living space.
The solution is a full-width fitted media wall with a central television recess, low-level cupboards, vertical display sections and a soft wood-effect finish combined with painted shaker-style details. Instead of treating the TV as the whole design, the installation is built around balance. The screen sits centrally at a comfortable viewing height, framed by clean joinery. Below it, base cabinets run wall to wall, giving the unit visual weight and much-needed hidden storage. On either side, shelving breaks up the solid mass and creates room for styling without looking fussy.
That is often the best starting point for a media wall installation example – not a dramatic sketch, but a practical brief solved well.
Why this layout works
The success of this kind of installation comes from restraint. Many media walls fail because they try to include too much: an oversized fireplace, very deep shelving, too many finishes or awkward asymmetry. Here, the design stays focused on what the room actually needs.
The lower cabinets are especially important. In family homes, open shelving alone rarely stays elegant for long. Closed storage keeps the visual noise down and gives you somewhere to put routers, remotes, chargers and children’s items without filling every shelf. At the same time, a few open sections stop the wall from becoming heavy.
Depth matters as well. A media wall that projects too far into the room can make circulation feel tight, particularly in narrower Victorian or Edwardian layouts. A shallower build looks neater, but it may limit what can be concealed behind the TV panel or inside cupboards. This is one of those areas where bespoke design earns its keep. The right depth depends on the screen size, the equipment being housed and the shape of the room.
Planning the installation before anything is made
A polished result starts long before fitting day. The first step is measuring the wall properly, including skirting boards, ceiling height, socket locations and any unevenness in the plaster. In older properties, walls and floors are rarely perfectly true, which is exactly why made-to-measure joinery tends to outperform off-the-shelf furniture.
Then comes the equipment plan. The size of the television affects more than the central opening. It influences sight lines from the sofa, the scale of surrounding cabinetry and how much blank wall should remain visible. A 55-inch screen and an 85-inch screen need very different treatment. Bigger is not automatically better if it leaves no breathing room around the joinery.
Electrical planning is just as important. Sockets, aerial feeds and data points should be considered early, not squeezed in at the end. If soundbars, LED lighting or a built-in fireplace are part of the design, those elements need dedicated space and proper ventilation. This is where many rushed installations come unstuck. What looks simple on paper often depends on careful coordination behind the scenes.
Materials and finish choices
The finish can completely change the feel of a media wall. In a contemporary flat, a smooth matt finish in a soft stone or warm taupe can look crisp and understated. In a period home, shaker-style fronts or subtle panelling may sit more comfortably with original features. Wood-effect interiors or accent shelving can also add warmth and stop the unit from feeling too flat.
There is always a balance between appearance, durability and budget. Painted finishes offer a more tailored look, but they can require a little more care in busy households. Textured boards and premium laminates are practical and consistent, especially where fingerprints are a concern. Neither is universally right. It depends on the room, the use and the look you want to achieve.
For many clients, the best result is a combination: durable cabinet interiors and carefully chosen visible finishes that give the piece its character.
Storage that earns its place
One reason media walls have become so popular is that they solve more than one problem at once. They are not just television units scaled up. When designed properly, they help organise the whole living area.
In this media wall installation example, the base cupboards are split into different functions. One section is dedicated to media equipment with discreet cable access and airflow. Another stores children’s toys and games. A third houses larger household items that would otherwise drift into other rooms. The open shelving is reserved for books, ceramics and a few decorative pieces, which keeps the overall look calm.
This is the quiet advantage of bespoke furniture. Storage can be planned around real habits rather than a showroom ideal. If you need deeper cupboards, touch-latch doors, integrated lighting or extra shelving for specific items, the design can respond to that.
The fitting process and what to expect
Clients are often surprised by how much of the quality of a media wall comes down to installation rather than design alone. Even the best drawings need accurate manufacturing and careful fitting to look right in a finished room.
Typically, the process begins with a home design visit and detailed site measurements. Once the design and finishes are agreed, the unit is manufactured to suit the exact dimensions of the wall. On installation days, the fitters assemble and level the cabinetry, scribe where needed against uneven surfaces and prepare all visible joins so the final result feels built in, not pieced together.
A straightforward installation may be completed quickly, but timelines vary depending on the complexity of the design, access to the property and whether electrical works or decorative finishing are happening at the same time. It is always worth allowing a little flexibility, especially during wider renovation projects.
Common mistakes this kind of example avoids
The strongest media walls usually share the same discipline. They avoid setting the TV too high, which makes viewing less comfortable. They do not overload the wall with random niches that serve no real purpose. They allow enough ventilation for equipment and they consider how the joinery will look when the screen is switched off.
Another common issue is poor scale. A unit can be beautifully made but still feel wrong if the shelves are too narrow, the side sections too bulky or the television opening too dominant for the room. This is why bespoke planning is not simply a luxury upgrade. In many homes, it is the difference between a feature that enhances the architecture and one that feels pasted onto it.
Is a bespoke media wall worth it?
If all you need is a place to stand a television, probably not. But if you want the wall to provide storage, improve the look of the room and feel integrated with the rest of your interior, bespoke usually makes much more sense.
It is especially worthwhile in homes where proportions are unusual, where alcoves or chimney breasts affect the layout, or where the media wall needs to tie in with other fitted furniture. Cost matters, of course, and there is no point pretending otherwise. Yet a made-to-measure installation often proves better value over time because it uses the space properly, lasts longer and avoids the patchwork effect that comes from combining several separate pieces.
At Finest Furniture Studio, we often see clients begin with a television wall in mind and then realise the bigger opportunity is to create a living space that feels calmer, more organised and more finished.
The best media wall installation example is not the flashiest one. It is the one that suits the room, supports how you live and still looks right years later, when trends have moved on and the house needs to keep working hard for everyday life.