
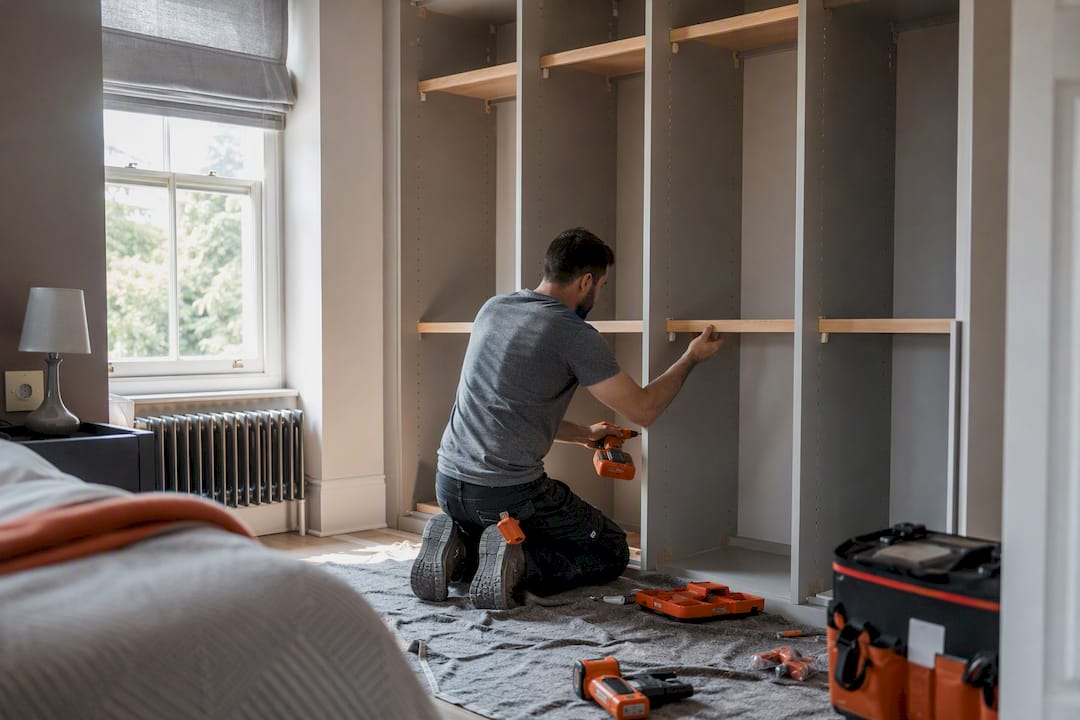
Stop wardrobe damp today with three moves: air the wardrobe fully, pull it away from any cold external wall to create a small gap, and add a moisture absorber or mini dehumidifier while you work on the cause. Most cases of wardrobe humidity control come down to trapped, unmoving air meeting a cold surface, and you can interrupt that process within the hour.
Try these today:
- Silica gel sachets tucked between folded jumpers
- Hanging crystal dehumidifier bags on the rail
- A small USB rechargeable wardrobe dehumidifier for enclosed cupboards
- A cheap hygrometer to see what you’re actually dealing with
If damp keeps returning after a fortnight of trying all this, or you see tide marks, salt staining, or damp on more than one wall, you’re past DIY territory and need a survey.
Key Takeaways
Wardrobe humidity control works best when same-day fixes handle the symptom and a ventilated standoff retrofit removes the cause permanently.
| Point | Details |
|---|---|
| Act same day | Air the wardrobe, create a gap from cold walls, and add a moisture absorber immediately. |
| Target 40 to 60% RH | Use a hygrometer in the room and wardrobe; mould risk climbs sharply above 60%. |
| Match product to space | Sachets for drawers, crystal bags for hanging sections, electric units for larger walk-ins. |
| Fix the wall, not just the shelf | A 50 to 75mm standoff with low and high vents stops condensation at source. |
| Escalate when damp persists | Multiple walls, tide marks, or soft plaster mean a professional survey, not more sachets. |
| Consider a bespoke retrofit | Finest Furniture Studio builds ventilated standoffs into fitted wardrobes with 7 to 12 day installation and a 10 year guarantee. |
Table of Contents
- What causes wardrobe humidity control problems in the first place?
- What are the quickest fixes for a damp wardrobe?
- Which products actually help with wardrobe moisture control?
- How do you stop condensation at the wardrobe itself?
- How do you monitor humidity so damp doesn’t come back?
- When should you call in a professional instead of DIY?
- How a bespoke fitted wardrobe solves recurring wardrobe damp
- What installers actually see behind wardrobe doors
- Get a lasting fix, not another sachet
- Sources
- FAQ
What causes wardrobe humidity control problems in the first place?
Condensation forms when warm, moisture-laden air touches a surface cold enough to chill it below its dew point. Inside a home that’s usually an external wall, and a fitted wardrobe pressed flush against one is a textbook set-up for exactly that. This is different from structural damp, such as rising damp from the ground or penetrating damp from a failed gutter or render crack, which needs a different remedy entirely.
Wardrobes make the problem worse in a few specific ways: they block the airflow that would otherwise dry that wall surface, they get overcrowded with clothes that trap humid air against the back panel, and they behave far worse in winter, when the wall is coldest and the room’s air holds more moisture from cooking, showering, and heating cycles. Condensation is the most frequent cause of wardrobe-related mould in UK homes, and it’s almost always this mechanism, not a leak.
Pro Tip: Mould concentrated at the back panel, a musty smell that’s worse in cold months, and no visible staining elsewhere in the room all point to condensation. Widespread patches, tide marks, or a smell that persists through summer suggest something structural, and no amount of silica gel will fix that.
- Localised mould at the back panel: condensation
- Musty smell that fades in summer: condensation
- Damp on multiple walls or floors: structural, get it surveyed
What are the quickest fixes for a damp wardrobe?
- Empty the wardrobe completely and let it air for a few hours with the doors open and a window cracked.
- Pull it away from the wall wherever you can. Even a 20 to 75mm gap dramatically improves airflow behind the unit, and research on furniture placement confirms that moving furniture a few centimetres from a wall meaningfully improves drying.
- Declutter. A packed wardrobe traps moist air against fabric and panels with nowhere to go.
- Never put damp or slightly-worn laundry straight back in. Let everything dry fully first.
- Open the doors for ten minutes daily, ideally when heating is on and the room’s warm and dry.
Place silica gel sachets or charcoal bags on shelves and in the corners where air moves least. A small rechargeable or plug-in dehumidifier works well as a stopgap while you sort the underlying cause, particularly in a walk-in or freestanding unit with no ventilation at all; you can enhance your home with shutters and condensation control to reduce temperature swings and room humidity further.
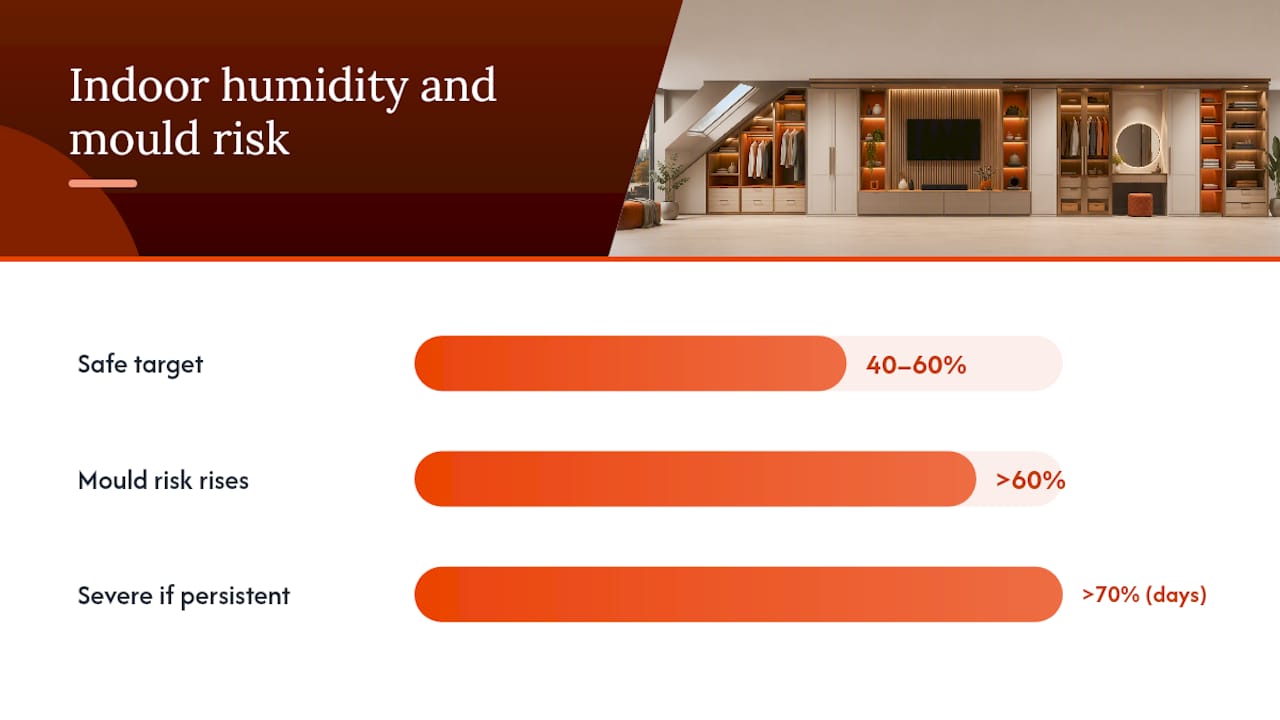
Aim for indoor relative humidity of 40 to 60%, with mould risk climbing sharply above 60% and becoming a real problem beyond 70% if it persists for days.
Pro Tip: Trickle vents left open, an extractor fan run for longer after a shower, and a short daily airing session cost nothing and fix more wardrobes than any gadget on the market. Watch the wall behind the unit over the following fortnight. If it stays dry, you’ve solved it. If it doesn’t, the room’s moisture load is too high for spot fixes.
Which products actually help with wardrobe moisture control?
Not every product suits every wardrobe, and picking the wrong one wastes money without fixing anything.
- Silica gel sachets and desiccant packs: cheap, disposable, best for drawers and small enclosed sections. They saturate fast in a genuinely damp room, which makes them a useful diagnostic as much as a cure. If a sachet is soaked within days, your room’s moisture load is too high for sachets alone and you need ventilation, not more sachets.
- Hanging crystal dehumidifier bags: the hydrophilic crystals inside these start collecting moisture within days, with a working life of a few weeks to a few months depending on humidity levels and bag size. Good for freestanding wardrobes and larger hanging sections.
- Rechargeable USB mini dehumidifiers: no disposal needed, just tip out the water tank and recharge. Suit small built-in cupboards and travel cases where mains power isn’t practical.
- Compact plug-in Peltier dehumidifiers: mains powered, higher capacity, better for larger walk-in wardrobes or persistently damp rooms, but they need a socket nearby and periodic filter cleaning.
- Hygrometers: a £10 to £15 digital hygrometer tells you whether you’re actually dealing with a humidity problem or just an odour issue. Installation complexity is zero. Every other product on this list is guesswork without one.
Refresh silica sachets regularly in a persistently damp wardrobe; empty electric units often in winter to maintain effectiveness. A product that saturates within days rather than weeks is telling you the fix needs to happen at wall level, not shelf level.
How do you stop condensation at the wardrobe itself?
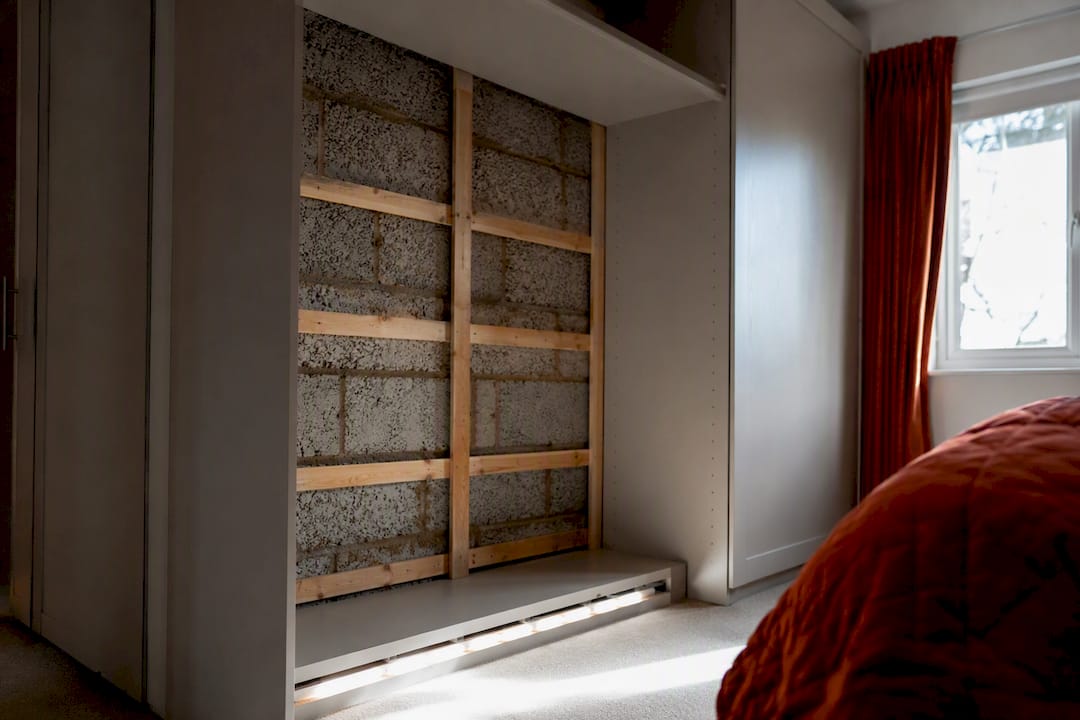
The most reliable retrofit detail is a 50 to 75mm standoff between the wardrobe’s back panel and the external wall, mounted on treated battens, with a ventilation inlet low and an outlet high. That gap lets air move in a slow convective loop, drying the cavity continuously rather than trapping stagnant moist air against cold plaster. It’s the single most effective preventative detail for condensation behind fitted units, and it’s why well-specified fitted wardrobe ventilation makes such a difference over a standard flush-fit carcass.
Do use moisture-resistant MDF or board for back panels. Do route vent slots into the plinth and cornice so air can enter low and exit high without visible grilles. Don’t use vapour-trapping paints or sealants on the wall behind the unit, and don’t skip the standoff just to save a few centimetres of depth.
In older or listed properties, favour breathable materials such as lime plaster and mineral paint, and choose reversible venting solutions over anything that alters the original fabric permanently, a point conservation-focused damp specialists rightly stress.
Pro Tip: A standoff-and-vent retrofit on an existing wardrobe usually takes a day or two. Full internal wall insulation, by contrast, is weeks of work and disruption, so it’s worth trying the simpler fix first unless a survey tells you otherwise.
How do you monitor humidity so damp doesn’t come back?
Put one hygrometer in the room, away from radiators and windows, and a second small one inside the wardrobe itself.
- Replace silica sachets and crystal bags every four to six weeks in winter, longer in summer
- Empty electric dehumidifier tanks weekly and clean filters monthly
- Check rechargeable units hold charge before the next damp spell hits
Winter months load more moisture into the air from heating and reduced ventilation, so absorbers work harder and need replacing sooner. Out-of-season clothing stored in vacuum bags or breathable garment covers, rather than left loose against a cold panel, holds up far better through a full year.
When should you call in a professional instead of DIY?
Persistent damp after trying the fixes above, damp spreading across more than one wall, visible wet patches, tide marks, or salt staining on plaster all signal something beyond wardrobe-level condensation.
- Damp returns within weeks despite airing, standoffs, and absorbers
- Multiple rooms or walls affected, not just the wardrobe
- Plaster feels soft, bubbled, or salt-stained
A damp specialist will check wall surface temperature, map moisture levels, and often use thermal imaging to spot cold bridging. The usual remedies at this stage are internal wall insulation or targeted remedial works, since ventilation and dehumidifiers are secondary once the wall itself is the problem. Photograph recurring patches with dates so a tradesperson can see the pattern, not just a snapshot.
How a bespoke fitted wardrobe solves recurring wardrobe damp
We build the 50 to 75mm ventilated standoff and low-inlet, high-outlet vent slots into every fitted wardrobe we install against an external wall, using moisture-resistant MDF and finishes that don’t trap vapour against the panel. It’s the same principle a damp survey would recommend, just built in from the start rather than retrofitted after the mould appears.
What Finest Furniture Studio delivers on every project:
- A free in-home design visit to assess the wall, layout, and existing damp signs
- Made-to-measure production around your exact space, including awkward alcoves and sloped ceilings
- Installation in 7 to 12 days, with the old wardrobe removed and disposed of as part of the job
- A 10 year guarantee on the build
Ask us during the design visit how deep the standoff will be, which vent positions suit your wall, and what finish resists moisture best in your room. That’s the difference between a wardrobe that looks good for a season and one that stays dry for a decade.
What installers actually see behind wardrobe doors
Most damp we uncover starts with a vent someone boxed in or a wardrobe pushed flush against a cold wall because nobody thought a few centimetres would matter. It usually does. A proper standoff and vent detail solves what homeowners assume is a major structural job.
Get a lasting fix, not another sachet
Sachets and mini dehumidifiers buy you time. A bespoke fitted wardrobe with a ventilated standoff built in from day one solves wardrobe humidity control at the source, and that’s what Finest Furniture Studio specialises in across Richmond, Wimbledon, Putney, Kingston, Chiswick, Fulham, Chelsea, Ealing, Twickenham, Barnes, Hammersmith, and Central London.

Every project starts with a free in-home design visit where we check the wall, agree the ventilation detail, and measure for a made-to-measure fit. Installation runs 7 to 12 days, we remove and dispose of your old wardrobe as part of the job, and every build carries our 10 year guarantee. If your current wardrobe backs onto a cold wall and keeps growing mould no matter what you hang in it, browse our built-in wardrobes or, if you’re closer to Richmond, our bespoke fitted wardrobes for Richmond homes. Message or call 07468 150807, or reach us on WhatsApp, to book your free design visit.
Sources
- Condensation, damp and mould – Centre for Sustainable Energy
- Why does mould grow on clothes in my wardrobe?
FAQ
How do I reduce humidity in a wardrobe?
Air it out fully, create a gap from any cold wall, declutter, and add a silica gel sachet or crystal dehumidifier bag while you address room-wide ventilation with open windows or an extractor fan.

What can I put in my wardrobe to stop damp?
What did Martin Lewis say about dehumidifiers?
Martin Lewis’s consumer advice has covered dehumidifier running costs and effectiveness for damp homes generally, though wardrobe-specific guidance isn’t part of that coverage, and ventilation fixes remain the primary long-term solution regardless.
What is the best moisture absorber for a wardrobe?
There’s no single best option. Silica sachets suit drawers, crystal hanging bags suit larger sections, and a rechargeable mini dehumidifier suits enclosed built-in cupboards with no ventilation at all.