
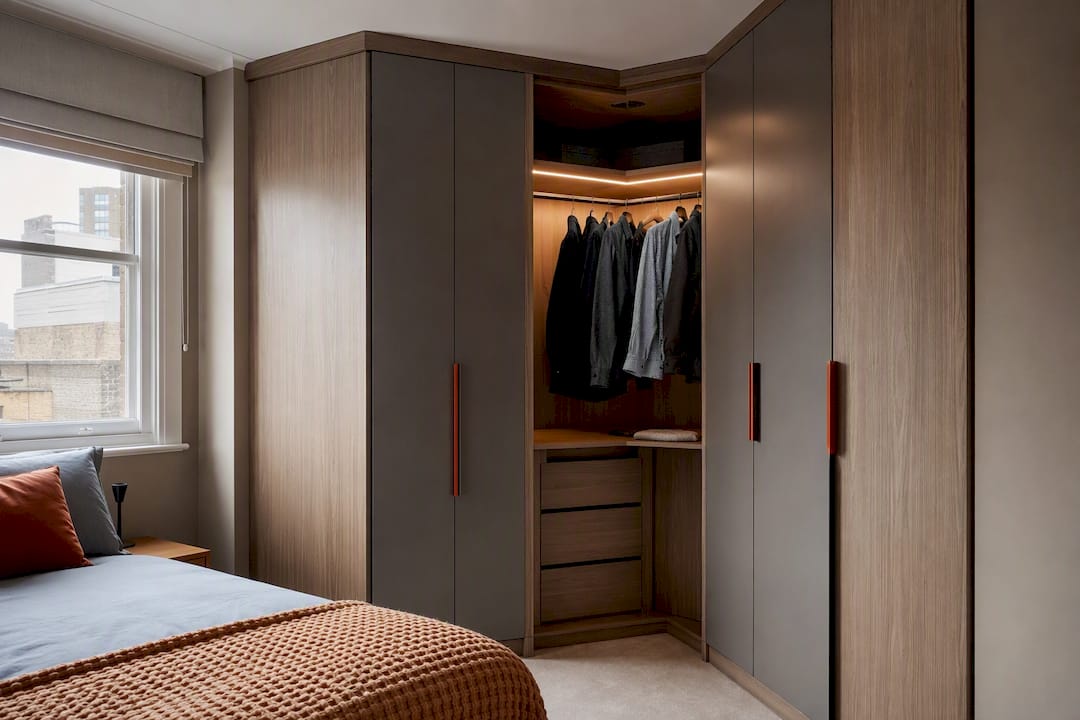
An L-shaped wardrobe design turns an unused corner into the room’s largest continuous storage run, ideal when you need more hanging and shelving without stealing floor space. It wraps two adjoining walls into one continuous run of storage, which recovers dead corner space that a single-wall wardrobe simply cannot reach. Choose this layout when you have an unused corner, need more hanging and shelving than a standard run offers, or want a fully built-in look. The trade-off is visual weight and planning: get the proportions or door access wrong and it can feel heavy in the room.
Before you commit, do three things:
- Measure both walls, ceiling height, and any obstructions (windows, radiators, sockets).
- Sketch the main run and the return, marking where doors will sit.
- Decide early whether you want sliding or hinged doors, since this affects clearance and layout.
Key Takeaways
An L-shaped wardrobe design works best when a standard-depth main run is paired with a shallower return, using mixed bay depths, integrated lighting, and a door system matched to the room’s circulation space.
| Point | Details |
|---|---|
| Start with the longer wall | Plan the main hanging run first, then allocate the shorter return for shelving and shoes. |
| Mix depths deliberately | A ~640mm main run paired with a ~300 to 400mm return keeps corners accessible. |
| Match doors to circulation | Sliding suits tight floor space; hinged needs clear swing room in front. |
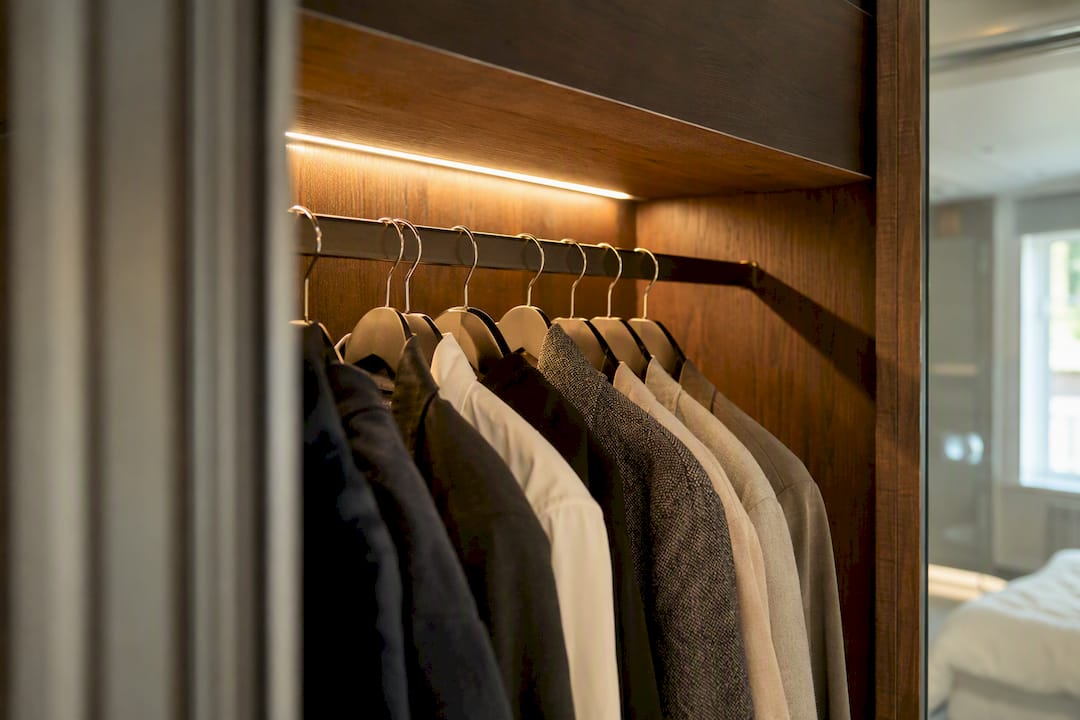
| Light the corner properly | Integrated LED strips with motion sensors stop deep bays becoming dead storage. |
| Bespoke suits awkward corners | Site templating and grain matching, as offered by Finest Furniture Studio, handle out-of-square walls that modular kits cannot. |
Further planning resources
For deeper measuring guidance, see the corner wardrobe design guide or explore small bedroom storage ideas from Finest Furniture Studio for compact-room layouts.
Table of Contents
- Planning and layout: how to measure an L-shaped wardrobe
- What door options work best for corner access?
- How should you organise the inside of an L-shaped wardrobe?
- Which finishes suit a corner wardrobe best?
- What lighting and hardware make corner storage practical?
- What depth should an L-shaped wardrobe be?
- Should you DIY a corner wardrobe or hire a bespoke joiner?
- How Finest Furniture Studio designs and fits L-shaped wardrobes
- Sources
- FAQ
Planning and layout: how to measure an L-shaped wardrobe
Good corner wardrobe layout starts with a tape measure, not a mood board. Record the full length of both walls, ceiling height at several points (older rooms rarely have a level ceiling), skirting board depth, cornice projection, and the exact position of windows, radiators, and sockets. Note which way any door in the room swings, because that dictates clearance for wardrobe doors on the facing wall.
Start planning from the longer wall. This becomes your main run and carries most of the hanging space. The shorter wall becomes the return, often shallower and used for folded storage or shoes rather than full-length hanging. Sketch the run on paper or graph paper, marking where each door panel will sit and which bays are hanging, shelving, or drawers. Made-to-measure suppliers generally recommend planning doors and internals together rather than as separate decisions, since door type limits what internal layouts are practical.
- Measure both walls and ceiling height at three points.
- Note obstructions: windows, radiators, skirting, sockets.
- Decide door type before finalising internal bays.
- Sketch bay widths and label each as hanging, shelving, or drawers.
Pro Tip: Take your measurements to a design planning guide or a design visit before ordering anything. A ten-minute sense check from someone who fits wardrobes daily catches mistakes a floor plan alone will miss.
What door options work best for corner access?
Sliding doors suit rooms where floor space is tight, since they need no swing clearance in front of the wardrobe. Aluminium-framed mitre systems can meet at the corner without a structural pillar, which improves access compared with some steel-frame installations that often need one. Hinged doors work well when the room has generous circulation space and the bed sits well clear of the wardrobe front, since each panel needs room to swing fully open.
- Sliding doors: best for tight rooms, minimal floor intrusion, aluminium mitre for cleaner corner joins.
- Hinged doors: better full access to shelving, needs clear floor space in front.
- Corner junctions: pillars, mitred tracks, or concealed sliding arrangements, depending on the system.
- Narrow returns: a single sliding panel or a pocketing door often solves access where a full hinge run would jam against the adjacent wall.
Whichever system you choose, ask your installer about templating and fitter experience first. Review platforms show that sliding-door corner systems attract mixed feedback mainly where sizing or fitting went wrong, not where the door mechanism itself failed.
How should you organise the inside of an L-shaped wardrobe?
Treat the interior as a hierarchy, not a uniform grid. Daily items belong at eye level and within easy reach: work clothes, everyday shoes, folded jumpers. Less-used items go higher, and seasonal storage, like winter coats or spare bedding, works well tucked into the deepest corner bays where reach matters less.
A typical bedroom layout might allocate a sufficiently deep bay for long hanging near the main run, a shallower bay for shelving and folded items, and a narrower bay on the return for shoes and accessories. Designers increasingly favour this mixed-depth approach: pairing a standard-depth main run with a shallower return keeps the corner accessible while still maximising overall volume.
- Daily wear at eye level, front and centre of the main run.
- Folded clothing and accessories on the shallower return.
- Seasonal or rarely used items in the deepest corner bay.
- Pull-out racks or baskets for anything stored above head height.
Corner bays lose usability fast once they’re deeper than an arm’s reach without a pull-out fitting. That’s exactly why integrated LED lighting matters more in a corner wardrobe than a straight run: shadowed recesses are where clothes and shoes genuinely disappear from use.
Which finishes suit a corner wardrobe best?
Material choice controls whether a corner wardrobe recedes into the room or becomes its focal point. Corners naturally draw the eye, and grain matching or fluted detailing at the return can either flatter that or fight it, so pick deliberately rather than defaulting to whatever finish the rest of the room uses.
- Matt lacquer: modern, hides fingerprints well, easy to wipe clean.
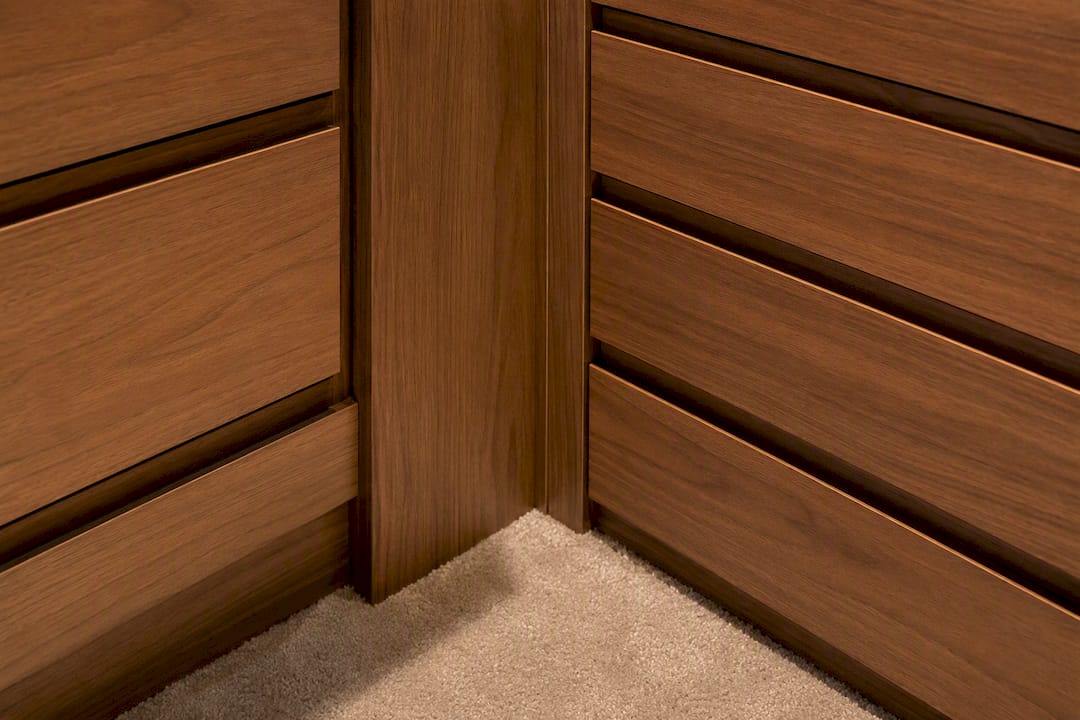
- Oak or walnut veneer: warmer look, needs continuous grain matching across the corner join to avoid an obvious seam.
- Laminate: budget-friendly, wide colour range, less tactile than veneer.
- Fluted or ribbed panels: adds texture without heaviness, works well on a return run.
- Mirror fronts: enlarge a small bedroom visually, but avoid positioning them to reflect the bed directly or a cluttered opposite wall.
Grain continuity across the corner join is where cheaper flat-pack systems usually fall short, since the pattern rarely lines up at the mitre.
What lighting and hardware make corner storage practical?
Corners are where shadows collect, which is exactly why lighting deserves more attention here than on a straight run. Integrated LED strips, ideally on motion sensors, remove the need to fumble for a switch or a torch when reaching into a deep bay.
- Soft-close hinges and runners: prevent slamming, protect the cabinetry over years of daily use.
- Push-to-open mechanisms: useful where handles would clash with a mitred sliding track.
- Handle scale: choose slimmer profiles on corner returns so they don’t catch clothing or collide with adjacent doors.
- Ventilation: discreet vents or breathable linings matter most in older properties with solid walls, where trapped moisture behind a full-height corner run can cause damp or mustiness.
Pro Tip: Specify concealed lighting at the design stage, not as an afterthought. Retrofitting wiring into a finished corner wardrobe is far more disruptive than running cable during the build.
What depth should an L-shaped wardrobe be?
Depth decisions shape everything from hanger clearance to how much the wardrobe intrudes on the room. A widely used benchmark is a finished depth of around 640mm on the main run, which allows comfortable hanger clearance alongside door hardware, though sliding systems can shave that back slightly since they need less internal track allowance.
| Element | Typical figure |
|---|---|
| Main run finished depth | Around 640mm for hanging with door clearance |
| Return run depth | Shallower depth for shelving and shoes |
| Minimum door clearance (hinged) | Full door width plus swing arc in front of the wardrobe |
| Bed to wardrobe front clearance | Enough for the chosen door type to open without obstruction |
Reducing the main run depth below the usual benchmark still works if you shift full-length items elsewhere and use the shallower space for folded storage. There’s no rule that both runs must match. As one detail of good practice puts it, pairing a standard-depth main run with a shallower secondary run gives better access and a lighter feel in the room without sacrificing much real storage. Bed placement also decides your door choice here: a bed pushed close to a hinged-door wardrobe will jam the swing, which is often the deciding factor in choosing sliding doors instead.
Should you DIY a corner wardrobe or hire a bespoke joiner?
Modular kits and flat-pack corner systems cost less upfront and suit rooms with standard proportions and square walls. Their limitation shows up fast in older homes: fixed panel widths rarely match an out-of-true corner, and the “corner solution” is often just two boxes pushed together rather than a genuinely integrated run.
Bespoke joinery earns its higher price in exactly those awkward corners. Site templating and scribing let the wardrobe follow the room’s actual walls, ceiling, and skirting rather than assuming they’re straight, and this is particularly valuable in period properties where nothing is quite square. Full-height runs and continuous grain matching are also far easier to achieve when the piece is built to the room, not the other way round.
- DIY/modular: cheaper, faster to source, poor fit in irregular corners.
- Bespoke: higher cost, requires a template visit, but delivers a genuinely fitted result with full-height integration.
- Ask any fitter: how do you handle out-of-square walls, and can I see grain-matched examples of previous corner work?
- Request a free design visit before committing, so measurements and door choice are confirmed on site rather than guessed from a sketch.
Designer-first perspective: what separates good from great
Proportion is where most corner wardrobes succeed or fail, more than finish or hardware. A run that ignores ceiling height or skirting depth always looks slightly wrong, however good the veneer. We’d rather see a client wait for full-scale drawings than rush a modular fit that can’t be adjusted once installed. Quick turnaround matters too: our typical seven-day installation and 10-year guarantee exist precisely because corners are unforgiving of error, and getting it right the first time avoids a second disruption to the bedroom.
How Finest Furniture Studio designs and fits L-shaped wardrobes
If you’ve read this far, you already know that a corner wardrobe rewards careful measurement and punishes guesswork. Finest Furniture Studio builds every L-shaped wardrobe around your actual room, not a fixed catalogue width, with a free in-home design visit to template both walls before anything is manufactured.
Installation typically takes around seven days from template to finish, backed by a 10-year guarantee on the build. We remove and dispose of your old wardrobe as part of the job, so there’s no separate skip hire or trip to the tip to arrange. Our bespoke wardrobe design guide covers finishes, door systems, and lighting options in more depth if you’re still deciding between sliding and hinged doors. Get in touch for a free design visit, call or WhatsApp 07468 150807, and we’ll book a template appointment around your schedule.
Sources
- Corner wardrobes: L-shaped storage ideas & design guide
- Corner Fitted Wardrobe: Making Corners Count – Tru English Bespoke Joinery
FAQ
What are the pros and cons of L-shaped wardrobes?
They maximise otherwise wasted corner space and create a built-in look, but they add visual weight to a room and need careful proportioning and door planning to avoid feeling heavy or blocking circulation.
Can you build an L-shaped wardrobe yourself?
Modular kits make a DIY build possible in a square room with standard dimensions, but out-of-square walls, uneven ceilings, and grain-matched corner joins are where most DIY attempts fall short.
Is it cheaper to build your own wardrobe or buy one bespoke?
A modular or flat-pack system usually costs less upfront, but bespoke joinery avoids the poor corner fit and wasted space that off-the-shelf panels often produce in irregular rooms, which can offset the price difference over time.
How do you use an L-shaped wardrobe effectively?
Keep daily items at eye level on the main run, use the shallower return for folded clothing and shoes, and reserve the deepest corner bay for seasonal storage with a pull-out fitting or internal light.