
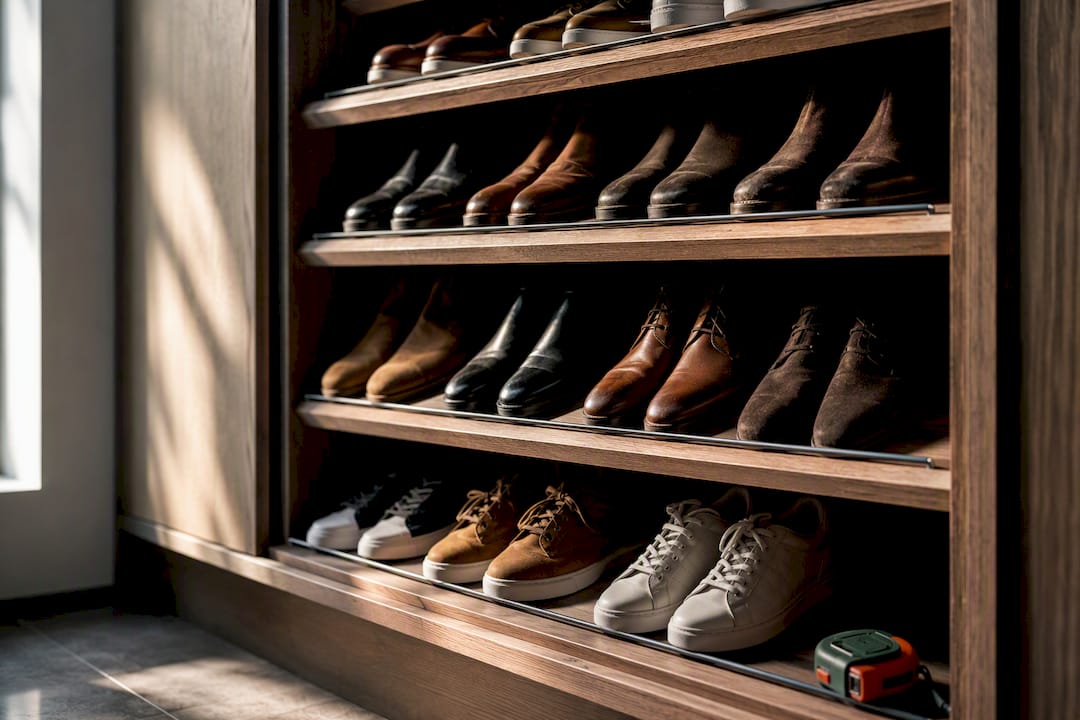
The best dressing room shoe wall for most homes combines angled display shelves for everyday pairs with concealed trays or glazed bays for the rest. Open shelving gives you visibility and grab-and-go access; enclosed sections protect prized pairs from dust and fading. Skip the fully open wall only if your room is very shallow or your budget is tight, in which case a smaller mixed run still beats a single flat shelf. The planning and fitting detail below shows how to size it properly.
TL;DR:
- Most shoe walls benefit from a combination of angled shelves for daily wear, pull-out trays for large collections, and glazed bays for display and dust protection.
- Suitable materials include moisture-resistant MDF or melamine-faced boards for easy cleaning, with finishes like lacquer, veneer, or mirrored panels depending on maintenance preferences.
- Enclosed bays with ventilation and LED lighting improve durability and visibility, while sliding or glazed doors optimize space and dust control.
- A bespoke shoe wall installation involves a detailed site survey, size-specific design, and typically takes seven to twelve days, offering a 10-year guarantee and full removal of old wardrobes.
Table of Contents
- What are the best shoe wall shelving options for a dressing room?
- How high should shoe shelves be for easy reach?
- Which materials and finishes suit a shoe wall?
- How do you keep a shoe wall ventilated and well lit?
- What does installing a bespoke shoe wall involve?
- What separates a good bespoke fitter from an average one?
- Display or discretion: which should win?
- Get a bespoke shoe wall fitted in seven to twelve days
- Sources
- FAQ
What are the best shoe wall shelving options for a dressing room?
Four shelving formats cover almost every dressing room brief, and most well-designed walls blend two or three of them rather than committing to one.
Open shelving gives you the clearest view of your collection and the fastest access, which matters if you’re choosing shoes at 7am. The trade-off is dust: open shoe walls need a wipe-down roughly weekly, more often near a window or busy hallway.
Angled fixed shelves are the workhorse of a good dressing room shoe wall. Set at around 15 degrees of tilt with a small toe or heel rail of roughly 25 to 35mm, they present each pair face-on rather than side-on, which both looks sharper and lets you spot a pair instantly. They suit flats, trainers, heels and most everyday footwear.
Pull-out angled trays on full-extension runners earn their place once a collection passes about 30 pairs. Rather than reaching into a fixed shelf, the whole tray glides forward for viewing, and each tray typically holds four to six pairs. For a serious collector, trays beat fixed shelves on both capacity and reach.
Glazed or closed bays solve the display-versus-dust argument outright. A glass-fronted section lets a curated few pairs stay on show while sealing out dust and direct light; solid doors suit the pairs you want tucked away for a calmer bedroom feel. Boxed trainers and flat boot storage tend to work better on deeper, unangled shelves rather than tilted ones.
- Open shelving: best visibility, weekly dusting
- Angled shelves (15°): best for everyday flats, heels, trainers
- Pull-out trays: best for 30+ pairs, four to six pairs per tray
- Glazed bays: display plus dust protection
- Closed doors: calm aesthetic, seasonal or occasion pairs
Pro Tip: Mix formats rather than picking one. A typical brief works well with angled shelves for the top two reach bands, a bank of pull-out trays below, and one glazed bay for the pairs you actually want on show.
How high should shoe shelves be for easy reach?
Get the reach bands right and the rest of the layout falls into place. The practical rule of thumb places daily pairs between 500mm and 1,500mm off the floor, the zone you can see and reach without bending or stretching. Anything above 1,800mm is better reserved for out-of-season boots or occasion shoes you reach for a few times a year. Heavy boots belong low, both for ease of lifting and because that’s where spare depth tends to sit unused anyway.
Shelf depth should be tailored to the actual footwear: flats and heels need moderate depth, trainers require slightly more, boots need deeper shelves usually flat rather than angled, and boxed trainers require deeper shelves sized to the box dimensions.
Shallow, one-size shelves are the single most common design mistake. A small-closet audit found that uniform shallow shelves waste depth that could otherwise become useful vertical storage, because nobody plans against real shoe lengths rather than catalogue guesses. Angled shelves need that 15° tilt and toe/heel rail mentioned above so pairs don’t slide forward every time the door opens.
Before finalising anything, check the door swing and aisle clearance: a glazed or hinged door needs enough floor space to open fully without hitting an island unit or a chest of drawers. Finish the process with a simple audit: count your pairs, measure your longest boot or largest trainer, then add roughly 20% spare capacity so next season’s purchases have somewhere to go.

Which materials and finishes suit a shoe wall?
Shoe walls take more abuse than hanging space, so the interior needs to earn its keep. Melamine-faced board or lacquered moisture-resistant MDF wipes clean in seconds and shrugs off the odd scuff of polish or grit. Fabric-lined trays look lovely in a showroom but pick up dirt fast in daily use, so save them for occasion-shoe bays rather than the everyday run. Every exposed edge should be banded to resist moisture, particularly near the floor where damp shoes land after a wet commute.
Fronts are where personality comes in, and each option carries a maintenance trade-off:
- Painted lacquer: crisp and modern, shows fingerprints more readily
- Veneer: warm and natural-looking, more forgiving of daily wear
- Mirrored panels: brighten a small dressing room but need regular glass cleaning
Choose handles or finger-pulls that sit flush enough not to catch on laces or ankle boots, and specify soft-close runners on any pull-out trays so nothing slams. A weekly wipe-down of melamine or lacquered surfaces, an occasional airing of enclosed bays, and a slightly more careful hand around mirrored fronts keeps the whole wall looking new for years rather than months.
How do you keep a shoe wall ventilated and well lit?
Enclosed shoe storage traps moisture unless you plan for airflow at the design stage. Shadow gaps, plinth vents and a simple 10mm gap behind the back panel all let air circulate without compromising the look of the wall, and they’re straightforward for a fitter to specify once you flag it at survey.
Lighting decides whether a shoe wall reads as a feature or an afterthought. Vertical LED strips at the edges of open bays and shelf-edge lighting along angled shelves both work well, with sensor-triggered switching so lights come on only when you’re actually choosing shoes. Take care with glazed doors, though: reflected LED light can brighten a glass-fronted bay beautifully or create irritating glare depending on where the fitting sits relative to the glass, so this is worth discussing at the design stage rather than after installation.
- Hinged doors: full access, most floor space needed to open
- Sliding doors: space-saving, ideal for narrow dressing rooms
- Glazed framed sections: display with dust control, but see below
- Interior closet doors affect usable depth as much as they affect looks
Door type changes more than the aesthetic. Framed glass, tracks and lighting channels all eat into usable depth compared with an open bay, so confirm the finished interior measurement after the frame and glazing are accounted for, not before.
What does installing a bespoke shoe wall involve?
A proper survey does most of the heavy lifting before a single panel gets cut. Expect a fitter to ask for an audited shoe count, measurements of your largest boots or trainers, a map of door swing and aisle clearance, and confirmation of where lighting and ventilation points need to sit.
- Book a site survey and walk through your current shoe count with the designer
- Agree shelf mix (angled, trays, glazed) against your reach-band plan
- Review sample finishes, runner specification and lighting placement
- Confirm lead time, then manufacture and install
Cost tends to move with three things: bespoke joinery complexity, any glazing or mirrored fronts, and the spec of runners and integrated lighting. Ask your fitter about sample trays before committing, the exact runner mechanism on any pull-out units, the warranty length on the finished wall, and what happens to your old wardrobe once the new one goes in.
DIY flat shelving can work for a modest, budget-led collection in a straightforward alcove. Once you’re mixing angled shelves, pull-out trays and glazing, though, the payback on a bespoke fit usually outweighs the saving, largely because getting the reach bands and depths wrong first time is expensive to correct later. Our guide to planning fitted wardrobes properly covers the same survey questions in more depth if you want to prepare before a visit.
Pro Tip: Ask any fitter for their standard installation window before you book. A reasonable installation timeframe is within about a week or two after survey, and a long-term guarantee is advisable when working with bespoke joiners.
What separates a good bespoke fitter from an average one?
A reputable fitter will always start with measurement, not a catalogue. That means an audited shoe count, drawings that reflect your actual reach bands and depths, and sample finishes you can hold before committing to lacquer, veneer or glass. Checking a supplier’s independent review history is a sensible step before booking, since consistency across dozens of installs tells you more than any showroom visit.
Most shoe wall failures trace back to the same handful of causes: shelves too shallow for real boot lengths, no ventilation behind an enclosed bay, or fixed shelving with no flexibility as a collection grows. Bespoke design fixes all three at the survey stage, before they become expensive to unpick. Our piece on custom shoe storage solutions walks through how that measurement-first process actually plays out.
Display or discretion: which should win?
My honest read after working through the planning logic here is that most homeowners over-invest in open display and under-invest in ventilation. A wall of thirty pairs on show looks striking in a photograph, but it needs weekly attention to stay that way, and few people keep it up. I’d rather see two or three angled shelves at eye level for the pairs worn most, everything else in trays or behind glass.
The habit that actually keeps a shoe wall tidy long-term is simpler than any shelf configuration: return each pair to its spot in one motion, rather than dropping shoes by the door and sorting “later.” No amount of clever joinery fixes a habit problem. What good design does is remove the friction that causes the habit to fail in the first place, angled shelves that show you exactly where a pair belongs, trays that pull forward instead of forcing a search.
If you’re planning one, get a site survey before you commit to a layout on paper. Room dimensions, door swing and the depth of your longest boots all shift the maths more than most people expect.
*— Aureliu
Get a bespoke shoe wall fitted in seven to twelve days
Finest Furniture Studio designs and installs bespoke shoe walls as part of a full walk-in wardrobe design, built around a measured survey rather than a standard module range. That means angled shelves, pull-out trays and glazed bays sized to your actual collection, not a catalogue guess, with installation typically completed within seven to twelve days of survey and backed by a 10-year guarantee.

We’ll also take away and dispose of the old wardrobe, so there’s no separate skip or removal job to organise. To get started, request a free design visit, bring an audited shoe count and your longest boot or trainer measurement, and ask to see finish samples for the fronts you’re considering. The service area includes a wide range of London and surrounding locations such as Richmond, Wimbledon, Putney, Kingston, Chiswick, Fulham, Chelsea, Ealing, Twickenham, Barnes, Hammersmith and Central London, as well as New Malden, Maidenhead, Brixton, Walton-on-Thames, Woking, Bracknell, Reading and Guildford. Browse the full bespoke wardrobe guide for West London, or call 07468 150807 or message on WhatsApp to book your free design visit.
Sources
- How to design a pull-out shoe drawer system for 30+ pairs
- Walk-in closet shoe wall planning before glass doors
- How to organise shoes in a small closet like an expert
FAQ
How many pairs fit in a pull-out shoe tray?
Most full-extension pull-out trays hold four to six pairs each, depending on shoe size and tray depth.
What angle should fixed shoe shelves be set at?
Angled shelves work best tilted at roughly 15 degrees, with a toe or heel rail of about 25 to 35mm to stop pairs sliding forward.
How do I stop a shoe wall smelling or growing damp?
Build in airflow at the design stage with shadow gaps, plinth vents or a 10mm gap behind the back panel, particularly in any enclosed or glazed bays.
Is a glazed door better than an open shelf for shoe storage?
Glazed doors offer the best middle ground for most dressing rooms, keeping pairs visible while sealing out dust that open shelving collects.
How long does a bespoke shoe wall installation take?
A bespoke shoe wall typically takes seven to twelve days to complete from survey to installation, and a long-term guarantee is recommended.

