
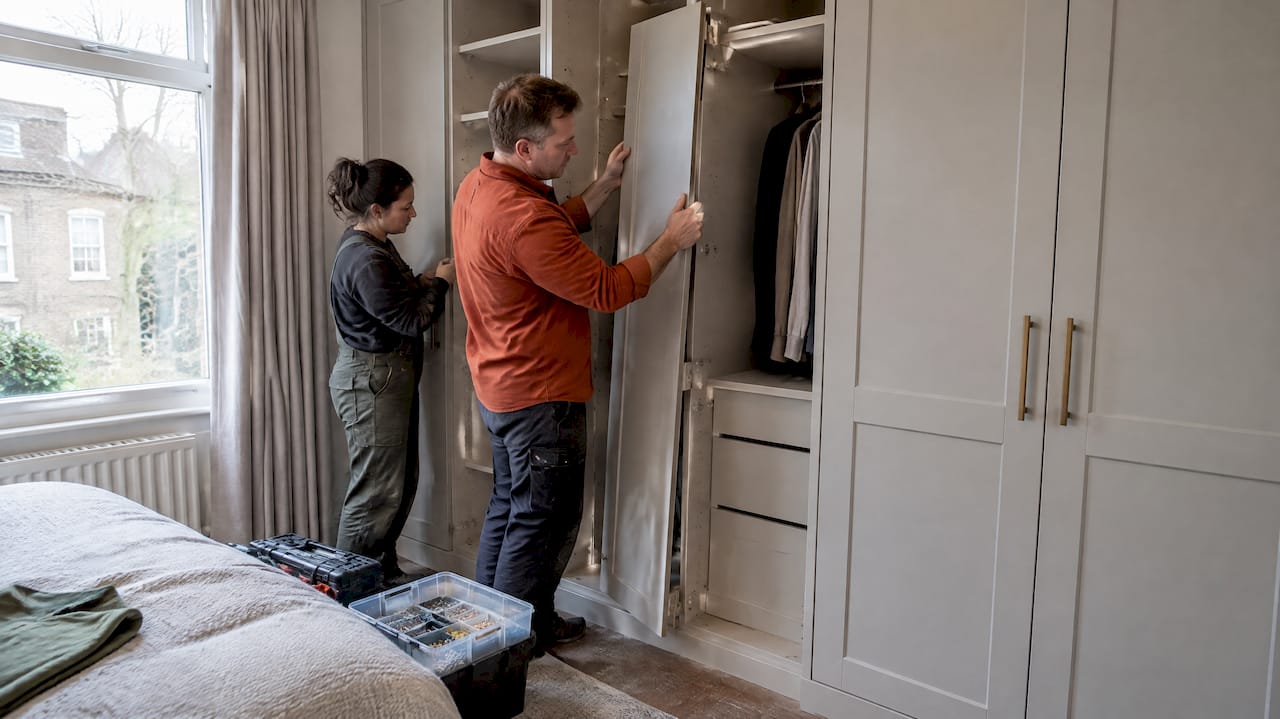
Yes, you can move a fitted wardrobe, but only if it was built with removable panels and standard fixings rather than scribed or sealed into place. The Health and Safety Executive’s manual handling guidance covers the safe lifting side of the job, while firms like Finest Furniture Studio see the practical limits every week on site. If your wardrobe has integrated panelling or bespoke scribing, check feasibility with a professional before you start dismantling anything.
TL;DR:
- Moving a fitted wardrobe is feasible if it was constructed with removable panels and standard fixings, but impossible if it is scribed into the wall or built around fixtures.
- Disassembly requires careful planning, including documenting all parts, removing doors and hardware first, and labeling components for reassembly to avoid delays.
- Disposing of the old wardrobe can be complicated because councils often do not include fitted furniture in their bulky waste collections, leading to higher disposal costs.
- Professional installers typically offer a site survey, precise measurements, and guarantees, and can handle complex removals or supply a new bespoke wardrobe with a timely turnaround.
- Moving a wardrobe yourself risks damage if it has been glued or scribed; in most cases, replacement may be more practical and cost-effective than dismantling and relocating an old unit.
Table of Contents
- When moving a fitted wardrobe is realistic
- When replacement tends to be the better option
- Step-by-step safe dismantling, moving and refitting
- Costs, disposal and recycling: what to budget for
- Permissions, tenancy and leasehold considerations
- What fitters actually find on site
- If you prefer a professional solution: how a bespoke installer can help
- Sources
- FAQ
When moving a fitted wardrobe is realistic
Not every fitted wardrobe is built to travel. Bolt-together carcasses and modular systems, where panels are joined with cam locks or visible screws rather than glued or scribed, are the easiest to take apart and reassemble elsewhere. Wardrobes scribed directly to an uneven wall, built around a chimney breast, or fitted with an integrated radiator recess rarely survive removal without damage to the wall finish or the panel edges.

Door type matters just as much as the carcass. Hinged doors are usually the simplest to remove and rehang, since they lift off standard hinges. Sliding doors depend on the track system: some tracks unscrew cleanly, others are fixed to the ceiling in a way that tears plasterboard on removal. Mirrored doors add weight and fragility, so they need padded transport and careful handling regardless of the frame type.
Before committing to a move, run through a quick feasibility check:
- Confirm whether panels are screwed, clipped or glued together.
- Measure the new space against the old one, including ceiling height and door swing.
- Check for scribing along walls, skirting or coving that would need re-cutting.
- Look for services, pipework, cabling or sockets built behind or through the unit.
- Assess access routes, stairwells, doorways and lift availability at both ends.
If most answers point to standard fixings and a comparable new space, moving is realistic. If the wardrobe was custom-scribed to its original room, replacement usually works out cheaper and less risky.
When replacement tends to be the better option
Some fitted wardrobes simply cost more to relocate than to rebuild. Once a unit has been scribed into an irregular wall, cut around a radiator, or bonded with adhesive rather than screws, dismantling almost always damages the panels or the surrounding plaster.
Replacement tends to make more sense when:
- The carcass uses veneered MDF that chips or delaminates once disturbed.
- The original fit was scribed to a specific wall, skirting or ceiling line that won’t match the new room.
- Transport distance or access (stairs, narrow doorways, a house move rather than a room swap) raises the risk of damage beyond repair.
- The wardrobe is old enough that soft-close hinges, runners or finishes are already outdated compared with current options.
A rough rule of thumb: if the repair and refinishing cost after a move would approach half the price of a new bespoke fit, replacement is usually the better spend. Our guide to fitted wardrobes for bedrooms covers this trade-off in more detail for readers weighing up a full replacement.
Step-by-step safe dismantling, moving and refitting
A methodical approach protects both the wardrobe and the people moving it. Here’s the sequence tradespeople and confident DIYers tend to follow.
- Survey and document. Photograph every panel, joint and fixing before touching anything. Note where cables, pipes or sockets run behind the unit and measure each section so you know what will fit in the new space.
- Gather tools and equipment. You’ll need a cordless drill, a full screwdriver set, a stud finder, moving blankets, and ideally a sack truck for carcass panels. HSE’s manual handling guidance recommends mechanical aids and two-person lifts for anything bulky or awkward, which a wardrobe carcass certainly is.
- Remove doors and rails first. Hinged doors lift off easily; sliding doors need the track unclipped before the panel comes free. Set these aside and pad them immediately to avoid scratches.
- Take out drawers, shelves and hanging rails. These are usually the lightest components and the quickest to damage if left loose during transport.
- Remove trim and cornice. Any scribed beading or cornice should come off carefully, since it’s the piece most likely to have been cut specifically for the old room and won’t necessarily fit the new one.
- Dismantle the carcass panels. Work from the top down, keeping screws and fittings bagged and labelled by panel so reassembly doesn’t turn into guesswork.
- Label and photograph each part as you go. A simple numbering system on masking tape, matched to your earlier photographs, saves real time later and stops panels being binned by mistake at a recycling centre.
- Transport with padding and mechanical aids. Use moving blankets on every finished surface and a sack truck or two-person lift for carcass sections, exactly as HSE’s guidance recommends.
- Check tolerances at the new location. Measure the new wall, ceiling height and skirting profile before reinstalling anything.
- Reassemble and re-scribe as needed. Expect to re-cut trim or beading to match the new wall line, and finish with a careful check that doors hang level and drawers run smoothly.
Pro Tip: Keep every screw, cam lock and hinge in a clearly numbered bag taped to its matching panel. It’s the single easiest way to avoid a reassembly delay.
Our fitted bedroom furniture installation guide walks through the same reinstallation checks a professional fitter runs before calling a job finished.
Costs, disposal and recycling: what to budget for
Moving a fitted wardrobe rarely costs nothing, even if you do the lifting yourself. Budget for a survey or feasibility check, labour if you’re hiring help, transport (van hire or a removal firm), likely repair or refinishing to damaged panels, and disposal of anything that doesn’t survive the move.
Disposal is where most people get caught out. Many councils exclude fitted furniture from standard bulky waste collections, as shown in guidance from Wandsworth borough council, which lists fitted units among the items residents must dispose of privately rather than through the standard collection service. This matters because it means you can’t simply book a council skip and expect a fitted wardrobe to be taken away whole.
Realistic disposal routes include:
- Booking a private bulky waste removal firm that handles fitted furniture specifically.
- Taking dismantled panels to a recycling centre, though some centres require materials sorted by type before accepting them, and painted or veneered MDF may not go into standard wood recycling streams.
- Selling or donating salvageable doors, handles or hardware if they’re still in good condition.
When you get quotes for a move, ask tradespeople directly whether disposal and recycling of the old unit is included. It’s a detail that’s easy to overlook until the old wardrobe is sitting dismantled in your garage with nowhere to go.
Permissions, tenancy and leasehold considerations
If you rent, don’t touch a fitted wardrobe without checking your tenancy agreement first. Citizens Advice guidance is clear that tenants typically need written landlord permission before altering or removing fixtures, and skipping that step can risk your deposit or put you in breach of the tenancy.
Leaseholders face a similar issue in a different form. Removing or relocating a fitted wardrobe can count as an alteration to the property’s layout, which some leases require formal consent for before work starts.
A few habits keep this simple:
- Get landlord or freeholder permission in writing before removing anything.
- Keep receipts and records from any professional work carried out.
- Agree in advance whether reinstatement is expected when you leave.
What fitters actually find on site
Most jobs that start as “just move the wardrobe” reveal something the homeowner hadn’t accounted for: a scribed panel that won’t come off cleanly, a hidden socket, or a doorway too narrow for the carcass to pass through intact. These issues rarely show up until dismantling is underway.
Some bespoke wardrobe installers build wardrobes made to measure, with a typical installation turnaround within about one to two weeks, and offer guarantees on workmanship. That combination of installation speed and warranty coverage is a factor in why some homeowners choose a fresh bespoke fit over trying to relocate an older, less flexible unit. As a general guide, DIY suits simple bolt-together units with easy access; anything scribed, load-bearing or awkward to access is worth a professional opinion first.
— Aureliu
If you prefer a professional solution: how a bespoke installer can help
If dismantling and relocating your wardrobe looks more complicated than it’s worth, a site survey settles the question quickly. A bespoke furniture installer measures your space precisely, checks access and structural quirks, and advises honestly on whether your existing unit can be saved or whether a new bespoke fit is the better route. Benefit of 10+ years warranty fitting timing 7-12 days.

- Made-to-measure design tailored to your exact room, alcove or awkward space.
- Guaranteed workmanship backed by a 10-year warranty.
- Wardrobe installers may offer to take away and dispose of the old wardrobe as part of their service.
- Fast turnaround so you’re not left without storage for long.
Whether you need fitted wardrobes, sliding wardrobes, or a solution for an awkward space, contact us for a free design visit, message or call for more information on 07468 150807 or WhatsApp.
Sources
- HSE — Manual handling: Reducing the risk of injury
- Wandsworth borough council — bulky waste and DIY waste collections: standard bulky item collection
- Gloucester City Council — bulky waste and recycling guidance
- Citizens Advice — understanding your tenancy agreement in England
FAQ
How much does it cost to remove a fitted wardrobe?
Costs vary depending on labour, transport and whether disposal is included, so there’s no single published figure. Ask any tradesperson for a breakdown covering removal, repair and disposal separately, since many councils won’t collect fitted units as standard bulky waste.
Do fitted wardrobes increase house value?
Well-designed, good-condition fitted storage is generally seen as a practical selling point because it maximises usable space without buyers needing to add their own furniture. The effect depends heavily on build quality and finish, so a dated or damaged unit can work against a sale rather than for it.
Is it possible to remove fitted wardrobes?
Yes, in most cases, though it depends on how the wardrobe was built. Units with bolt-together panels and standard fixings come apart relatively easily, while scribed or glued carcasses are far harder to remove without damage.
How do I move a wardrobe without dismantling it?
Moving a fitted wardrobe whole is rarely practical, since it’s built into the room’s fixtures rather than freestanding. If the unit is small and unfixed enough to attempt this, use moving blankets and a two-person lift as recommended in HSE’s manual handling guidance, and check doorway widths first.

