
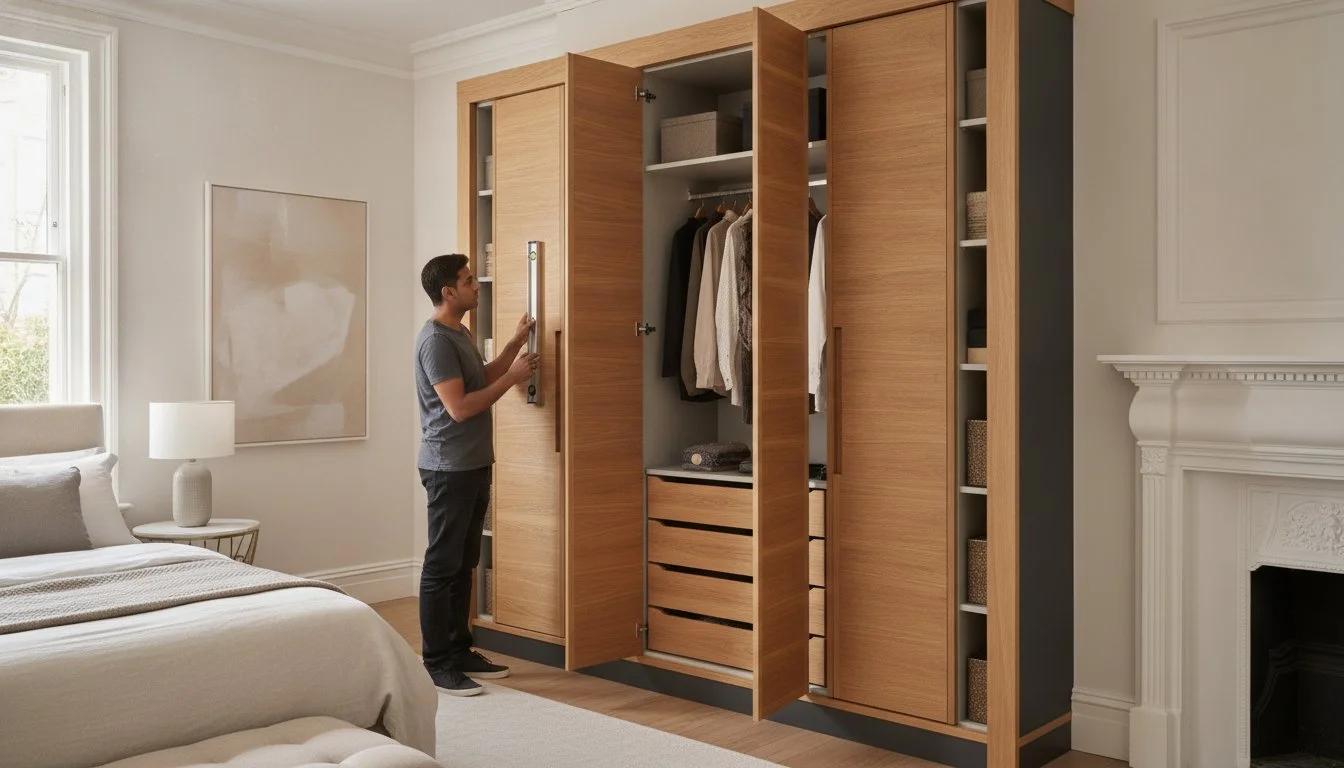
A single millimetre of error on a spirit level can transform a weekend project into a £2,000 disaster before you’ve even hung the first door. You’ve likely visualised the perfect storage solution that finally tames your bedroom clutter, yet the reality of London’s notoriously uneven walls often tells a different story. Understanding the most common fitted wardrobe installation mistakes to avoid is the difference between a bespoke sanctuary and a frustrating waste of premium materials.
We understand the stress that comes with trying to measure a wonky chimney breast or worrying that a DIY attempt will look amateurish next to your existing decor. You deserve a flawless, floor-to-ceiling finish that maximises every centimetre of space while increasing your home’s value. This guide reveals the 15 critical errors that often derail home installations, from ignoring the architectural behaviour of Victorian properties to miscalculating door clearances. We’ll show you exactly what to watch out for so you can achieve the precision of a professional installation and enjoy the peace of mind that comes with expert craftsmanship.
Key Takeaways
- Learn why measuring width and height alone is a recipe for disaster and how the “three-point rule” ensures your wardrobe fits London’s notoriously uneven walls.
- Discover the essential fitted wardrobe installation mistakes to avoid, including why using standard 15mm chipboard leads to structural instability and the dreaded sagging shelf syndrome.
- Understand the critical importance of professional scribing and ventilation to eliminate unsightly gaps and protect your garments from mould build-up.
- Optimise your storage by avoiding ergonomic “dead zones” and ensuring hanging rails are set at heights that prevent your clothes from bunching at the bottom.
- Evaluate the long-term financial benefits of a bespoke installation, which offers a 10-year guarantee and significantly higher property resale value than DIY alternatives.
Measuring Mistakes: Why Most DIY Wardrobe Projects Fail at the Start
The biggest misconception in home improvement is that a tape measure and a single set of numbers are enough to plan a storage solution. In reality, failing to account for the architectural quirks of older properties is one of the primary fitted wardrobe installation mistakes to avoid. Most DIY enthusiasts measure the width and height at a single point, assuming their walls and floors are perfectly square. They aren’t. Professional installers use the “Three-Point Rule,” measuring the width at the top, middle, and bottom, and the height at the left, centre, and right. This reveals the true shape of your space, which is often more of a trapezoid than a rectangle.
Ignoring the spirit level is equally dangerous. If you live in a period terrace or a Richmond villa, your floors have likely settled over decades. Even a 5mm slope across a two-metre span will cause wardrobe doors to hang wonky or refuse to close entirely. Similarly, failing to check the plumb of your walls leads to massive, unsightly gaps at the sides that no amount of filler can hide. You must also consider the “hidden” obstacles like skirting boards and coving. If you don’t plan for their depth during the design phase, your wardrobe units won’t sit flush against the wall, ruining the built-in aesthetic you’re aiming for.
The Trap of Standard Dimensions
Off-the-shelf components are designed for “perfect” rooms that rarely exist in London. When you try to force standard-sized units into unique alcoves, you’ll inevitably face gaps or need to make messy modifications. Beyond the units themselves, you must account for door swing clearance. It’s heartbreaking to finish an installation only to realise the wardrobe door hits a radiator or a window frame. For those in period properties, investing in bespoke fitted wardrobes london ensures every millimetre of an awkward space is utilised without compromising on functionality or style.
Measuring Around Chimney Breasts
Chimney breasts present a particular challenge because alcoves are rarely symmetrical. You might find one side is significantly shallower than the other, or that the depth varies as the wall rises. Poor corner planning often results in “dead space,” where DIYers lose up to 20% of their potential storage because they can’t access the area behind the chimney return. To achieve a seamless look, professional installers rely on precise scribing. Scribing tolerance is the calculated margin of extra material left on a filler piece that is carefully cut to follow the exact, often wavy, contour of an uneven wall or ceiling.
Interior Layout Errors: Forgetting Ergonomics and Access
A stunning exterior is meaningless if the interior of your storage feels like a logistical puzzle. One of the most frustrating fitted wardrobe installation mistakes to avoid is failing to plan for human ergonomics. Many DIY projects result in what we call “The Dead Zone,” where top shelves are placed so high they become unreachable graveyards for out-of-season suitcases and forgotten items. Without a clear strategy for how you interact with your clothes daily, you risk creating a space that looks bespoke but functions like a standard flat-pack unit.
Hanging rail height is another area where precision is often sacrificed for convenience. If you don’t measure the drop of your longest coats or dresses, you’ll find them bunching at the bottom of the unit, leading to permanent creases and a cluttered appearance. Similarly, deep wardrobes can quickly become dark caves. Without integrated LED solutions, finding a specific navy jumper amongst black trousers becomes a morning chore. Modern lighting isn’t just a luxury; it’s a functional necessity that transforms the usability of your furniture.
Balancing Hanging Space vs Shelving
Modern UK homes typically benefit from the 70/30 rule. Dedicating 70% of your internal volume to hanging space and 30% to shelving and drawers usually provides the best balance for a varied wardrobe. It’s vital to include adjustable shelving rather than fixed units. This future-proofs your storage as your needs change, allowing you to reorganise the interior for bulky winter knitwear or smaller accessories without needing a complete refit. Designing specifically for your favourite pieces ensures every centimetre works in your favour.
The Sliding Door Overlap Trap
Sliding doors are a fantastic space-saving solution for smaller London bedrooms, but they come with a significant design hurdle: the overlap. A common error is placing internal drawers or pull-out shoe racks directly behind the point where the doors cross over. If you ignore this clearance, your drawers will be permanently blocked by the door frame. This complexity is why the fitted wardrobes cost can vary based on the intricacy of the internal mechanisms. You must organise the interior so that your most-used items are always in the centre of the door’s opening path to ensure fluid, daily access. For more insights on refining your home storage, you can explore our latest design guides.
Material and Structural Blunders: The True Cost of Cheap
Choosing budget materials is perhaps the most deceptive of all fitted wardrobe installation mistakes to avoid. Whilst a low price point is tempting, the structural consequences often manifest within months. The most common culprit is the thin, 3mm hardboard back panel found in standard flat-pack units. In a professional installation, the back panel acts as the structural spine. If it’s too flimsy, the wardrobe suffers from “racking,” a phenomenon where the entire unit leans or twists, eventually causing doors to misalign and joints to fail.
The “Sagging Shelf” syndrome is another hallmark of DIY builds. Standard 15mm chipboard lacks the internal density required to support weight over long spans. Once you load these shelves with heavy knitwear or shoe collections, they inevitably bow. We’ve seen countless DIY drawers collapse because the bases weren’t designed for the reality of modern storage needs. Beyond the timber, low-grade hardware is a hidden trap. Cheap sliding door rollers may work initially, but they lack the precision bearings found in premium systems, leading to jams and derailing after just a few seasons of use.
Premium Materials vs Flat-Pack Alternatives
The difference between high-density moisture-resistant (MR) MDF and cheap particle board is vast. Professional artisans favour MR MDF for London homes because it provides a superior surface for high-end finishes and resists the humidity changes common in older properties. Premium materials aren’t just about aesthetics; they are the foundation of a 10-year guarantee on quality. This level of durability is something DIY hacks simply cannot match, as they rely on materials designed for convenience rather than longevity.
The Hidden Costs of DIY Tools
Many homeowners underestimate the financial investment required for a professional finish. Achieving clean, splinter-free edges on bespoke panels requires a track saw, whilst structural joints often demand a biscuit joiner and specialist cabinet clamps. When you factor in the cost of these tools and the risk of wasted material, the wardrobe fitting cost often proves more economical. A single wrong cut on a pre-finished bespoke panel can cost hundreds of pounds in replacements, effectively wiping out any perceived savings from a DIY approach. Investing in a specialist ensures the work is done right the first time, saving you both time and significant stress.

Fitting and Finishing Fails: The Battle with London Architecture
London’s architectural heritage is beautiful but presents a geometric nightmare for anyone attempting a DIY build. One of the most glaring fitted wardrobe installation mistakes to avoid is underestimating the sheer irregularity of period properties. In boroughs like Kensington or Chiswick, walls rarely meet at ninety degree angles, and floors often dip by several centimetres from one side of the room to the other. If you build your wardrobe directly onto a carpet, the weight of the furniture will cause it to sink unevenly over time, leading to door misalignment and structural strain. A professional installation always begins with a level, moisture resistant plinth to provide a stable foundation regardless of the floor’s behaviour.
Poor scribing is where many DIY projects lose their bespoke appeal. Scribing involves tracing the exact contour of a wall onto a filler piece and cutting it with extreme precision. When done poorly, you’re left with unsightly gaps that act as magnets for dust and cobwebs. Similarly, cutting around skirting boards or coving rather than integrating them looks clunky and amateurish. Expert artisans often remove these mouldings and reinstall them around the wardrobe, or scribe the wardrobe panels to fit the mouldings perfectly, creating a seamless finish that feels like an original feature of the property.
Managing Sloped Ceilings and Lofts
Attic conversions in Richmond or Wimbledon often feature complex coombed ceilings that make standard cabinetry impossible. Attempting fitted wardrobes loft projects without specialist equipment usually results in wasted timber and poor structural seals at the angles. A DIYer might struggle with the compound mitre cuts required to meet a sloping roofline, whereas a specialist uses digital angle finders to ensure every panel fits tightly against the plasterwork. This precision is vital for both the visual flow of the room and the long term stability of the unit.
The Importance of Airflow
Moisture behaviour in older homes across London and Slough is a critical consideration that DIYers often overlook. Sealing a wardrobe tightly against a cold external wall traps humid air, which quickly leads to mould growth on the back of the unit and your clothes. Incorporating hidden ventilation or maintaining a 10mm air gap behind the back panel can prevent a £1,000 mould problem from developing in your bedroom sanctuary. To discover more ways to protect your investment and refine your home’s organisation, explore our expert design blog for the latest industry insights.
Bespoke vs DIY: Making the Right Investment for Your Home
Opting for a made to measure solution is about more than just avoiding the common fitted wardrobe installation mistakes to avoid; it’s about elevating your home’s aesthetic and long-term utility. A shaker fitted wardrobe, for instance, provides a timeless elegance that DIY units cannot replicate, especially when working within the unique proportions of a London bedroom. Whilst a self-build project might save a few pounds upfront, it often lacks the refined finish that turns a simple storage unit into a permanent architectural feature. Finest Furniture Studio focuses on reclaiming every millimetre of space, ensuring that your investment results in a sanctuary rather than a source of weekend stress.
Beyond the bedroom, a cohesive design strategy involving a bespoke media wall unit or integrated alcove storage significantly enhances property resale value. Buyers recognise the difference between a self-build hack and the work of expert artisans who have spent years perfecting the fluid experience of luxury storage. Professional craftsmanship ensures that the furniture fits seamlessly within your existing decor, providing a level of sophistication that DIY kits simply ignore. Investing in a specialist means you aren’t just buying a cupboard; you’re commissioning a piece of furniture designed to last a lifetime.
Why Choose Finest Furniture Studio?
- 10-year guarantee: Total peace of mind with a formal assurance on quality and durability.
- 7-12 day installation: A brisk, efficiency-oriented service from initial design to final completion.
- Expert artisans: Specialists in navigating the architectural quirks of West London homes.
- Premium materials: We use only high-density moisture-resistant MDF and elite hardware.
The 7-12 Day Transformation
We’ve refined our methodology to ensure a seamless journey from the initial concept to the final reveal. Our process begins with a detailed consultation and a high-resolution 3D render, allowing you to visualise your new storage before a single board is cut. We proudly serve West London neighbourhoods, including Chiswick, Ealing, and Hammersmith, delivering precision-engineered solutions with a 7-12 day turnaround. This efficient approach extends beyond the bedroom; we apply the same level of craftsmanship to fitted living room furniture, creating a harmonious aesthetic throughout your home.
Final Checklist: Is DIY Right for You?
Before you pick up a drill, honestly assess whether you have the necessary resources for a professional-grade finish. A successful installation requires several critical elements:
- Advanced carpentry skills for precise scribing and complex mitre cuts.
- Specialist tools like track saws, digital angle finders, and heavy-duty cabinet clamps.
- The ability to troubleshoot the uneven architectural behaviour of London properties.
- Significant physical stamina for handling and positioning large, heavy bespoke panels.
If you find yourself hesitating over these requirements, it’s time to call the experts. Saving your budget and your sanity is often a matter of knowing when to delegate to artisans who live and breathe precision design. To ensure your project results in a sanctuary rather than a nightmare, Book a Free Design Visit today and let us help you avoid costly pitfalls.
Secure Your Storage Sanctuary Today
Creating a flawless storage solution requires more than just a vision; it demands an intimate understanding of architectural behaviour and material integrity. You now know how to navigate the complexities of London’s uneven walls and the importance of prioritising ergonomics over simple aesthetics. By avoiding structural blunders like sagging shelves and poor ventilation, you’re already ahead of most home improvement projects.
Understanding the fitted wardrobe installation mistakes to avoid is only the first step toward a truly transformative result. Our expert artisans are ready to turn your vision into a reality with a 7-12 day installation service from design to finish. We include a 10-year guarantee on every project, ensuring your investment is protected whilst we maximise every awkward alcove in your London or Slough home. You don’t have to settle for amateur results. Professional perfection is within reach.
Take the final step toward a beautifully organised home and Book a Free Design Consultation with our London Artisans. We’re excited to help you create a sanctuary that brings you peace of mind and lasting pride.
Frequently Asked Questions
What is the most common DIY fitted wardrobe mistake?
The most frequent error is measuring only a single point for width and height. London walls are notoriously “out of square,” meaning a unit that fits at the bottom might jam halfway up. Professionals use the three-point rule, measuring at the top, middle, and bottom to identify exactly where the architecture bows or leans before any timber is cut.
Do I need a specialist for wardrobes with sloped ceilings in my loft?
Specialist intervention is highly recommended for loft spaces due to the geometric complexity of coombed ceilings. DIY angle cuts often lead to wasted timber and poor structural seals. Experts use digital angle finders and precise scribing techniques to ensure every panel fits tightly against the roofline, maximising every centimetre of available attic storage.
How do I prevent mould from forming inside a fitted wardrobe?
You prevent mould by incorporating hidden ventilation and maintaining a small air gap behind the back panel. Trapped humid air against cold external walls is a recipe for damp in older properties. This simple design choice ensures proper airflow, protecting your garments and the unit’s structural integrity from the moisture problems common in period homes.
Is it cheaper to build your own fitted wardrobes or buy bespoke?
DIY may seem cost-effective at first, but bespoke often offers superior long-term value. Once you account for specialist tool hire, wasted materials from cutting errors, and the increased property resale value of professional work, the initial savings of a self-build quickly diminish. Bespoke installations also include long-term guarantees that DIY projects simply cannot offer.
Can I install fitted wardrobes over a carpeted floor safely?
Installing directly onto carpet is a significant risk that leads to door misalignment as the pile compresses over time. You must build on a level, moisture-resistant plinth to provide a stable foundation. This is one of the most critical fitted wardrobe installation mistakes to avoid if you want your doors to remain perfectly aligned for years to come.
How do I measure an uneven wall for a fitted wardrobe project?
Measuring an uneven wall requires checking the width and height at the top, middle, and bottom sections. Don’t assume your corners are ninety degrees or that your floor is level. Use a long spirit level to identify bows in the plasterwork. This data allows you to calculate the necessary scribing tolerance for a seamless, gap-free finish.
What tools do I actually need to build a wardrobe from scratch?
Building from scratch requires a track saw for splinter-free cuts, a biscuit joiner for strong joints, and heavy-duty cabinet clamps. Basic hand tools won’t achieve the precision needed for high-end cabinetry. You’ll also need digital angle finders for lofts and specialist scribing tools to handle the architectural quirks of London’s older housing stock.
How long does a professional fitted wardrobe installation take?
A professional installation typically takes just one day to complete in your home. Although our full bespoke process from the initial design consultation to the final reveal spans 7-12 days, the actual fitting is swift and efficient. This dramatically minimises the disruption to your daily routine compared to the weeks of stress often associated with DIY attempts.

