
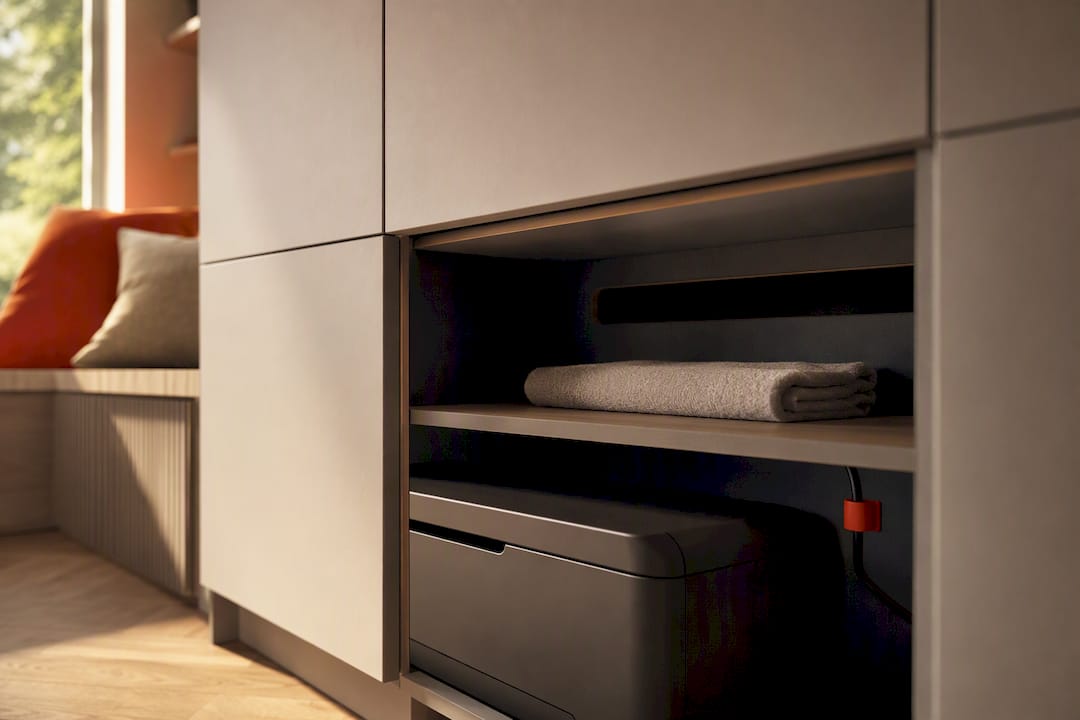
The most practical way to hide a printer is a cabinet with a pull-out shelf, a converted drawer front, or, where you want a permanent and seamless look, a bespoke fitted alcove or an under-stairs unit. Every option trades some visual concealment for access and airflow, so the right choice depends on how often you print. Before buying or building anything, measure your printer and check how much clearance its paper tray and cartridge door actually need.
TL;DR:
- Choosing a hidden printer cabinet depends on how often you print, with quick fixes suitable for occasional use and built-in solutions better for permanent setups.
- Measure your printer’s full size, including paper tray and cartridge door, and plan ventilation to prevent overheating and ensure safety.
- Use discreet vents, fans, or diffusers in the cabinet to maintain airflow, and keep vents free of dust and paper to minimize fire risks.
- Route power and USB cables through rear grommets or channels, and use Wi-Fi for greater placement flexibility, especially in concealed cabinets.
- Fitted bespoke cabinets offer precise fit, integrated ventilation, and professional installation that typically takes around a week, providing reliable long-term concealment.
Table of Contents
- 1. Practical ideas for hiding a printer without losing access
- 2. How to choose the right hidden cabinet solution
- 3. Ventilation, fire safety and maintenance for a hidden printer
- 4. Cable management and connectivity for a concealed printer
- 5. DIY quick fixes versus bespoke fitted furniture
- 6. A practical reminder before you commit
- Bespoke hidden printer cabinets from Finest Furniture Studio
- Sources
- FAQ
1. Practical ideas for hiding a printer without losing access
Some solutions take an afternoon, others take a joiner. Here are the ones worth considering, roughly in order of effort.
- Wicker basket with a lift-off lid: cheap, portable and good for compact inkjets in a living room, though ventilation is minimal and lifting the lid every print gets old fast.
- Fabric roll-top cover: a tailored or off-the-shelf cover that slides back for use; suits printers that sit out in the open occasionally rather than daily.
- Wooden box cover with a cut rear slot: a step up from fabric, offering a tidier look and space for a cable to pass through, but you still lift or slide the box to print.
- Drawer conversion with a false front: the printer sits inside a wide drawer that pulls forward for printing and pushes back to hide it; works well in a sideboard or credenza with deep runners.
- Floating shelf with a rear port cut-out: a slim shelf behind a cupboard door, with a cable channel routed through the back panel, suited to smaller desktop printers.
- Roll-top or tambour-door cabinet: the door curls up and out of the way rather than swinging open, useful where floor space in front of the unit is tight.
- Rolling printer cart with a cover: wheels the printer out for use and tucks it into a cupboard or under a desk afterwards, good for renters who need a solution that moves with them.
- Pull-out shelf inside an existing cabinet: adapts a kitchen or office cupboard you already own, giving frequent access without a full drawer conversion.
- Bespoke alcove cabinet: built to fill the recess beside a chimney breast, with a pull-out shelf, a discreet vent and a matching finish to the rest of the room.
- Under-stairs cabinetry with a printer nook: makes use of dead space, keeps the printer out of the main room entirely, and can include a hinged or sliding front for access.
- Media wall with a concealed printer slot: built into the same unit as your television and storage, with a soft-close door and cable routing shared with the AV equipment.
Everyday fixes such as baskets, fabric panels and box covers are the quickest to try and the commonly cited hiding methods for anyone who wants a printer out of sight without any building work. They also tend to need a second look at ventilation and cable routing once the novelty wears off.
- Everyday fixes suit occasional printing and rented homes where structural changes are not an option.
- DIY drawer and shelf conversions suit anyone reasonably handy with a saw and a set of runners.
- Bespoke alcove, under-stairs and media wall builds suit permanent installations where finish and airflow matter as much as concealment.
2. How to choose the right hidden cabinet solution
Start with the printer itself, not the furniture. Measure its width, depth and height with the paper tray extended, and add clearance for the cartridge door to swing open fully.
- Measure the printer and its full paper path before choosing a cabinet size.
- Decide whether you print daily or occasionally, since frequent use suits a drawer or pull-out shelf over a lift-off cover.
- Check the shelf’s loading capacity, since laser printers are considerably heavier than inkjets and may need a reinforced shelf.
- Plan ventilation before the cabinet is built, not after the printer starts overheating.
Pro Tip: Print a full test page with the cabinet closed before you commit to a design. If the printer sounds muffled or the room warms up, you need more airflow, not a smaller vent.
3. Ventilation, fire safety and maintenance for a hidden printer
Electrical equipment tucked into an enclosed space needs a little extra care. Fire-safety guidance for offices warns that dusty electrical equipment surrounded by flammable material presents a genuine risk, and it recommends regular checks and PAT testing wherever printers sit in a workplace setting. At home, the same logic applies on a smaller scale: keep paper stacks and fabric covers clear of the printer’s vents and check for dust build-up every few months.
Fitted cabinetry rarely needs to sacrifice airflow for looks, since discreet ventilation products exist specifically for this problem.
- Fit a simple grille or louvred panel into the cabinet door or back panel.
- Add a small fan for laser printers, which run hotter than inkjets.
- Consider a hidden diffuser, of the kind used in fitted interior ventilation projects, where airflow needs to stay invisible.
- Wipe down vents and check cable connections every time you clean the room.
4. Cable management and connectivity for a concealed printer
A hidden printer is only convenient if you never have to fight the cables to reach it. Fit a switched surge protector inside the unit, positioned so the switch itself stays reachable without pulling the printer forward.
Route power and USB leads through grommets or a cut channel in the back panel rather than leaving them looped across the shelf. Fitted furniture projects commonly build in lighting, cable routing and outlets as standard, which keeps the whole unit tidy rather than just the printer. If your printer supports Wi-Fi, you can place it further from the router without a wired connection, which gives you more freedom over where the cabinet sits. A wired Ethernet connection is more reliable for busy print jobs but ties the cabinet to a fixed point near your network socket.
- Keep the surge protector’s switch within reach without moving the printer.
- Route cables through a rear grommet rather than draping them over the shelf edge.
- Choose Wi-Fi for flexible cabinet placement, or Ethernet for reliability near the router.
- Leave the cartridge door and paper tray completely clear of cabling.
5. DIY quick fixes versus bespoke fitted furniture
A DIY basket or drawer conversion can be finished in a weekend for the cost of materials alone, but most quick fixes fall short on ventilation, long-term durability and a finish that matches the rest of the room. Bespoke cabinetry solves those gaps by design.
- DIY fixes: fast and inexpensive, but airflow and cable routing are usually an afterthought rather than part of the plan.
- Bespoke fitted cabinets: built to the printer’s exact dimensions, with cable routing, a discreet vent and a finish that matches your existing joinery from the start.
- Professional installation and warranty: a fitted job removes the guesswork around loading capacity and airflow that a DIY build often gets wrong.
Balancing concealment with practical access and quiet airflow matters more than the finish alone, and integrating cable routing at the design stage makes the biggest difference to how well the finished cabinet actually works day to day.
Pro Tip: Ask any fitter about lead time, the guarantee on workmanship, how ventilation is handled, where the electrics sit, and whether they remove your old furniture before quoting.

6. A practical reminder before you commit
Of everything covered here, a pull-out shelf inside an existing cabinet and a bespoke alcove build are the two most versatile answers: one solves the problem this weekend, the other solves it permanently. Measure your printer first, prioritise access and airflow over pure concealment, and sketch the layout or book a design consultation if you are still unsure.
— Aureliu
Bespoke hidden printer cabinets from Finest Furniture Studio
If you want the alcove, under-stairs or media wall version done properly, that is where a fitted solution earns its keep. We design each cabinet around your printer’s exact measurements, so the paper tray, cartridge door and power switch all stay reachable behind a finish that matches your existing joinery. Cable routing and a discreet vent are built in from the start, not fitted as an afterthought.

- Exact-fit cabinetry for alcoves, under-stairs recesses and media walls.
- Discreet ventilation and cable routing planned at the design stage, not added later.
- Installation typically completed within about a week.
| What you get | Detail |
|---|---|
| Fit | Built to your printer’s exact measurements |
| Ventilation | Discreet vents planned into the design |
| Installation time | Typically completed within about a week |
| Guarantee | Backed by a guarantee on workmanship |
Whether you are covering an under-stairs recess, fitting a home office into an awkward space, or want the printer built into a media wall, we handle the design, the joinery and the electrics. We will also take away and dispose of the old furniture once your new cabinet is fitted. Contact us for a free design visit, message or call 07468 150807, or reach us on WhatsApp, and we will talk through what fits your room.
Sources
For visual ideas beyond this guide, Pinterest’s hidden printer storage collection and Houzz’s hidden printer photo gallery both show real-project examples of concealed units, from sideboards to full media walls, worth browsing before you finalise a design.
- You’re fired: how to prevent fires in the workplace
- Design Book_WEB-2
- Fitted Home Office Bespoke Furniture for Working from Home
- 9 Completely Genius Ways to Hide a Clunky Printer
FAQ
What is the best storage cabinet to hide my printer?
A cabinet with a pull-out shelf works best for most homes, since it keeps the printer accessible for daily use while closing away when not needed. For a permanent, seamless look, a bespoke alcove or under-stairs cabinet built to the printer’s exact size performs better long term.
What are some clever ways to store my printer?
Drawer conversions, floating shelves with a rear cable slot, and roll-top cabinets all balance concealment with reasonably easy access. A wicker basket or fabric roll-top cover is the simplest option if you print only occasionally.
What are some creative hidden storage ideas?
Under-stairs cabinetry, media walls with a concealed printer slot, and fitted alcove units all hide a printer within furniture you would already have in the room. These tend to need a properly planned vent and cable channel to stay practical rather than just decorative.
How do I hide a home printer safely?
Keep the printer’s vents clear of paper, fabric and dust, since fire-safety guidance for electrical equipment warns that dusty units surrounded by flammable material carry a genuine risk. Add a grille, louvre or small fan to the cabinet, and check cables and airflow every few months as part of routine cleaning.

