
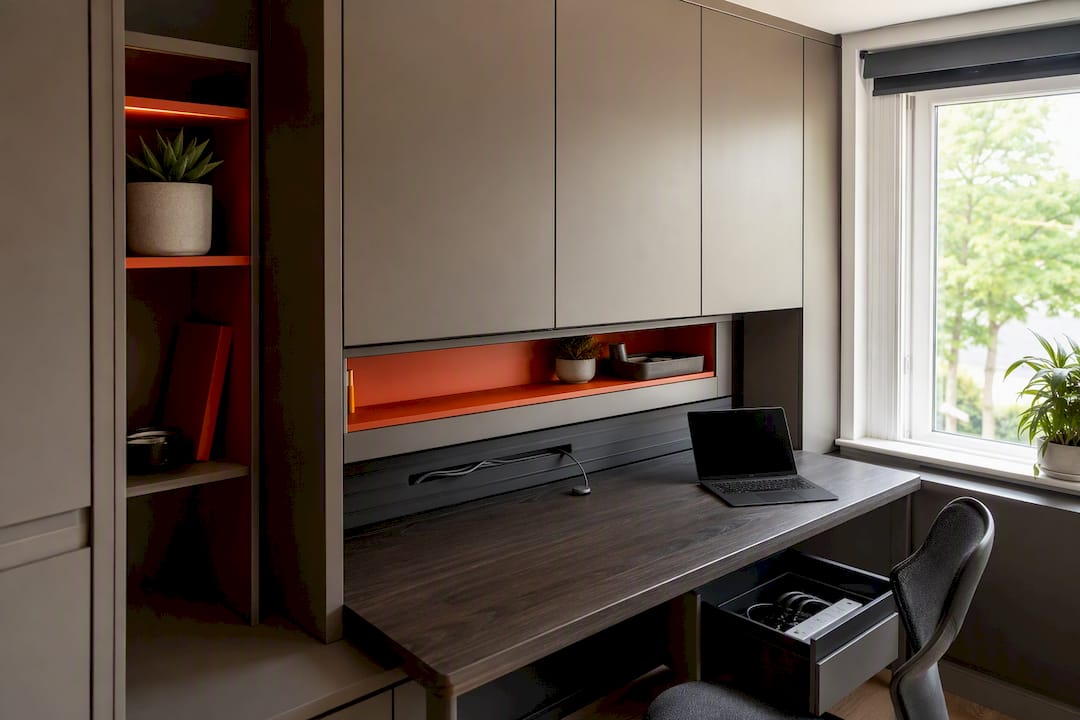
Mount your power strip inside an under-desk tray or cable box, bundle every lead with Velcro ties, then route only that single power cord to the wall. That’s the whole job. It takes about 10 minutes, needs no more than a handful of cheap parts, and the only real caution is this: never run mains power through a wall cavity yourself — that’s an electrician’s job, not a Saturday afternoon one.
TL;DR:
- Mount the power strip inside a tray or box and bundle cables with Velcro ties to keep everything off the floor and route only one lead to the wall.
- Measure desk clearance, outlet positions, and device types beforehand to select appropriate cable management solutions and avoid fitting issues.
- Use dynamic hardware like cable spines or articulated managers for sit-stand desks to accommodate movement and prevent cable damage.
- Cover floor crossings with low-profile protectors or under-rug channels, especially on carpet, to protect cables and maintain safety.
- Opt for bespoke fitted furniture with built-in cable channels and grommets for a permanent, integrated solution to manage cables during desk installation.
Table of Contents
- Quick kit: the eight items to buy or find now
- How do I audit my desk before fitting anything?
- The 10-minute step-by-step method to hide cables under a desk
- Sit-stand desks: solutions that move with the desk
- Wall-mounted monitors and wall runs: raceway or in-wall?
- Floor crossings and accessibility: protecting cables across paths
- Safety, ergonomics and upkeep: why cable management matters beyond looks
- Maintenance, labelling and troubleshooting
- When bespoke fitted furniture is the right solution
- Recommendations for wireless alternatives to reduce cable usage
- Author perspective: common mistakes and professional priorities
- How Finest Furniture Studio helps with a permanent fix
- Sources
- FAQ
Quick kit: the eight items to buy or find now
You don’t need a trolley full of gadgets. Most home office cable management jobs need eight things, and you probably already own half of them.
- Velcro cable ties — reusable, gentler on cables than zip ties, and the backbone of any bundle.
- Under-desk tray or cable box — holds the power strip and adapters off the floor.
- Adhesive cable clips — route single cords along legs or desk edges without drilling.
- Braided cable sleeve — turns four or five loose leads into one tidy tube.
- Cable spine (for sit-stand desks) — flexes with the desk instead of snagging.
- Floor protector or under-rug channel — covers any cable crossing a walkway.
- Label tags or washi tape — marks both ends of a cable in seconds.
- Basic toolkit — a small screwdriver and spirit level cover most mounting jobs.
Buy at three rough tiers: a basic setup (ties, clips, one tray) costs very little; a mid-tier kit adds a sleeve and a proper cable box; a genuinely tidy finish adds labelling and a sit-stand spine. Skip the bargain-bin adhesive clips — the sticky pads shrink and drop off within weeks, usually right when you’ve forgotten which cable went where. Brand doesn’t matter much here; check the tray’s weight rating and the clip’s adhesive size before you check the label.
How do I audit my desk before fitting anything?
Fitting cable management before you’ve actually looked at the desk is how people end up with a tray that’s too small and a power strip still on the floor. Run this check first.
- Measure clearance under the desk. Note the gap between the underside and the floor, and the depth from front edge to the wall or skirting board.
- Map every outlet. Mark which sockets are within reach and which would need an extension lead.
- List every device and its cable type. Separate mains power (laptop charger, monitor, lamp) from low-voltage data (HDMI, Ethernet, USB).
- Trace any route that crosses open floor. If a cable has to cross a walkway rather than hug a wall, it needs floor protection, not just clips.
- Check whether the desk is sit-stand. A fixed desk takes static bundling; an adjustable one needs hardware that moves.
The measurements decide the method. A clearance under 8cm rules out most trays and points you towards a slim cable box instead. An outlet more than a metre from the desk means you’re routing a raceway rather than a single short lead. And if the desk changes height at all, skip static ties near the column and go straight to a proper spine, covered next.
The 10-minute step-by-step method to hide cables under a desk
This sequence follows the order installers actually use — skipping a step tends to leave you with something that looks tidy for a week and then unravels. It’s based on a tested four-step approach that reliably converts a messy desk into a tidy one in around 10 minutes.
- Unplug everything and lay it out. Disconnect every cable and lay them side by side so you can see what actually needs to reach the wall.
- Bundle by destination, not by device. Group the laptop charger, monitor lead, and desk lamp cable together if they all run to the same corner.
- Label both ends before you tidy anything. A strip of tape with “monitor” written on it saves you ten minutes of guesswork in six months’ time.
- Mount the tray or place the cable box under the desk. Fix it with the screws provided, or use a freestanding box if you’d rather not drill into the desk.
- Set the power strip inside the tray first. Everything else plugs into it, not into the wall directly.
- Route one cord to the wall socket. That’s the only lead that should be visible from the front of the desk.
- Secure loose runs along the desk legs with adhesive clips. Leave a small loop of slack at each joint, not a taut line.
- Test everything before you close it up. Power on each device in turn to check nothing’s come loose in the shuffle.
The most common mistake is applying adhesive clips to a dusty or cold surface. Wipe the desk leg with a dry cloth first, or the clip will peel away within days. The second is leaving zero slack: cables need a little give so a slight knock at the desk doesn’t yank a connector loose.
Pro Tip: Leave one spare loop of cable inside the tray, coiled loosely rather than taped flat. When you next buy a monitor or add a webcam, you’ll have enough spare length to reach the new device without redoing the whole bundle.

Sit-stand desks: solutions that move with the desk
A static bundle that works perfectly on a fixed desk will tear itself apart on a sit-stand one within a month. Every time the desk rises or drops, a taped-down cable gets pulled tight, then slack, then tight again, and eventually a connector fails or a cable snaps at the strain point.
Dynamic desks need dynamic hardware, which is why manufacturers build cable managers specifically for height-adjustable desks rather than relying on standard clips.
- Cable spine or vertebrae — a flexible plastic channel that concertinas as the desk moves, keeping cables together without binding.
- Articulated cable manager — a hinged arm that tracks the column’s movement rather than fighting it.
- Floor anchor plus vertical snake — anchors the cable run at floor level and lets a looped section absorb the desk’s travel.
Anchor the spine at both the desktop and the floor plate, and size it generously — an undersized spine crammed with too many adapters binds and fails early. Leave enough slack in the loop to cover the desk’s full range of movement, then check it every few months for fraying at the anchor points.
Wall-mounted monitors and wall runs: raceway or in-wall?
Choosing between a surface raceway and an in-wall kit comes down to what’s actually running through the cable, not just how neat you want the wall to look.
- Surface raceway suits renters, anyone who wants the job finished in an afternoon, and situations where you might need to change the cable run later. Paint it to match the wall and the channel disappears from view within a day of drying.
- In-wall kits work well for low-voltage cable only, such as HDMI or Ethernet, where standard wall cavities are appropriate for signal cable but not for mains power.
- Mains power in a wall needs an in-wall-rated power kit or a qualified electrician. Running a standard extension lead through a wall cavity is a fire risk, not a shortcut.
- Finish the run by feeding the cable in at the monitor mount and out at skirting height, so the visible section is as short as possible.
Floor crossings and accessibility: protecting cables across paths
Any cable that crosses open floor between the desk and a socket needs protection, and the right product depends on the surface underneath it as much as the traffic over it.
- Low-profile floor protectors suit hard floors and higher foot traffic — they’re rigid, ramped at the edges, and easy to wipe clean.
- Interlocking ramps work well when you need to cover a wider run, such as a cable crossing a doorway rather than a single desk leg.
- Under-rug channels are the neatest option on carpet, hiding the cable entirely under existing flooring rather than adding a visible strip.
Choosing the right one is largely an accessibility question: ramped, low-profile protectors are the standard approach where a walkway needs to stay trip-free, and a barrier-free ramp matters if anyone using the space relies on a wheelchair or a walking frame. On a shared landing or hallway, a bright or contrasting colour makes the ramp obvious rather than something to trip over. Anchor whichever option you choose with its own adhesive strip, and check every couple of months that the edges haven’t lifted.
Safety, ergonomics and upkeep: why cable management matters beyond looks
A tidy desk isn’t just pleasant to look at. HSE guidance on workstation ergonomics specifically flags removing obstacles from under the desk to improve legroom and reduce fatigue, and a nest of cables around your feet is exactly the kind of obstacle that guidance means. It also recommends checking that the setup still fits once anything changes, which matters if you’ve just added a second monitor or swapped desks.
There’s a fire-safety angle too. Enclosed extension blocks can build up heat if they’re not ventilated, so never cram every adapter into a sealed box with no airflow.
- Leave a small gap around any enclosed power strip rather than packing the box tight.
- Check monthly that nothing’s come loose or started fraying at a joint.
- Re-bundle every six months, since devices get added and cables get swapped more often than people expect.
- Inspect straight after adding any new device, before the new lead gets lost in the existing bundle.
Unmanaged cable nests also collect dust and make cleaning under the desk far harder, which matters more than it sounds if anyone in the house has allergies.
Maintenance, labelling and troubleshooting
The system you build today only stays tidy if you maintain it, and that takes minutes rather than hours.
- Label both ends of every cable that matters, not just the plug end you can see.
- Keep power cables and data cables in separate bundles so a fault in one doesn’t mean unwrapping the other.
- Velcro ties beat zip ties here, since you’ll want to reopen a bundle the next time you add a monitor.
- If a device stops working, trace its cable back to the strip and test it in a different socket before assuming the device itself has failed.
- Call an electrician if the issue involves anything running through a wall, if a fault keeps recurring, or if any part of the setup feels warm to the touch.
When bespoke fitted furniture is the right solution
Retrofitted trays and raceways solve most desks. They don’t solve a desk that was never designed to hide anything in the first place — no grommet holes, no rear channel, no housing for the power strip at all. At that point you’re not managing cables, you’re managing the desk’s design flaws.
Bespoke cabinetry removes the problem rather than dressing it up: integrated grommets, hidden cable channels built into the carcass, and a housed power strip that never sits on view or on the floor. Finest Furniture Studio designs these details into fitted desks and cabinetry from the outset, with most installations completed within seven days and backed by a 10-year guarantee on the build.

If your desk is a standalone piece bought off the shelf, the DIY route above will serve you well. If you’re planning a proper home office fit-out or replacing a desk that’s never worked for your space, building the cable routing in from day one is the more permanent fix.
Recommendations for wireless alternatives to reduce cable usage
The cheapest cable to manage is the one you never plug in. A wireless keyboard and mouse remove two of the most tangle-prone cords on any desk, and modern versions hold a charge for weeks rather than days. Bluetooth or Wi-Fi speakers cut the audio lead that usually snakes across the desktop to reach a laptop.

Wireless charging pads deal with the phone cable, which is often the one cord that never quite makes it into the bundle because it’s plugged and unplugged several times a day. A dock or hub with wireless display support, such as Miracast or AirPlay for presentations, can remove the HDMI cable entirely for anyone who mainly casts a screen rather than needing a permanent monitor link.
None of this eliminates cables completely. A monitor still generally needs a wired connection for a stable, high-resolution signal, and a wired Ethernet connection beats Wi-Fi for anyone doing video calls on a shaky connection. The realistic goal is fewer cables, not zero: swap out the cords that offer no real performance benefit over wireless, and keep the wired connections that genuinely need the bandwidth or reliability. A desk with three fewer cables to route is a desk that’s easier to keep tidy regardless of which management method you use for what’s left.
Author perspective: common mistakes and professional priorities
The single biggest mistake people make isn’t a lack of Velcro ties. It’s leaving the power strip on the floor and building everything else around that error. Once the strip is off the ground and inside a tray, half the visible mess disappears on its own. The second mistake is treating zip ties as permanent. They’re not reworkable, so the first time you add a monitor you end up cutting through the whole bundle rather than opening it. The third is ignoring desk movement entirely. Sit-stand owners who bundle cables the way they would on a fixed desk are, in effect, scheduling a cable failure for a few months out. Prioritise strip placement first, reworkable ties second, and movement-specific hardware third if the desk adjusts. Beyond that, if the desk itself has no cable provision built in, no amount of tray-fitting closes that gap permanently.
— Aureliu
How Finest Furniture Studio helps with a permanent fix
Finest Furniture Studio is the alternative to endless tray-fitting and raceway patch-jobs for anyone whose desk was simply never built with cables in mind. Where a retrofit hides the mess after the fact, a bespoke fitted desk removes it at the design stage, with grommets, cable channels, and power housings built into the cabinetry itself rather than bolted on afterwards.

Every fitted home office from Finest Furniture Studio is designed around your actual layout, whether that’s a study in Richmond, a loft office in Wimbledon, or an awkward alcove in Chiswick or Fulham. Installation typically takes seven to twelve days, every project carries a 10-year guarantee on the build, and we’ll take away and dispose of your old desk or wardrobe as part of the job. If you’d rather not retrofit a desk that was never designed for this, take a look at our bespoke fitted furniture guide and get in touch for a free design visit. Call or WhatsApp 07468 150807, or reach us at 124 City Road, Kemp House, London, EC1V 2NX.
Sources
- HSE leaflet on ergonomics (INDG90)
- Cable management and workplace safety (D-Line technical leaflet)
- How to hide cables behind a desk (DeskDNA)
- NeatUp cable manager for sit-stand desks (Humanscale product page)
FAQ
What is the fastest way to hide cables under a desk?
Mount your power strip inside an under-desk tray, bundle the remaining cables with Velcro ties, and route a single cord to the wall. The whole job takes around 10 minutes using a basic kit.
Are cable grommets for desks worth fitting?
Yes, if your desk has a solid worktop and no existing hole. A grommet lets you route cables straight down through the desktop rather than around the edge, which keeps the run shorter and tidier.
Can I run power cables inside a wall myself?
No. Standard wall cavities are only suitable for low-voltage cable such as HDMI or Ethernet; mains power run through a wall needs an in-wall-rated kit or a qualified electrician.
How do I manage cables on a sit-stand desk?
Use a dedicated cable spine or articulated manager rather than static ties, since these desks need hardware that moves with the height change to avoid pulling and tangling.
Does Finest Furniture Studio build cable management into fitted desks?
Yes. Finest Furniture Studio designs concealed cable channels, grommets, and power housings directly into bespoke home office cabinetry, with installation typically completed within seven to twelve days and a 10-year guarantee on every build.

