

Table of Contents
- Understanding Your Kitchen Corner Cabinet Layout
- How to Measure a Cabinet for Pull-Out Shelves
- Tools and Materials You’ll Need
- Blind Corner Cabinet Organiser Installation: Preparing Your Space
- Step-by-Step Installation of Pull-Out Shelves
- DIY Pull-Out Shelves for Kitchen Cabinets: Load Limits and Safety
- Magic Corner Basket Installation and Adjustment
- When to Call a Professional
- Frequently Asked Questions
Last Updated: October 20, 2026
Understanding Your Kitchen Corner Cabinet Layout
A kitchen corner cabinet is awkward, hard to reach, and often wastes valuable room, installing pull out shelves in kitchen corners transforms these dead zones into functional storage.
First, understand your cabinet type. Blind corners, standard layouts, and frameless designs each need different approaches; get this wrong and your pull-out system won’t fit.
Blind corner cabinets versus standard corner layouts
A blind corner cabinet has one side blocked by an adjacent cabinet, so you can only access it from one direction, creating a dead zone at the back.
Standard corner layouts meet at a 90-degree angle with access from both sides, easier to work with, but still better with pull-out organisation.
According to Dream Kitchen AI’s 2026 research on kitchen storage trends, customised storage solutions including pull-out mechanisms are increasingly prioritised to support aging in place and improve daily kitchen functionality.
The key difference:
- Blind corner: One access point, deeper cabinet, more wasted space
- Standard corner: Two access points, easier to reach, better for baskets
Face-frame and frameless cabinet compatibility
Face-frame cabinets have a wooden frame around the opening; frameless cabinets (European-style) have no frame, with the door attached directly to the box.
Pull-out shelves work with both, but face-frame cabinets offer more mounting options since the frame provides solid wood for brackets, while frameless cabinets require brackets fixed directly into the sides.
Check your doors: wood trim around the opening means face-frame; a flush door with no visible frame means frameless.
How to Measure a Cabinet for Pull-Out Shelves
Accurate measurements are everything, a mistake means the system won’t fit, and returns are rarely straightforward once holes are drilled. Use a systematic checklist, not memory.
You need more than three numbers: opening width, internal depth, internal height, door clearance, and obstruction mapping all matter. Measure twice, write everything down, and photograph the interior with a tape measure in shot.
Taking accurate depth, width, and height measurements
Depth is the distance from the front face (or inside of the door, if it sits proud) to the back panel.
Width is the clear opening left to right, measured inside the box, not across the face frame.
Height is the vertical space from cabinet floor to the underside of the top panel or counter.
Door clearance is often overlooked.
Use this checklist and record every figure:
| Measurement | Top (mm) | Middle (mm) | Bottom (mm) | Smallest (mm) |
|---|---|---|---|---|
| Clear opening width | ||||
| Internal depth (front to back) | ||||
| Internal height (floor to underside) | ||||
| Door clearance (fully open) | ||||
| Access opening width (blind corner) |
Print this table and fill it in by hand inside the cabinet. Take a photo of the completed table and keep it with your toolkit, you will need these figures when ordering hardware and when adjusting the installation later.
Checking clearance and minimum dimensions
Clearance isn’t just about depth: a pull-out shelf needs room to extend fully without hitting the counter overhang, adjacent doors, or the wall behind.
Check for obstacles before you commit to a layout. Look inside the cabinet for:
- Water pipes or waste traps (common under sinks)
- Electrical outlets or wiring clips
- Structural supports or corner braces
Mark each obstruction with its position and size.
Also measure the diagonal of the opening: a tray that fits width and height may still bind if the cabinet is out of square.
Never assume a standard cabinet size. Kitchen cabinets vary between manufacturers and eras. A cabinet that looks like a 600 mm unit may measure 597 mm or 603 mm internally. Always measure the actual cabinet you are fitting, not the nominal size on the door or invoice.
For blind corners, sketch a plan view showing the access opening, internal depth, and obstructions. This helps you choose between a pull-out tray, swing-out carousel, or magic corner basket, each has different space requirements.
Tools and Materials You’ll Need
You don’t need many tools, and most homeowners already have them.
Essential tools:
- Measuring tape (at least 3 metres)
- Pencil (for marking)
- Electric drill with bits
Materials depend on your system:
- Pull-out shelf or basket kit (includes slides, brackets, trays)
- Wood screws (typically 25 mm and 35 mm)
- Wood filler (if you need to cover old holes)
Blind Corner Cabinet Organiser Installation: Preparing Your Space
Before you touch a drill, empty the cabinet completely and vacuum out dust and debris, a clean space is easier and safer to work in.
Clearing and cleaning the cabinet
Wipe down the interior with a damp cloth. Remove dust, grease, and buildup. Let it dry completely. Moisture can cause wood swelling later.
Check for damage: cracks, water stains, or soft wood mean the cabinet needs repair before installation.
Removing existing shelves and hardware
Fixed shelves are usually held by shelf pins or screws, pop out the pins or unscrew them carefully.
Save any hardware you remove in case you need it later.
Sand smooth any holes or grooves where shelves were mounted so new brackets sit evenly.
Remove old organisers, liners, or adhesive for a clean slate.
Step-by-Step Installation of Pull-Out Shelves
Follow each step carefully, rushing here causes problems, especially when installing pull out shelves in kitchen corners where precision determines whether the system fits and operates smoothly.
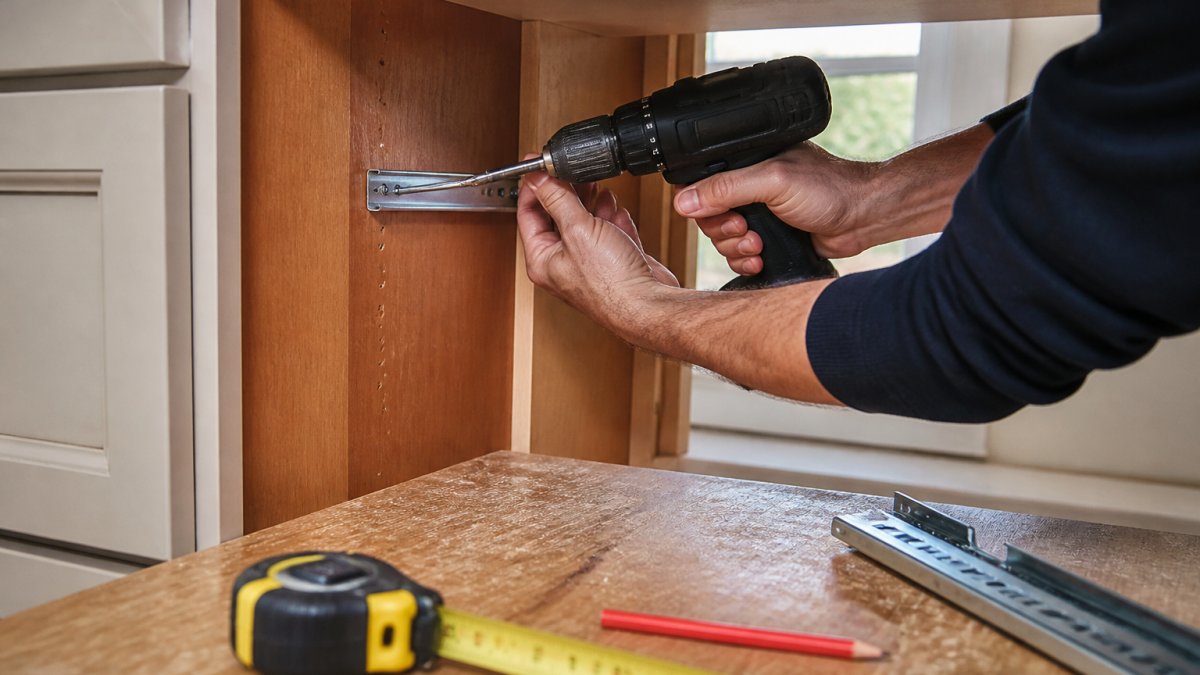
Securing these brackets firmly ensures that your new storage solution operates smoothly, providing a solid foundation as you organize your kitchen to maximize every inch of available space.
Marking mounting positions and drilling pilot holes
Use a combination square to mark level lines on the cabinet sides, measuring up from the bottom in equal increments.
Mark each bracket screw hole lightly in pencil so you can erase it later.
Drill pilot holes first, using a bit slightly smaller than your screw diameter, straight into the wood to prevent splitting.
Installing mounting brackets and drawer slides
Insert the mounting brackets into the pilot holes, aligning them level and parallel, check with your combination square.
Screw the brackets in firmly but don’t overtighten, tight enough that they don’t wiggle is the goal.
Attach the drawer slides to the brackets, following the manufacturer’s steps exactly, systems vary slightly here.
Assembling and attaching the tray or basket
Assemble the tray or basket on a flat surface first, easier than building it inside the cabinet, following the kit instructions.
Attach the assembled unit to the slides per the manufacturer’s guidance; most systems use screws or clips that lock the tray in place.
Testing alignment and smooth operation
Slide the tray in and out several times. If it’s stiff or catches, loosen the brackets slightly and adjust until movement is smooth.
Check the tray sits evenly with no tilting or leaning, and adjust as needed.
Once everything moves smoothly, tighten all screws fully and test again.
DIY Pull-Out Shelves for Kitchen Cabinets: Load Limits and Safety
Exceeding your pull-out shelf’s weight limit is the most common cause of sagging, binding, and sudden failure. Most domestic systems are rated for a uniform load across the tray, not a point load in one corner, understanding capacity, spacing, and distribution separates an installation that lasts from one that sags within a year.
Understanding weight capacity and shelf spacing
Most standard pull-out systems are rated between 15 kg and 25 kg per shelf when evenly loaded.
Shelf spacing affects capacity: closer spacing distributes load across more mounting points and reduces leverage on each pair of slides.
Consider the dynamic load too: pulling a loaded tray out creates a twisting force proportional to the load and extension distance, so a fully extended tray with 20 kg on it stresses the slides far more than the same tray pushed in.
A practical rule: keep the load on any pull-out shelf to no more than 70% of its stated capacity if you plan to extend it fully and regularly. This leaves a margin for dynamic forces and uneven loading.
Securing brackets for stability and durability
Use the screw size specified by the kit manufacturer: undersized screws pull out under load, while oversized screws can split chipboard or MDF.
Screw into solid material, not joints, edges, or the thin back panel.
Check the installation monthly for the first three months, then every six months. Wood and chipboard compress slightly under load, loosening screws; tighten any loose ones and check the tray runs level.
Never store heavy items such as large appliances, full demijohns, or bulk liquids on a pull-out shelf unless the system is specifically rated for that load. A sudden failure can cause injury and damage to the cabinet.
Magic Corner Basket Installation and Adjustment
Magic corner baskets are rotating organisers that maximise blind corner space and work well in tight spots.
Fitting baskets and organizing access
Install the rotating mechanism per the manufacturer’s instructions; most mount to the cabinet floor and one side wall.
Attach your baskets or trays to the mechanism. These typically clip or screw on.
Test the rotation: it should spin smoothly without binding. If it’s stiff, check nothing is blocking the mechanism.
Organise logically: frequently used items in the most accessible basket, rarely used items in harder-to-reach spots.
Fine-tuning slides and troubleshooting common issues
If your pull-out shelf binds or sticks, the slides may be misaligned.
Squeaking usually means the slides need lubrication. Use a dry lubricant spray.
If a basket tilts, the brackets aren’t level. Check with your combination square.
Noise during operation often means loose screws, tighten every fastener and test again.
When to Call a Professional
Some situations call for professional help. Recognise when DIY isn’t the right choice.
Call a professional if:
- Your cabinet has structural damage
- You’re unsure about your measurements
- The cabinet is an unusual size or shape
At Finest Furniture Studio, we specialise in custom-fitted storage solutions for awkward spaces. Whether it’s a blind corner needing a tailored pull-out system or a space with unusual dimensions, we can design and install a solution that fits perfectly.
Our team handles measurement, installation, and adjustment, working with face-frame and frameless cabinets alike. Most installations complete efficiently.
Frequently Asked Questions
How do I measure a corner cabinet for pull-out shelves?
Start by measuring the cabinet’s interior depth, width, and height with a measuring tape. Record the distance from the back corner to the front opening, and note any obstacles like pipes or wiring. Check the minimum clearance needed for your pull-out mechanism to operate smoothly, typically at least 5-8 cm of unobstructed space. Mark these measurements on paper and compare them against the pull-out shelf product specifications to confirm compatibility before purchasing.
What’s the difference between blind corner cabinets and standard corner layouts?
Blind corner cabinets have one fixed side and one open side, creating a hard-to-reach dead zone in the corner. Standard corner layouts have two open sides. Blind corners benefit most from pull-out organizers because the mechanism brings storage forward into accessible reach. Standard corners may use Lazy Susans or fixed shelving. Pull-out shelves work best in blind corners where traditional storage leaves items trapped and difficult to retrieve.
Can I install pull-out shelves in my existing kitchen cabinet?
Yes, pull-out shelves can retrofit into most existing cabinets. Check whether your cabinet is face-frame (wood frame around the opening) or frameless (European-style with no frame). Both types accommodate pull-out systems, but mounting methods differ slightly. Measure your cabinet opening and interior depth to confirm the pull-out shelf will fit. Remove any fixed shelves or obstacles, then follow the manufacturer’s installation steps. If your cabinet is damaged or unstable, reinforce it first or consult a professional.
What tools do I need to install pull-out shelves in a kitchen cabinet?
You’ll need a measuring tape, pencil, electric drill with bits, combination square, spirit level, and screwdrivers (Phillips and flathead). A drill press or impact driver makes pilot holes faster and more accurate. Have a pencil and paper ready to mark mounting positions. Soft-close pull-out systems may require a hex key or Allen wrench for assembly. Gather all tools before starting to avoid delays, and wear safety glasses when drilling to protect your eyes from debris.
Kitchen corners don’t have to be wasted space. The right pull-out system transforms an awkward area into functional storage. Whether you tackle this yourself or bring in a professional, the key is accurate measurement and careful installation. For bespoke solutions tailored to your specific cabinet layout and needs, get in touch with Finest Furniture Studio for a free design visit and transparent quote.

