

Last Updated: November 9, 2026
Quick Summary
You can upgrade fitted wardrobes cost effectively by keeping a sound carcass and refreshing the parts that let it down: paint the doors, add moulding for a shaker look, replace handles and hinges, fit interior dividers and LED strip lighting, and repair small faults like loose hinges and sagging shelves. Refurbishment costs less than replacement because you pay for doors, paint, hardware and labour rather than a full build.
- Check the carcass first: soft or crumbly board near the base means water damage that must be fixed before painting.
- Paint doors in two thin coats of satinwood over a suitable primer for a hard-wearing, low-sheen finish.
- Thin moulding strips fixed to flat doors create a shaker panelled look at a fraction of bespoke cost.
- A standard double-hang needs roughly 1,000mm of drop per rail; a full-height section wants about 1,700mm.
- Fill torn hinge screw holes with glued matchsticks or fit a metal repair plate instead of buying new doors.
Table of Contents
- How to Update Old Fitted Wardrobes Without Replacing Them
- How to Paint Fitted Wardrobe Doors for a Fresh Look
- When to Replace Fitted Wardrobe Doors Instead of Painting
- Fitted Wardrobe Interior Ideas That Maximise Space
- Budget-Specific Material Comparisons for DIY Upgrades
- Structural Repairs and Sustainable Disposal of Old Components
- Planning Your Wardrobe Upgrade with a Free Design Visit
- Frequently Asked Questions
How to Update Old Fitted Wardrobes Without Replacing Them
Most homeowners assume a tired wardrobe means a full rip-out. It rarely does. The frame is usually sound, and the doors, handles and interior are what let it down. That is where cost effective ways to upgrade fitted wardrobes start to make sense. Refreshing the doors and handles can make the whole room feel more considered, especially when the same restrained approach guides your home decorating ideas.
Here is the key point: refurbishment is not a compromise. It is often the smarter spend.
Before you pick up a paintbrush, you need an honest assessment. Work through this checklist:
- Open and close every door. Do they catch, sag or rub?
- Press the carcass panels. Any softness or swelling means moisture damage.
- Check hinges and runners for rust or looseness
- Look for water stains near the ceiling or back panel
- Test whether shelves bow under load
If the frame passes those checks, refurbishment is viable.
Assessing the Condition of Your Wardrobe Carcass
The carcass is the box behind the doors, and it decides everything. A solid carcass means you can upgrade safely. A failing one means you should not spend a penny on paint.
Watch out: soft, crumbly board near the base usually means water has got in. Painting over it traps the damp and the damage spreads. Fix or replace that panel first.
The Cost-Benefit of Refurbishment vs. Replacement
Refurbishment can cost less than replacement because you keep the existing frame, so you pay for doors, paint, hardware and labour rather than a full build.
Replacement makes more sense when the carcass is failing or the layout is genuinely wrong. For a straight comparison of fitted versus freestanding options, our guide to fitted wardrobes versus freestanding furniture sets out the trade-offs.
How to Paint Fitted Wardrobe Doors for a Fresh Look
Painting is the cheapest visible transformation you can make. A tired set of doors can look new in a weekend for the price of paint, primer and sandpaper.
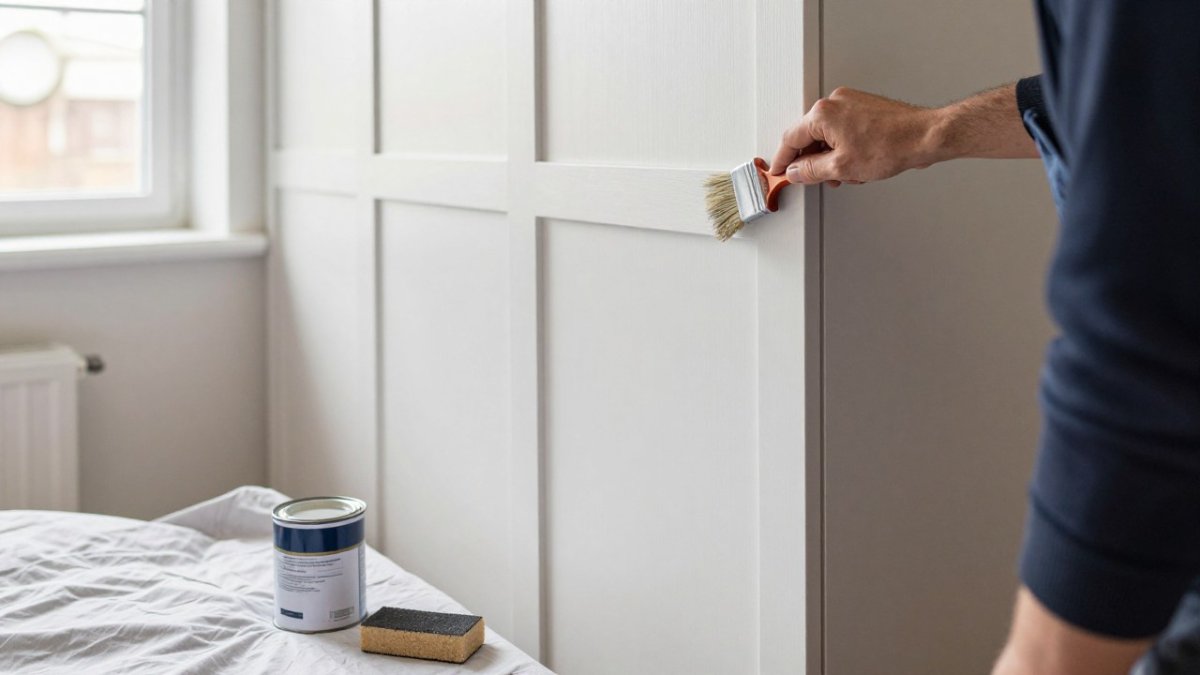
Preparation, Priming, and the Right Top Coat
Preparation decides whether the finish lasts. Skip it and the paint peels within a year.
- Remove doors and handles, then label each door
- Clean with a degreaser to remove kitchen or skin oils
- Sand lightly to key the surface
- Fill dents with wood filler and sand flush
- Apply a primer suited to the surface
- Finish with two thin coats of satinwood paint
Satinwood gives a hard-wearing, low-sheen finish that suits bedrooms. Thin coats beat thick ones every time.
Adding Moulding for a Shaker Style Finish
Shaker style is the look most people ask for, and it is cheap to fake. Thin strips of moulding fixed to a flat door create the panelled effect.
Cut the trim to size, fix with adhesive and panel pins, fill the joints, then paint the whole door as one. The result reads as a bespoke shaker door at a fraction of the cost.
When to Replace Fitted Wardrobe Doors Instead of Painting
Replace the doors when the carcass is sound but the doors are beyond saving. Warped, delaminated or badly damaged doors will not take paint well, and the finish will fail.
Replacement doors also let you change the style entirely. Sliding doors suit tight rooms; panelled doors suit period homes.
New doors cost more than paint but are generally less than a full rebuild, and you keep the frame while gaining a different look.
Fitted Wardrobe Interior Ideas That Maximise Space
The inside matters more than the outside. A beautiful wardrobe that wastes space is still a bad wardrobe, and the interior is where the cheapest gains sit.
Start with the layout. Double-hang one section for shirts and trousers. Add a full-height section for dresses and coats. Fit drawers at waist height so you can see what is in them. Keep the top shelf for occasional items and the floor clear for shoes on a low rail or pull-out tray.
Measure before you buy anything. A standard double-hang needs roughly 1,000mm of drop per rail; a full-height section wants about 1,700mm. If your carcass is shallower than 550mm, deep drawers will foul the doors, so favour shelves and shallow trays instead.
For layout options you can apply inside your existing carcass, our guide to fitted wardrobe interior storage ideas covers the practical arrangements.
Upgrading Hardware and Lighting
Hardware is the cheapest upgrade with the biggest daily impact. Soft-close hinges stop doors slamming. Full-extension drawer runners let you reach the back. Handle replacement changes the whole look for very little money, match the finish to your other room hardware.
Lighting is the upgrade most people forget, and it is the one that makes a fitted wardrobe feel considered. A simple LED strip inside the wardrobe can help you see everything without overhead light.
If you want to build your own dividers, our guide on making DIY wardrobe dividers and organisers walks through the options.
Budget-Specific Material Comparisons for DIY Upgrades
Material choice is where budgets are won or lost. The right board keeps costs down without sacrificing durability.
| Material | Best For | Cost Level | Durability |
|---|---|---|---|
| Melamine faced chipboard | Internal carcasses and shelves | Low | Good for dry rooms |
| Moisture-resistant MDF | Doors and structural panels | Mid | Good, takes paint well |
| Plywood | Load-bearing shelves | Mid to high | Very good |
| Solid timber | Handles, trim and edging | High | Excellent |
For a deeper look at board options, our guide to choosing wardrobe materials explains which board suits which job.
Structural Repairs and Sustainable Disposal of Old Components
Repair before you replace. Most fitted wardrobe faults are small and cheap to fix, and fixing them protects the investment you are about to make in doors, paint and hardware.
Loose hinges usually need the screw holes filled and re-drilled, not new doors. Push a matchstick or a sliver of hardwood into the hole with wood glue, snap it flush, then drive the screw back in. For a hinge that has torn out completely, a metal repair plate spreads the load across sound board.
Sagging shelves need a stronger support bracket, not a new carcass. Add a centre support or a vertical divider to shorten the span; a shelf spanning more than about 900mm in chipboard will bow over time. A strip of hardwood lipping glued to the front edge stiffens it further.
Edge banding is a cheap fix for chipped shelf edges. Iron-on tape hides the damage and stops moisture getting into the board. Trim it flush with a sharp blade once cool.
Runners that stick usually need cleaning and a touch of silicone spray rather than replacement. Check that the cabinet is still square, a carcass that has racked out of true will make even new runners bind.
When you do remove old components, dispose of them responsibly. Timber and board can go to a local household waste and recycling centre; check your council’s rules first, as some charge for bulky DIY waste. Metal handles and runners go in the scrap metal bin. Reuse what you can: old shelves make good garage storage, and sound doors can be repurposed as shed cladding or offered through local reuse networks.
Watch out: composite board and MDF should not go in garden waste or general kerbside recycling. Keep them separate and take them to the correct facility.
Planning Your Wardrobe Upgrade with a Free Design Visit
A plan beats a shopping trip. Decide what you are keeping, what you are replacing and what your budget covers before you buy anything.
Our step-by-step guide to budgeting for custom fitted furniture gives you a framework to cost the whole project properly.
When the job goes beyond a refresh, a free design visit from Finest Furniture Studio takes the guesswork out of it. We measure the space, talk through the layout and give you clear upfront pricing with no hidden fees. Our 7-day fitting service and 10-year warranty on wardrobes are part of our offer.
A wardrobe that sags, sticks or looks dated does not need to be ripped out. Assess the carcass, refresh the doors, upgrade the hardware and fix the small faults first. That approach saves money and keeps a sound frame out of landfill.
When the frame itself is the problem, Finest Furniture Studio can design and fit a bespoke replacement that uses every inch of the space, including awkward alcoves and sloping ceilings. You get a free design visit, transparent pricing with no hidden fees, a 7-day fitting service and a 10-year warranty on wardrobes.
Get started with Finest Furniture Studio and book a free design visit to see what your wardrobe could become.
Frequently Asked Questions
Is it cheaper to replace wardrobe doors or the whole wardrobe?
Replacing just the doors is almost always the more cost-effective option if the wardrobe carcass is solid. A full replacement involves removing the old unit, disposing of it, and paying for a new design and installation. Swapping the doors refreshes the look for a fraction of the cost, provided the hinges and runners are in good condition. However, if the frame is warped or damaged, a full replacement is the better long-term investment.
Can you paint fitted wardrobe doors?
Yes, you can paint fitted wardrobe doors, but the finish depends entirely on the material and preparation. MDF and solid wood take paint well after sanding and priming. Melamine or vinyl surfaces need a specialist adhesion primer first. Always use a durable top coat like satinwood for a wipeable finish, and allow doors to dry fully before rehanging to avoid sticking.
How do you make old fitted wardrobes look modern?
The quickest ways to modernise old fitted wardrobes are to replace the handles with sleek, contemporary designs, paint the doors in a neutral or bold colour, and add decorative moulding for a shaker style. Internally, adding LED strip lighting and new drawer inserts improves both function and perceived quality. These small changes deliver a significant aesthetic update without the cost of a full rebuild.
When should fitted wardrobes be replaced rather than refurbished?
Refurbishment stops making sense when the carcass is structurally compromised. Look for sagging shelves, water damage, failing hinges that have torn out of the board, or a layout that no longer suits the room. If repairs would cost more than half the price of a new unit, or if the wardrobe blocks essential space, a bespoke replacement designed for the room will add more long-term value.


