

Last Updated: October 24, 2026
Quick Summary
DIY wardrobe dividers are custom organizers you build to fit your exact shelf or drawer space, stopping folded clothes from toppling and creating clear zones. You can make them from wood, fabric, cardboard, or recycled materials using basic hand tools in an afternoon.
- Wood dividers work best on shelves; use 12 mm plywood for spans up to 300 mm and 18 mm for wider spans.
- Fabric dividers suit drawers; cut strips 5 cm shorter than drawer depth and sew into tubes to hold items gently.
- Standard sizing is 200-300 mm width for jumpers and jeans, matching shelf depth exactly and full clear height minus 5 mm.
- Freestanding dividers need no fastening, making them ideal for renters and awkward spaces like sloped ceilings.
- Free alternatives like hardback books, shoe boxes, and rolled clothing work for light loads but require weekly re-sorting to stay organized.
Table of Contents
- Why DIY wardrobe dividers make sense for your home
- What you’ll need before you start
- Building DIY wardrobe shelf dividers
- Creating DIY fabric drawer dividers
- How to organise wardrobe shelves without buying organisers
- Renter-friendly and no-drill options
- Common mistakes to avoid
- When to invest in custom-fitted solutions
- Frequently Asked Questions
Why DIY wardrobe dividers make sense for your home
Building your own wardrobe dividers gives you control ready-made solutions can’t match: exact dimensions, materials, and style to fit your space and budget.
At Finest Furniture Studio, we know the challenge: awkward alcoves, sloping ceilings, or shelves that don’t fit standard organizers.
The benefits are practical: dividers stop folded clothes toppling, create clear zones, and make your wardrobe feel intentional rather than chaotic.
Research on home organization and mental clarity shows that organized spaces reduce stress and improve daily routines.
Whether it’s a tiny bedroom, an awkward under-stairs space, or a full walk-in wardrobe, DIY wardrobe dividers offer flexibility you can build this weekend.
What you’ll need before you start
Materials for different divider types
Materials depend on your space and what you’re organizing:
Wood dividers suit shelves. Plywood, MDF, or solid wood offcuts are sturdy, look clean, and take stain or paint easily; most DIY stores sell timber in standard sizes.
Fabric dividers suit drawers. Cotton, linen, or repurposed fabric from old clothes or sheets is soft on garments and costs almost nothing.
Cardboard and recycled materials are budget-friendly: cereal boxes, delivery boxes, and old cardboard wrapped in fabric cost virtually nothing.
Plastic organizers or containers can act as dividers in drawers, repurposing storage boxes you already have.
The best material is the one you’ll actually use. Start with what you have at home.
Tools and equipment
You don’t need a workshop, basic hand tools suffice:
- Tape measure (for accurate sizing)
- Pencil (for marking)
- Saw (hand saw works fine for small cuts)
If you don’t own a saw, ask the timber supplier to cut your wood to size, most do this free or for a small charge. Power tools aren’t necessary; a hand saw, sandpaper, and screwdriver handle almost any divider project.
Building DIY wardrobe shelf dividers
Shelf dividers are the highest-value project here because they stop folded stacks collapsing sideways, the most common cause of wardrobe chaos. It’s a measured, repeatable build you can cut in an afternoon with hand tools.
A measured plan you can copy
Work to these starting dimensions and adjust to your own shelf. They assume a standard UK wardrobe shelf around 30-35 cm deep and 80-100 cm wide.
| Component | Size | Quantity | Notes |
|---|---|---|---|
| Divider panel | 300 mm deep × 250 mm high × 12 mm thick | 2-4 per shelf | 12 mm plywood or MDF; 18 mm if the shelf is wider than 900 mm |
| Front lip (optional) | 300 mm × 40 mm × 12 mm | 1 per shelf | Stops items sliding forward |
| Fixing blocks | 40 mm × 40 mm × 12 mm | 2 per divider | Glue-and-screw to shelf underside |
| Adhesive strips | Removable, damage-free | 2 per divider | For renter-friendly fitting |
Cut list for one 900 mm shelf with three dividers: three panels at 300 × 250 mm, six fixing blocks at 40 × 40 mm, one front lip at 900 × 40 mm. Buy one 600 × 400 mm offcut of 12 mm plywood, most timber merchants cut it to size free or for a small charge. These precise dimensions ensure that your storage remains modular and efficient as you organize a small closet to maximize every inch of available space.
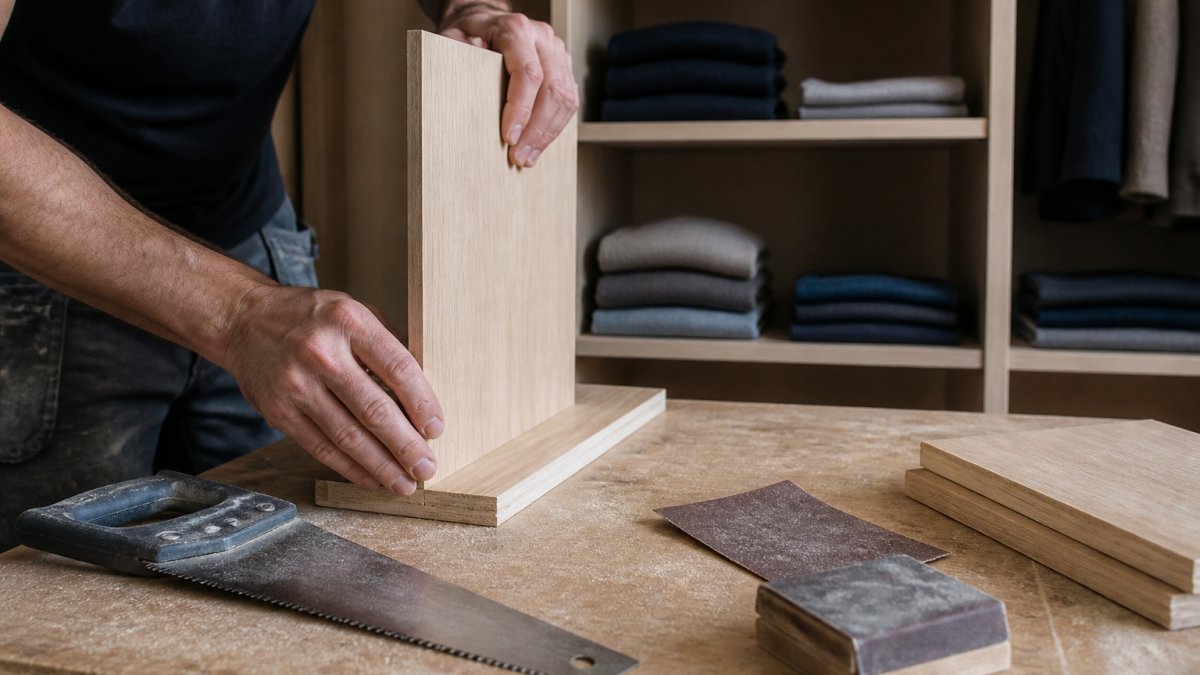
Step-by-step construction
Step 3: Sand every edge. Work through 80-grit then 120-grit paper, especially the top and front edges that contact knitwear and delicates.
Step 4: Seal or paint. Bare MDF swells if damp, so seal cut edges with primer or a 50/50 PVA-and-water mix; plywood benefits from oil or water-based varnish.
Step 6: Load-test. Add folded items one section at a time and check for lean.
Sizing and fitting rules that actually matter
- Width: 200-300 mm per section suits folded jumpers and jeans; 150-200 mm suits shirts and t-shirts; 100-150 mm suits accessories and rolled items. Anything under 100 mm rarely holds a folded garment upright.
- Height: match the clear height minus 5 mm. A divider that is 50 mm short lets the stack lean over the top.
- Depth: match the shelf depth exactly. A divider 50 mm shallower than the shelf leaves a gap where small items vanish.
Label the underside of each divider with its shelf position in pencil before fitting. When you rearrange the wardrobe, you can match dividers back to the shelf they were cut for instead of re-measuring.
Creating DIY fabric drawer dividers
Fabric selection and cutting
Fabric dividers work brilliantly in drawers because they’re gentle on clothes and easy to adjust. Choose sturdy but not stiff fabric, cotton or linen are ideal; avoid stretchy jersey knit. Repurposed fabric is smart: old bed sheets, worn-out clothing, or scraps cost nothing and keep waste out of landfill.
Measure your drawer width and decide how many sections you want, 4-6 works well for a standard drawer. Divide the width by the number of sections, add 2 cm for seams, and cut strips to this width; make the height about 5 cm shorter than the drawer depth so clothes sit comfortably.
Assembly and insertion
Fold each strip in half lengthwise with the right side facing inward, sew or glue along the long edge to create a tube, then turn it right side out so the seam is hidden. Press flat with an iron. Stand the dividers upright in the drawer, spacing them evenly, snug enough to stay put but loose enough to remove. If they shift, anchor lightly with removable adhesive dots.
How to organise wardrobe shelves without buying organisers
Most organisation content stops at “use what you have”. This section compares common no-cost dividers by strength, cleaning, and what they’re safe to hold, so you can pick the right one instead of guessing.
Material comparison for zero-cost dividers
| Material | Best for | Load guidance | Cleaning | Watch-outs |
|---|---|---|---|---|
| Hardback books | Heavy folded stacks, denim, knitwear | A 25 mm spine book holds a normal stack; keep spines vertical | Wipe with a dry cloth | Dust traps; do not use damp or mould-damaged books near clothing |
| Shoe boxes and delivery boxes | Accessories, rolled items, socks | Light loads only, card softens in damp air | Replace when corners crush | Not moisture-safe; avoid in bathrooms or against external walls |
| Fabric bins and baskets | Scarves, belts, small accessories | Depends on the base; choose rigid-base bins for stacking | Spot-clean or machine-wash if fabric | Soft-sided bins collapse when overloaded |
| Glass jars and tins | Jewellery, cufflinks, hair accessories | Small items only | Wash and dry fully before use | Breakage risk on high shelves; keep away from shelf edges |
| Rolled clothing | T-shirts, leggings, gymwear | Self-supporting if rolled tightly | Launder as normal | Loses shape if rolled loosely; re-roll seasonally |
| Tension rods | Hanging sections in open shelving | Check the rod’s stated weight limit | Wipe with a damp cloth | Can slip on glossy shelf surfaces; use rubber end caps |
How to use each one well
Books as dividers. Stand hardbacks upright with the spine facing out and the page block against the clothes.
Fabric bins. Choose bins with a rigid base and stitched sides; soft drawstring bags slump when full.
Glass jars and tins. Use only on lower or middle shelves, never high shelves where a knock could send glass onto the floor.
Rolled clothing as its own divider. Roll t-shirts and leggings to roughly the height of the shelf gap, then stand them upright in a row like files.
Tension rods. A spring-loaded rod placed horizontally between two shelf uprights creates a hanging zone for hangers without drilling. Check the rod’s stated weight limit and use rubber end caps on gloss or melamine surfaces, which are slippery.
Never use glass jars, heavy books, or stacked tins on a shelf you have not checked for load. A shelf fixed with two brackets into plasterboard alone can pull out under a heavy stack. Test by pressing firmly on the shelf before loading it, and move heavy items to the lowest shelf.
The trade-off most guides skip
Free dividers save money but cost time and consistency: books and boxes vary in size, so sections end up uneven and you re-sort constantly. If you want a wardrobe that stays organised without weekly fiddling, cut a small set of identical timber dividers (see the shelf-divider build above) and use free options only for accessories, durability of a measured build with the zero-cost flexibility of household items.
Discover budget-friendly wardrobe organization strategies that work alongside DIY dividers for maximum impact.
Renter-friendly and no-drill options
Renters can’t drill holes or install permanent fixtures, and DIY dividers solve this because they need no fastening.
For sloped ceilings or awkward alcoves, explore how to adapt DIY dividers for sloped spaces. Freestanding solutions work best there because they don’t require permanent installation.
Fabric dividers in drawers need no fastening at all. They simply sit upright and stay in place through friction. Perfect for renters.
Common mistakes to avoid
Making dividers too narrow. Narrow dividers look neat but don’t hold clothes effectively.
Using flimsy materials. Thin cardboard or weak plastic bends under clothes.
Forgetting to sand wood edges. Rough edges snag delicate fabrics, always sand smooth before using.
Overcrowding sections. Leave breathing room so you can see and access items easily.
Ignoring drawer depth. A divider that’s too tall makes it hard to close the drawer.
When to invest in custom-fitted solutions
DIY dividers work brilliantly for most situations, but some spaces benefit from custom-fitted storage built to last decades.
Finest Furniture Studio specializes in transforming difficult spaces into organized, beautiful storage. When your DIY dividers are working well but you need something more comprehensive, understand the broader decluttering context before deciding whether DIY or custom solutions suit your needs.
Our 10-year warranty means your investment is protected. Our 7-day fitting service gets you organized quickly.
For many homeowners, DIY dividers are the perfect starting point. They’re affordable, flexible, and satisfying to build. As your needs evolve, custom solutions are there when you’re ready.
Frequently Asked Questions
What materials work best for DIY wardrobe dividers?
Wood, acrylic, fabric, and recycled cardboard are all effective. Wood offers durability and a finished look; fabric is lightweight and ideal for drawers; acrylic provides a modern, see-through option. Choose based on your wardrobe layout, weight load, and aesthetic preference. For shelves holding heavier items, wood or acrylic withstand repeated use better than fabric alone.
How do you keep DIY wardrobe dividers in place?
For shelves, friction and weight often suffice if dividers fit snugly. Use non-slip matting underneath to prevent sliding. For drawers, fabric dividers can be glued to the base or held by the drawer’s sides. Adjustable dividers use brackets or tension rods. Test stability before loading with clothes; unstable dividers defeat the purpose and can damage garments.
Can I make wardrobe dividers without power tools?
Yes. Fabric dividers require only scissors and optional fabric glue. Cardboard or foam dividers need a craft knife and ruler. For wood, pre-cut materials and hand tools like a saw and sandpaper work, though they take longer. Many DIY builders combine no-power-tool options: fabric for drawers, stacked boxes for shelves, and tension rods for hanging rails.
How long does a DIY wardrobe divider project take?
Simple fabric drawer dividers take 1-2 hours. Shelf dividers with basic wood or acrylic typically take 3-5 hours, including measuring, cutting, and assembly. Complex custom solutions for awkward spaces may take a weekend. Planning and accurate measurement beforehand save significant time and reduce mistakes during construction.
Start with what you have at home. Build a simple divider this weekend. See how it transforms your wardrobe organization. If you need help designing a more comprehensive storage solution for your space, book a free design visit with Finest Furniture Studio and discover what’s possible.


