
Table of Contents
- Start With a Storage Audit, Not a Shopping List
- Measure the Loft Before You Commit to Anything
- Bespoke Fitted Wardrobes for Sloping Ceilings: What Changes
- Custom Built-In Storage for Eaves: Turning Dead Corners Into Capacity
- Internal Wardrobe Organization Tips That Reclaim Real Space
- Doors, Lighting and Access: The Details That Decide Usability
- Weight, Materials and Keeping Loft Wardrobes in Good Order
- Conclusion: Plan the Space Before You Fill It
- Frequently Asked Questions
Last Updated: October 3, 2026
Start With a Storage Audit, Not a Shopping List
Most people attack a loft wardrobe by buying more boxes. That is backwards. Maximizing storage in loft wardrobes starts with an audit: an honest count of what you own, wear, and never touch.
Industry data backs the optimism behind a proper refit. According to Woodworking Network’s 2026 closet industry outlook, 63.6% of businesses in the closets and organised storage sector expect better or much better performance this year.
At Finest Furniture Studio, we run this audit on every free design visit, and it changes the brief almost every time. Do it yourself:
- Pull everything out of the current wardrobe and sort into keep, repair, and donate piles
- Count long-hanging items (coats, dresses) separately from short-hanging items (shirts, trousers)
- Measure your tallest item, usually a coat or a long dress
That last list matters most. Weekly items belong at eye level. Seasonal items go high or low.
Photograph each pile before you put anything back. When you plan the new layout, you will forget how much you actually own. The photos keep the design honest.
Measure the Loft Before You Commit to Anything
A loft wardrobe only works if the numbers work first. Measure before you buy a single rail, shelf, or drawer.
You need five figures:
- Floor-to-ceiling height at the tallest point, then again at the lowest point under the slope
- Width at floor level and again at shoulder height, since sloped ceilings narrow as they rise
- Depth available, allowing for door swing or sliding track clearance
- Headroom where you will stand while dressing
- Access route, including stair turns and any doorway width a flat-packed unit must pass through
Get these wrong and you waste money on furniture that cannot be installed. Write the numbers down and keep them with you in the showroom or on the measuring app, guessing costs more than any upgrade later.
Bespoke Fitted Wardrobes for Sloping Ceilings: What Changes
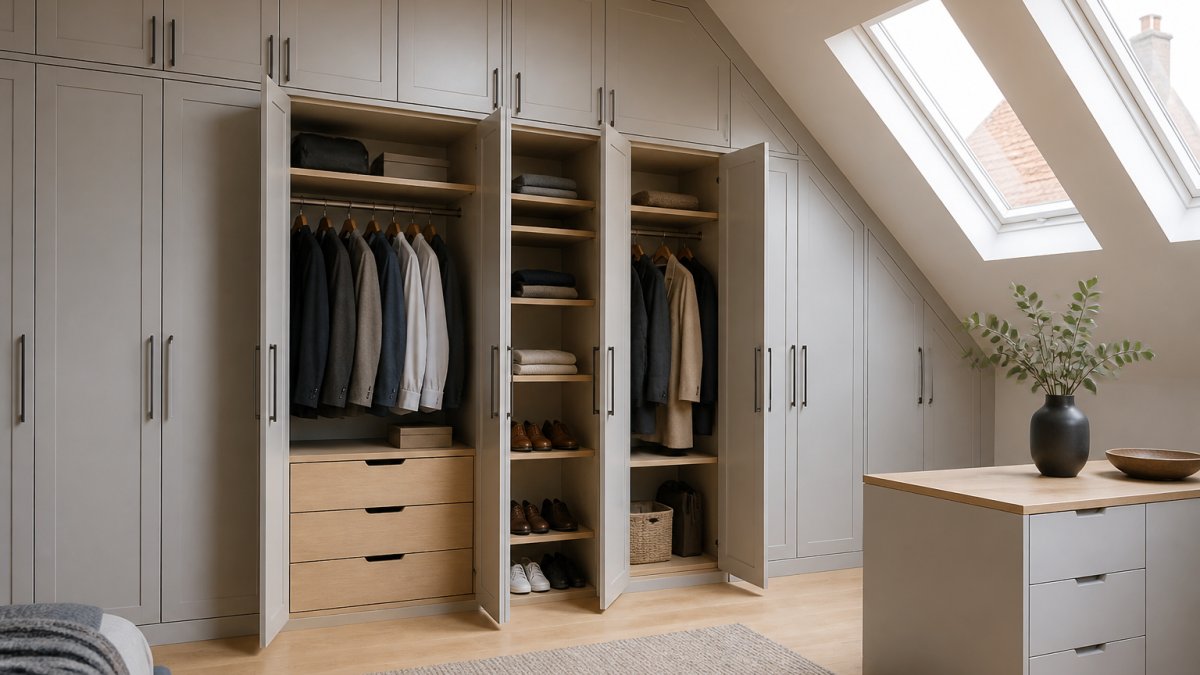
Bespoke fitted wardrobes for sloping ceilings solve a problem standard units cannot: a sloped ceiling cuts usable height, so a rectangular wardrobe either leaves a dead gap or blocks the space.
Custom-built joinery follows the angle. That means:
- The carcass is cut to match the pitch of the roof
- Low sections become drawers or open shelving instead of wasted void
- Tall sections take full-height hanging
Off-the-shelf furniture fails here, a standard wardrobe in a loft leaves triangular gaps you cannot use or hide.
Working Out Your Usable Height
Usable height is the vertical space where a person can stand and a door can open, measure from the floor to where the ceiling drops below roughly 1.8 metres.
Everything above that line is storage, not standing room. So the plan splits into two zones:
- Below the line: hanging rails, drawers, and anything you need daily
- Above the line: long-term storage for suitcases, spare bedding, and off-season clothing
This measurement decides your whole layout, and whether a sliding door will work, sliding doors need a flat track across the full width.
Custom Built-In Storage for Eaves: Turning Dead Corners Into Capacity
Custom built-in storage for eaves turns the lowest, most awkward corners of a loft into genuine capacity.
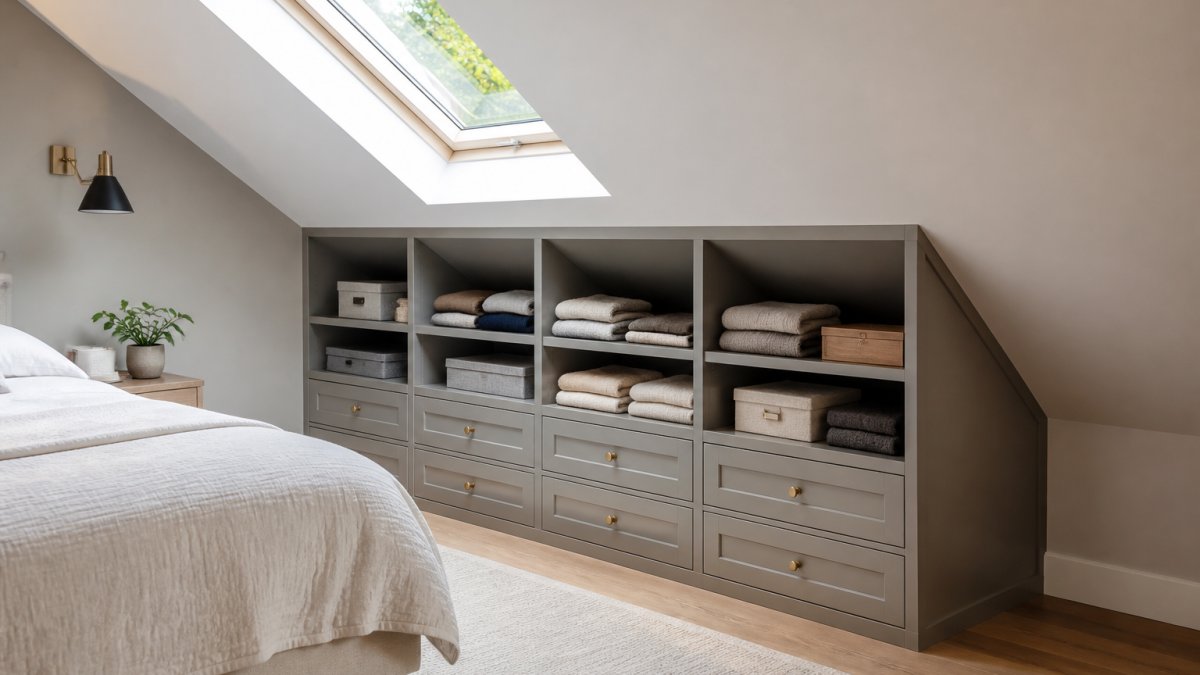
Design trends support this approach. According to Parker Design Build’s 2026 closet organisation analysis, homeowners are increasingly prioritising floor-to-ceiling shelving and double-hang systems to maximise capacity.
The practical moves for eaves:
- Low pull-out drawers in the knee-wall space, ideal for shoes and folded knitwear
- Open shelving for boxes and baskets where a drawer would not open
- Access panels for hidden compartments behind the wardrobe back
A common mistake is fitting standard-depth units into eaves and losing 300mm or more of usable depth.
Internal Wardrobe Organization Tips That Reclaim Real Space
Internal wardrobe organization tips matter more than the wardrobe itself. The difference between a wardrobe that holds 40 items and one that holds 90 is almost never the footprint, it is the split between hanging, shelving and drawers, and how well each zone is dimensioned.
Most people over-allocate hanging and under-allocate drawers. A common loft pattern is 70% hanging and 30% everything else, when the reverse suits most households.
The Dimensions That Actually Decide Capacity
Generic advice says “use double-hang rails”. Useful advice says how high and how deep:
- Short-hang (shirts, blouses, folded trousers): allow roughly 1 metre of rail height per row. Two rows fit comfortably inside a 2.2 metre internal height, leaving a shelf above.
- Long-hang (coats, dresses, long skirts): allow roughly 1.5 to 1.7 metres. This is why long-hang belongs in the tallest section of a loft, not under the slope.
- Shelf depth: 350mm to 400mm suits folded clothes and boxes. Anything deeper swallows items at the back.
Hanging Rails, Shelf-Risers and Pull-Out Drawers
- Hanging rails: use double-hang for shirts and trousers, single full-height for coats and dresses. In a loft, put the double-hang in the tall zone and the long-hang where the ceiling is highest.
- Shelf-risers: stack folded items vertically so you see every colour at a glance. They double the usable layers on a deep shelf without changing the carcass.
- Pull-out drawers: bring deep storage forward so nothing disappears at the back. Full-extension runners are worth specifying over three-quarter runners in a deep loft carcass.
A Budget-Friendly Version of the Same Layout
Not every loft needs bespoke joinery to hit these numbers. If you are renting or on a tight budget, the same layout logic works with off-the-shelf components:
- Add a second rail to an existing wardrobe using a rail-and-bracket kit. This is the single cheapest way to double shirt capacity.
- Stack two modular drawer towers side by side instead of one wide unit, narrower drawers pull out further in a tight space.
- Use shelf-risers and clear stackable boxes rather than fitted dividers. They cost a fraction and move with you.
The trade-off is finish and fit. Off-the-shelf components leave side gaps and rarely follow a slope, so the top becomes dead space. Bespoke joinery closes those gaps, but the layout rules above apply either way, get the split right first, then decide how much to spend closing the edges.
The interior layout decides whether a wardrobe holds 40 items or 90. Plan the split, the rail heights and the drawer depths before you choose the finish, and if budget is tight, apply the same numbers to modular components.
Doors, Lighting and Access: The Details That Decide Usability
Doors and lighting decide whether a well-planned wardrobe is pleasant or irritating, both are easy to get wrong in a loft, where the ceiling slopes and the floor may not be forgiving.
Choosing Between Hinged and Sliding Doors
For tight spaces, sliding doors beat hinged doors, they need no swing clearance, which matters when a bed or desk sits close to the wardrobe run. But they have trade-offs:
- Track depth: sliding systems need a flat track across the full width, typically 80mm to 100mm of depth at the top and bottom. In a loft, the top track must follow a level line, not the slope.
- Access: you only ever see half the wardrobe at once. Plan the interior so each half works as a standalone zone.
- Maintenance: bottom tracks collect dust and grit. Vacuum them monthly and wipe with a dry cloth, dust is the main cause of stiff runners.
A common compromise in loft conversions is a mix: sliding doors across the low, wide run under the eaves, and hinged doors on the tall section where there is room to swing.
Lighting That Actually Helps You See
Lighting is the upgrade most people skip. Integrated LED strips inside the wardrobe let you see the back of every shelf without a torch:
- Warm white (around 3000K) reads better against clothing than cool white, which makes colours look harsh.
- Sensor activation on the door or drawer is more useful than a wall switch you have to reach past hanging clothes to find.
- Continuous strip lighting along the underside of each shelf beats a single ceiling light, which casts shadows into the corners.
- Battery vs. mains: battery LED strips are simple to retrofit but need recharging; mains-wired strips need an electrician but are set-and-forget. In a loft, running cable before the carcass goes in is far easier than after.
Access Details Worth Planning
- Door handles that do not catch on clothing, recessed or edge pulls work well in tight runs.
- A clear standing zone at least 900mm deep in front of the wardrobe.
- Internal drawers that pull out fully, not three-quarters.
- A mirror positioned where natural light reaches it, or lit by its own strip.
The Weight Question Nobody Else Raises
Before any of this is finalised, check what the floor can take. A fully loaded wardrobe is heavy, and loft floors are not always built for concentrated loads in one corner, a row of shoe-packed drawers plus a full rail of coats adds up quickly on a small footprint.
- Spread the load across the run rather than concentrating it in one tall tower.
- Put heavy items low, shoes, boots and folded denim in lower drawers, not on a high shelf.
- Ask a structural surveyor to confirm the floor can take a heavy fit-out, especially in older conversions where joist sizes and spans vary.
- Fix tall units to the wall as well as the floor, so they cannot tip or shift.
This is not a step to skip. It is also the step most loft storage guides leave out entirely.
Overloading a single rail or shelf in a loft conversion can bow the carcass and stress the floor. Spread heavy items across drawers and lower shelves instead of stacking them all on one high shelf.
Weight, Materials and Keeping Loft Wardrobes in Good Order
Weight load matters in a loft. Before a heavy fit-out, check where the load will sit, a structural surveyor can confirm the floor can take it, especially in older conversions.
On materials, sustainable choices are now mainstream.
Maintenance in awkward loft spaces is simple if you plan for it. Dust collects on top of tall units, so leave a small gap or fit a closed top. Wipe sliding tracks monthly, and check hinges and rail fixings yearly.
Conclusion: Plan the Space Before You Fill It
Maximizing storage in loft wardrobes comes down to planning, not products. Measure the slope, audit what you own, and design the interior before you choose a finish. That order saves money and space.
If the awkward angles and sloped ceilings feel like more than a weekend job, Finest Furniture Studio can help. We offer a free design visit, transparent pricing with no hidden fees, a 7-day fitting service, and a 10-year warranty on our wardrobes.
Frequently Asked Questions
How do you design a wardrobe for a sloping ceiling?
Measure the usable height at the tallest point and again every 300mm along the slope, then plan the interior around those figures. Full-height hanging goes at the highest end, with shelf-risers or low pull-out drawers under the lower section. A bespoke joiner builds the carcass to follow the slope rather than boxing it in, which keeps every centimetre of capacity. This is where bespoke fitted wardrobes for sloping ceilings differ from standard units: the frame is made to the angle, not cut down to fit it.
What internal storage accessories work best for loft wardrobes?
Start with double-hang rails, which give two rows of hanging where ceiling height allows, then add shelf-risers to split tall voids into two usable levels. Pull-out drawers suit the low sections under eaves because they slide clear of the slope. Hidden compartments work well for occasional items. Match accessories to what you actually own, not to a catalogue.
Is it worth investing in custom-built furniture for loft eaves?
For awkward geometry, usually yes. Standard cabinets leave triangular gaps under a slope that nothing else can fill, and those gaps can account for a significant share of the floor area. Custom built-in storage for eaves is made to the exact angle and depth, so the space becomes drawers, shelving or hanging rather than dust collection.
How can I maximise storage in a small loft bedroom?
Work upwards first: floor-to-ceiling runs use the vertical space most loft rooms waste, and double-hang rails roughly double hanging capacity in the same footprint. Move bulky items into eaves storage and keep the central floor clear. Choose sliding doors if there is not enough room for a hinged door to swing. Plan the layout around your actual wardrobe contents, then have the interior built to that list rather than buying a standard unit and hoping it fits.

