
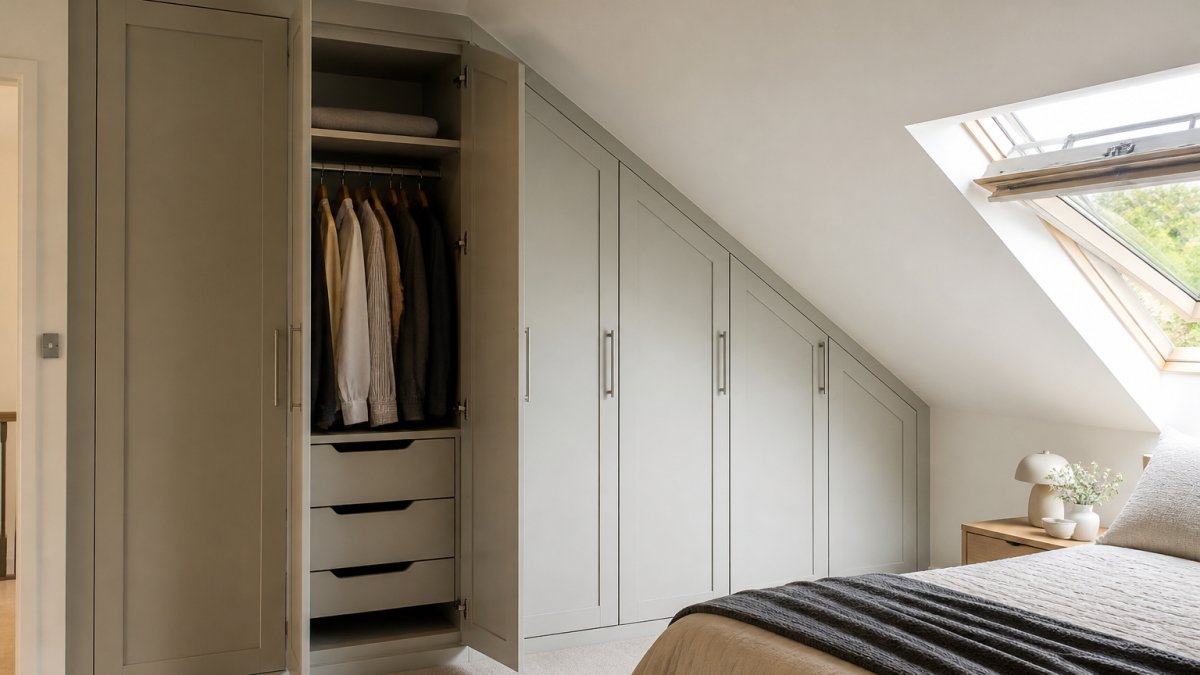
Table of Contents
- Small Bedroom Sloping Ceiling Wardrobe: Planning the Perfect Fit
- Sloping Ceiling Wardrobe Measurements: A Step-by-Step Guide
- Small Bedroom Wardrobe Ideas for Sloped Ceilings
- Designing a Wardrobe Under a Sloping Ceiling
- Sloping Ceiling Wardrobe Interior Ideas for Maximum Storage
- Common Mistakes to Avoid with Sloping Ceiling Wardrobes
- Conclusion: Making the Most of Your Awkward Space
- Frequently Asked Questions
Last Updated: October 6, 2026
Small Bedroom Sloping Ceiling Wardrobe: Planning the Perfect Fit
A small bedroom sloping ceiling wardrobe is a storage unit designed and cut to follow the angle of a pitched roof, so the space under the eaves becomes usable instead of wasted. At Finest Furniture Studio, we fit these units across London and the surrounding counties, where loft conversions and Victorian attic rooms rarely offer a single square corner. The problem is rarely the wardrobe itself. It is the ceiling pitch, the low head height at the eaves, and the fact that a standard 600mm-deep carcass simply will not slide into place.
Below, we break down how to measure a sloped ceiling properly, which layouts work, and the mistakes that turn a promising space into a badly fitting box.
The single biggest factor in a sloping ceiling wardrobe is the height at the back wall, not the width of the room. Measure that first. Everything else follows from it.
Sloping Ceiling Wardrobe Measurements: A Step-by-Step Guide
Getting sloping ceiling wardrobe measurements right comes down to five steps. Work through them in order, and write every number down before you look at any design.
- Measure the floor width along the wall where the wardrobe will sit.
- Measure the height at the tallest point, usually the back wall.
- Measure the height at the lowest point, under the eaves.
- Record the ceiling pitch angle, or the drop in height per metre of run.
- Note the position of any window, radiator, socket, or loft hatch.
Take each measurement at three points along the wall and use the smallest figure. Old houses rarely have level floors or straight walls, and a wardrobe built to an average will not fit.
Accounting for Ceiling Pitch and Clearance
Clearance is the gap you need between the wardrobe front and anything else in the room. For a hinged door, allow at least 750mm of clear floor in front. For a sliding door, 100mm is enough.
Ceiling pitch changes what you can hang inside. A full-height hanging rail needs roughly 1,400mm of vertical space for shirts and jackets, and closer to 1,700mm for long dresses and coats. Where the ceiling drops below that, hanging space has to move to the tall end of the run.
| Measurement | Why it matters | Typical figure |
|---|---|---|
| Back wall height | Sets the tallest usable section | Measure on site |
| Eaves height | Decides where hanging stops | Measure on site |
| Ceiling pitch | Shapes the top cut of the unit | Measure on site |
| Front clearance | Door swing and access | 750mm hinged, 100mm sliding |
| Hanging drop | Short vs long garments | 1,400mm short, 1,700mm long |
Small Bedroom Wardrobe Ideas for Sloped Ceilings
The best small bedroom wardrobe ideas for a sloped ceiling all follow the same rule: put the tall storage where the ceiling is high, and the low storage where it dips. A fitted run that mirrors the roofline will always beat a freestanding box pushed into the corner.
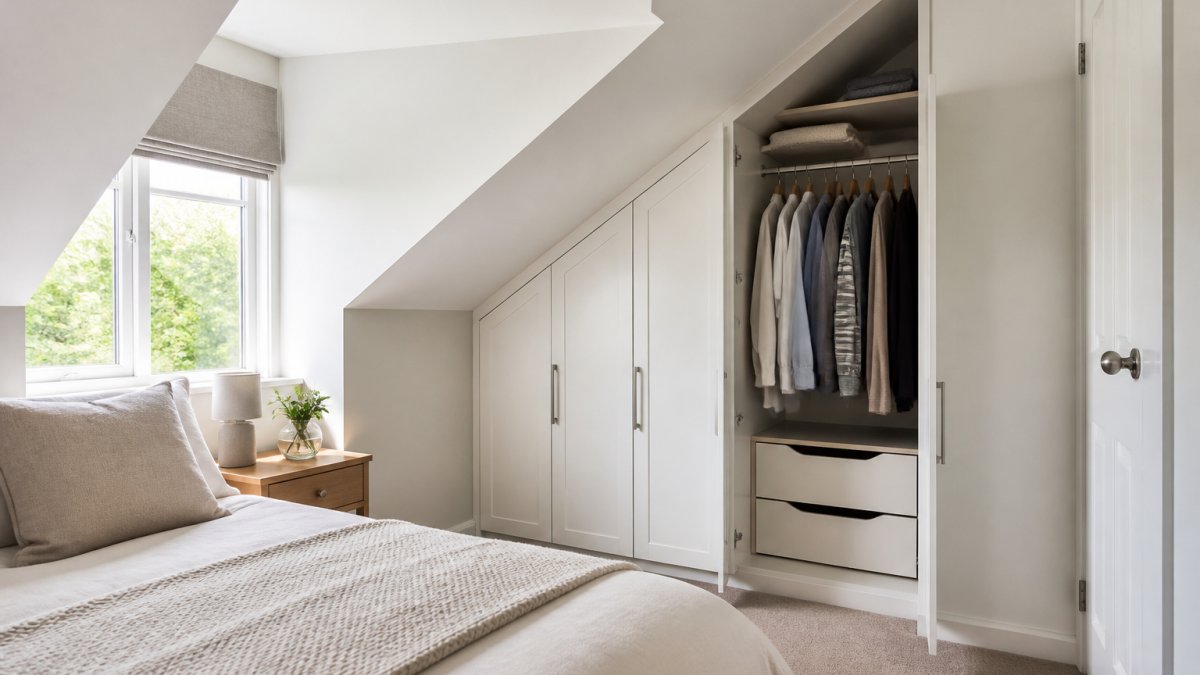
Five layouts that work well:
- Full-width run under the eaves, with sliding doors and drawers at the low end.
- L-shaped corner fit, using the tall wall for hanging and the low wall for shelves.
- Wardrobe plus desk, with the sloped section closed off above a work surface.
- Half-height unit under a steep pitch, topped with open shelving.
- Recessed alcove fit, built between two chimney breasts or party walls.
Fitted vs Freestanding: What Works Under a Slope
Fitted wardrobes win under a slope almost every time. A freestanding unit leaves a triangular void above it that collects dust and looks untidy, and no standard carcass is cut to match a pitched ceiling.
That said, freestanding has one honest advantage: you can take it with you. If you rent, or you plan to move within a couple of years, a freestanding wardrobe plus a well-placed shelf may be the sensible call. For anyone staying put, made-to-measure joinery uses the full volume and adds a genuine fixture to the room.
Measure the diagonal, not just the width and height. On a steep pitch, the usable internal depth shrinks as you go up. A wardrobe that looks fine on a floor plan can lose half its shelf depth by the time it reaches the sloped section.
Designing a Wardrobe Under a Sloping Ceiling
Designing a wardrobe under a sloping ceiling starts with dividing the run into zones by height, then assigning a job to each zone. This is where most off-the-shelf plans fall apart, because they assume one uniform height across the whole unit.
Work in three bands:
- Tall zone (over 1,700mm): full-length hanging, coats, dresses.
- Mid zone (1,000mm to 1,700mm): double hanging for shirts, trousers, and folded stacks.
- Low zone (under 1,000mm): drawers, pull-out trays, shoe racks, or closed cupboards.
The low zone is the one people waste. It is also the most useful part of a loft or attic room, because drawers and trays only need 200mm to 400mm of height to work properly.
For a loft conversion or attic room, run the unit along the longest low wall rather than the gable end. It keeps the centre of the room clear and makes the space feel wider than it is.
Sloping Ceiling Wardrobe Interior Ideas for Maximum Storage
Sloping ceiling wardrobe interior ideas should be chosen by what you actually own, not by what looks good in a brochure. Count your long garments first. If you own four coats and forty shirts, a full-length rail across the whole run is a waste of a good wardrobe.
Work to these bands:
- Tall zone (over 1,700mm): full-length hanging for coats and dresses, plus a high shelf for suitcases or bedding.
- Mid zone (1,000mm to 1,700mm): double hanging for shirts and trousers, or a single rail with a shelf above.
- Low zone (under 1,000mm): drawers, pull-out trays, shoe racks, or closed cupboards.
A standard hanging rail needs roughly 1,400mm of vertical space for shirts and jackets, and closer to 1,700mm for long dresses and coats.
Interior options worth building in:
- Adjustable shelves on a 32mm pitch so you can move them as your storage needs change.
- A double hanging rail in the mid zone for shirts and trousers.
- Deep drawers at the low end for knitwear and bedding.
- Pull-out shoe trays instead of a fixed rack, so you can see every pair.
- A slim tall cupboard for an ironing board or vacuum.
- Internal LED lighting on a door switch, useful in a dark eaves corner.
Modular storage works well here. Build the carcass once, then swap the internals later rather than replacing the whole unit. For a loft conversion or attic room, run the unit along the longest low wall rather than the gable end. It keeps the centre of the room clear and makes the space feel wider than it is.
Do not block ventilation into the eaves. Sealing a wardrobe tight against a cold roof slope traps moist air, and clothing stored against a cold surface can develop damp and musty smells. Leave a gap, or ask for a ventilated back panel.
Common Mistakes to Avoid with Sloping Ceiling Wardrobes
The most common mistake is ordering a wardrobe by width and height alone, with no allowance for ceiling pitch. The second is forgetting door clearance. Both are avoidable with a tape measure and ten minutes. But the mistakes that cause the most frustration are the ones you only notice after fitting, so it is worth planning for them now.
Watch for these:
- Ignoring the pitch. A rectangular unit leaves a dead triangle above it. Measure the drop in height per metre of run, not just the angle.
- Forgetting door swing. Hinged doors need at least 750mm of clear floor in front. Sliding doors need around 100mm.
- Skipping the skirting. Units pushed flush to the wall often will not sit level. Allow for the skirting depth or cut it back.
- Blocking the loft hatch or a socket you still need. Note every window, radiator, socket, and hatch before you design.
- Choosing high-gloss finishes on a large run, which shows every mark in a small room.
- Ignoring height-adjustable feet, which save you when the floor is uneven.
A common mistake is treating the low end of the run as dead space. In practice, that is where drawers and shoe storage belong, and it is often the most hard-working part of the whole unit.
Layout and Clearance Planning for a Small Bedroom
Before you commit to a design, sketch the room and mark the door swing, the bed position, and the walkway. A wardrobe that fits the wall but blocks the door or crowds the bed will feel wrong every day, no matter how well it is built.
- Door swing: allow 750mm of clear floor in front of hinged doors, or 100mm for sliding doors.
- Walkway: keep at least 600mm of clear floor between the wardrobe front and the bed or wall.
- Bed placement: avoid putting the wardrobe where it forces you to sidestep the bed to reach it.
- Access: make sure you can open drawers and pull-out trays fully without hitting the bed or door.
Ventilation, Damp and Clothing Protection
Loft and attic rooms are more prone to damp than ground-floor rooms because they sit against a cold roof slope. Sealing a wardrobe tight against that slope traps moist air, and clothing stored against a cold surface can develop damp and musty smells.
- Leave a gap between the wardrobe back and the roof slope, or ask for a ventilated back panel.
- Do not block eaves vents. Air must be able to move through the roof space.
- Use breathable materials for the back panel where possible.
- Store clothing dry and avoid packing damp items into the wardrobe.
- Check for condensation on the inside of the wardrobe after a few weeks, especially in winter.
Conclusion: Making the Most of Your Awkward Space
An awkward corner under a pitched roof is not a problem to work around. It is storage waiting to be built. Get the measurements right, zone the run by height, and the space will outperform a standard wardrobe in a room twice the size.
That is the work we do at Finest Furniture Studio. We offer a free design visit, clear upfront pricing with no hidden fees, and a 7-day fitting service, all backed by a 10-year warranty on our wardrobes. Book a free design visit and we will show you exactly what your sloped ceiling can hold.
Frequently Asked Questions
How do you fit a wardrobe under a sloping ceiling?
Fitting a wardrobe under a slope starts with accurate measurements of the ceiling pitch and the lowest point of clearance. A bespoke, made-to-measure unit is built to follow the angle, using the taller side for full-depth hanging and the lower side for drawers or shelving. This creates a seamless fit that a standard rectangular wardrobe cannot achieve.
How do you measure a sloping ceiling for a wardrobe?
Measure the height at the lowest point, the highest point, and the width along the floor. Then measure the depth from the back wall to the front of where the wardrobe will sit. Note the ceiling angle. These sloping ceiling wardrobe measurements let a joiner design a unit that fits without gaps and uses every centimetre of space.
Can you use a standard wardrobe under a sloping ceiling?
A standard freestanding wardrobe will leave a large, unusable gap above it and may not fit at all if the slope is steep. A fitted or bespoke wardrobe is designed to follow the ceiling line, turning that dead space into useful storage. For awkward angles, made-to-measure is almost always the better choice.
What is the best way to organise a wardrobe under a sloping ceiling?
Use the tallest section for a full-length hanging rail, and the lower section for shelves, drawers, or shoe racks. Adjustable shelves let you change the layout as needed. Add internal lighting so you can see items at the back. This zoning keeps clothes organised and makes the most of every compartment.

