

Last Updated: November 2, 2026
Quick Summary
Custom media units for living room alcoves are built-in units that fill the recess beside a chimney breast, combining open shelving, closed cupboards and drawers around a flush-mounted television. Measure the alcove at three heights and three depths, using the narrowest figures, and plan cable routes and ventilation before the carcass is built.
- Leave a minimum 50mm clearance above and behind the TV for ventilation.
- Keep mains and signal cable separated by at least 100mm to avoid interference.
- Set the screen centre roughly 1,000mm to 1,100mm from the floor at eye level.
- Budget in order: carcass, doors, internal fittings, installation, then contingency.
Table of Contents
- Why Alcove Media Units Beat Freestanding TV Furniture
- Built-in Media Units with Storage: Choosing the Right Mix
- Your Alcove Unit Measuring Guide: Dimensions That Decide the Design
- TV, Sound and Ventilation Planning Before You Build
- Hiding Cables in a Media Unit: A Step-by-Step Plan
- Materials, Finishes and Joinery Trade-Offs
- What Custom Media Units Cost and How to Budget
- Book a Free Design Visit for Your Alcove
- Frequently Asked Questions
Why Alcove Media Units Beat Freestanding TV Furniture
Custom media units for living room alcoves solve a problem freestanding furniture cannot: they use every centimetre of a space that was never designed to hold a television.
The result is a room that feels smaller than it is. Cables trail across the floor, the TV sits at whatever height the stand allows, and the alcove becomes a dumping ground rather than storage.
A built-in unit changes the geometry of the room. The Royal Institution of Chartered Surveyors guidance on residential space planning notes that usable storage volume, not floor area, is what buyers notice first in compact homes.
That is the argument for going bespoke. For a full walkthrough of a similar project, see our custom under stairs media unit build guide. The rest of this guide covers how to plan, measure, build and budget for it.
Built-in Media Units with Storage: Choosing the Right Mix
Every alcove unit is a mix of three elements: open shelving, closed cupboards and drawers. The balance decides how the room feels and how well it works day to day.
Open shelves suit display and everyday items you want to reach. Closed cupboards hide the clutter that accumulates around a television: routers, consoles, chargers, board games, spare remotes. Drawers handle the small stuff that gets lost at the back of a deep shelf.
Shelves, Cupboards or Drawers: What Goes Where
A practical allocation for a typical two-alcove setup:
| Zone | Best element | What it holds |
|---|---|---|
| Eye level, beside TV | Open shelving | Decorative objects, books, plants |
| Below worktop height | Cupboards | Media boxes, routers, cables, games |
| Base level | Deep drawers | Remote controls, chargers, paperwork |
| Above TV | Shallow shelves | Display only, low weight |
| Full-height side column | Cupboards | Vertical storage for awkward items |
A common mistake is filling every alcove with open shelving because it looks lighter. In practice, open shelves beside a television collect visual noise.
Your Alcove Unit Measuring Guide: Dimensions That Decide the Design
Measure the alcove at three heights and three depths before you commit to any design. Walls are rarely plumb, and a recess that measures 1,200mm at the skirting can be 1,180mm at the ceiling. The narrowest measurement governs the build.
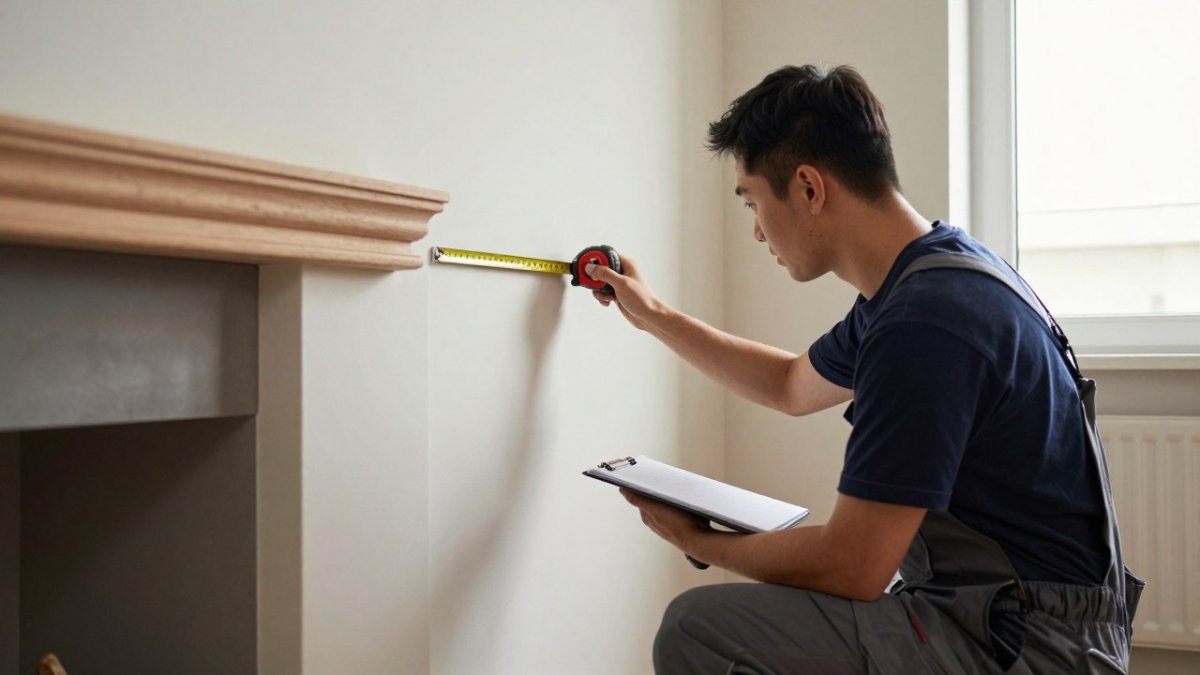
Work through this checklist for each alcove and record every figure on a simple sketch. A dimensioned drawing is the single most useful thing you can hand a joiner, and it takes about twenty minutes to produce.
- Width at floor, mid-height and ceiling, taken at the front face of the alcove and again at the back
- Depth at left, centre and right, measured from the chimney breast face to the back wall
- Height from floor to ceiling at both front corners and both back corners
- Skirting board height and projection, plus any picture rail or dado rail
- Coving depth and profile, if present
- Position, size and height of radiators, sockets, switches and vents
- Chimney breast projection from the alcove face, measured at top and bottom
- Floor level across the opening, checked with a spirit level or straight edge
Measuring an Uneven Wall or Chimney Breast
Old properties rarely offer a square recess, and period features make it harder. A chimney breast that leans by 15mm over its height will show a visible gap behind a straight cabinet. These variations make accurate cabinet measurements essential, since the same careful approach helps a custom unit sit neatly within an irregular alcove.
Skirting boards need the same treatment. Rather than cutting the skirting away, most joiners notch the base of the unit around it or run a plinth that sits proud of the skirting line. If your alcove sits beside original cornicing or a dado rail, our guide to restoring period features covers how to work around them without losing the detail.
Sockets, Radiators and Service Points
Note every socket and switch before the design is fixed. A double socket at 300mm above floor level inside the alcove will be buried by a full-height cupboard unless the back panel is set forward or an access hatch is cut. The same applies to radiator valves and thermostats.
If a radiator sits in the alcove, decide early whether it stays, moves or is replaced by a plinth heater.
Watch out: measuring only at floor level is the most common cause of a unit that will not fit. Always take the narrowest width and the shallowest depth, and add 10mm to 15mm of tolerance for plaster thickness and skirting projection.
TV, Sound and Ventilation Planning Before You Build
Decide the television size before the drawing, not after. The screen dictates the internal width of the unit, the height of the opening, and where the mounting bracket sits.
Three technical points decide whether the finished unit works:
- Viewing height. The centre of the screen should sit roughly at eye level when seated, which usually means 1,000mm to 1,100mm from the floor. In a room where the sofa is close, a lower screen is more comfortable; in a long room, a slightly higher screen works better.
- Ventilation. Screens and media equipment generate heat. Leave a minimum 50mm clearance above and behind the TV, and cut ventilation slots in any cupboard housing a console or amplifier. A closed cupboard with no airflow will shorten the life of the equipment inside it.
- Sound. Built-in units can rattle. Line cupboard interiors that hold speakers with a sound-absorbing material, and avoid mounting a soundbar directly against a hollow cabinet panel.
Cable Routing and Access
Plan the cable routes before the carcass is built. Bring power up into a closed cupboard rather than leaving it on show, and keep mains cable and signal cable separated by at least 100mm where possible to avoid interference.
Access matters as much as routing. Leave a removable back panel or an access hatch behind any cupboard that houses a router, amplifier or aerial splitter, so equipment can be reached without dismantling the unit. Label both ends of every cable before installation; once the unit is fixed, tracing a cable is a two-person job.
Equipment Clearances and Future-Proofing
Allow 100mm of depth behind the TV for a wall bracket and cable bend, and check that the bracket’s pull-out or tilt range does not foul the shelf above.
Future-proofing is cheap at design stage and expensive later. Run a spare drawcord or conduit from the service void to the cupboard so a new cable can be pulled through without cutting the unit. If you are likely to add a soundbar or a larger screen, size the opening for the next size up rather than the current one.
Get these wrong and the unit looks fine but performs badly. Get them right and the technology disappears into the furniture.
Hiding Cables in a Media Unit: A Step-by-Step Plan
Cable management is the difference between a bespoke unit and an expensive shelf. Plan the routes before the carcass is built, because retrofitting cables into a finished unit means cutting holes you did not want.
- Map every device and its cable. TV, soundbar, console, router, streaming box, lamp. Note plug type and cable length.
- Choose a single service void. A 50mm to 75mm gap behind the back panel gives every cable one route down to the base.
- Position the socket bank inside a cupboard. Bring power up into a closed compartment rather than leaving it on show.
- Cut cable ports at build stage. A 60mm grommet in each shelf lets cables pass between levels without trailing.
- Label both ends before installation. Once the unit is fixed, tracing a cable is a two-person job.
- Test everything before final fixing. Plug in, power on, check signal and sound, then close up.
Watch out: running mains cable and signal cable in the same channel can cause interference. Keep them separated by at least 100mm where possible.
Materials, Finishes and Joinery Trade-Offs
Material choice affects how the unit ages more than any other decision. The three realistic options for a living room alcove are moisture-resistant MDF, birch plywood and solid timber.
Finish matters as much as substrate. Our article on the best materials for bespoke under stairs cupboards compares finishes and joinery options in more depth.
Door style changes the feel of the room.
What Custom Media Units Cost and How to Budget
Pricing for custom media units for living room alcoves depends on width, height, material, door style and the amount of internal fitting. There is no single figure, and any quote given without a survey is a guess.
Budget in this order:
- Carcass and structure. The largest share. Driven by size and material.
- Doors and drawer fronts. Style and finish move this significantly.
- Internal fittings. Shelving, cable management, ventilation, lighting.
- Installation and making good. Fitting, scribing, filling and painting.
- Contingency. Set aside a margin for surprises behind old plaster.
Our article on how to budget for custom fitted furniture in seven steps walks through this process in detail, including how to compare quotes on a like-for-like basis.
Two questions worth asking every provider: what is included in the quoted figure, and what triggers a variation charge. A transparent quote names the finish, the internal layout and the making good. Ask for current prices directly from our website or a quote.
Book a Free Design Visit for Your Alcove
The gap between a good alcove unit and a great one is decided in the survey. A designer who measures on site can see the lean in the wall, the position of the joists and the route the cables need to take.
Finest Furniture Studio offers a free design visit, with clear upfront pricing and no hidden fees. We build bespoke units, back wardrobes with a 10-year warranty, and offer a 7-day fitting service. If you are still working out how a bespoke project runs from first drawing to final fix, our guide to planning a bespoke joinery project sets out each stage.
For a media unit that combines storage, display and a proper home for the television, book a free design visit and we will measure the alcove and talk through the options.
Frequently Asked Questions
How do you measure a living room alcove for a custom media unit?
Measure the width at the top, middle and bottom of the alcove, and take the height at both sides as well as the centre. Note the depth from the back wall to the chimney breast face, plus skirting and cornice projections. Record the position of sockets, aerial points and any radiators.
What should you include in built-in media units with storage?
The mix depends on how much clutter you are trying to absorb.
How do you hide cables in a media unit?
Plan cable routes before the frame is built. Hiding cables in a media unit is far easier at design stage than after installation.
Can a TV fit in a living room alcove, and how much ventilation does it need?
Yes, provided the bay is wide enough for the screen plus a small gap on each side and above. Televisions and consoles release heat, so avoid sealing them into a tight box.
The hardest part of a media wall is not the design. It is finding someone who will measure the awkward recess properly and stand behind the result. Finest Furniture Studio builds bespoke fitted furniture for living rooms, bedrooms and home offices, with a free design visit, transparent pricing and a 10-year warranty. Get started with Finest Furniture Studio and turn your alcove into the most useful wall in the room.


